
This guide walks through a full Cisco SD-WAN lab deployment — from Windows Server infrastructure and certificate authority setup through controller bring-up, certificate enrollment, tunnel configuration, and edge device onboarding.
Lab Components
| Component | Role |
|---|---|
| WinServer | AD-DC, DNS, NTP, Certificate Authority |
| vManage | SD-WAN management plane |
| vSmart | SD-WAN control plane |
| vBond1 | Orchestrator (site 250) |
| vBond2 | Orchestrator (site 251) |
| vEdge | WAN edge router |
| cEdge (IOS XE) | WAN edge router (IOS XE based) |
Step 1 — Windows Server: AD, DNS, NTP & CA
Install AD-DC
- Domain:
ittechnetworkk.ccnp
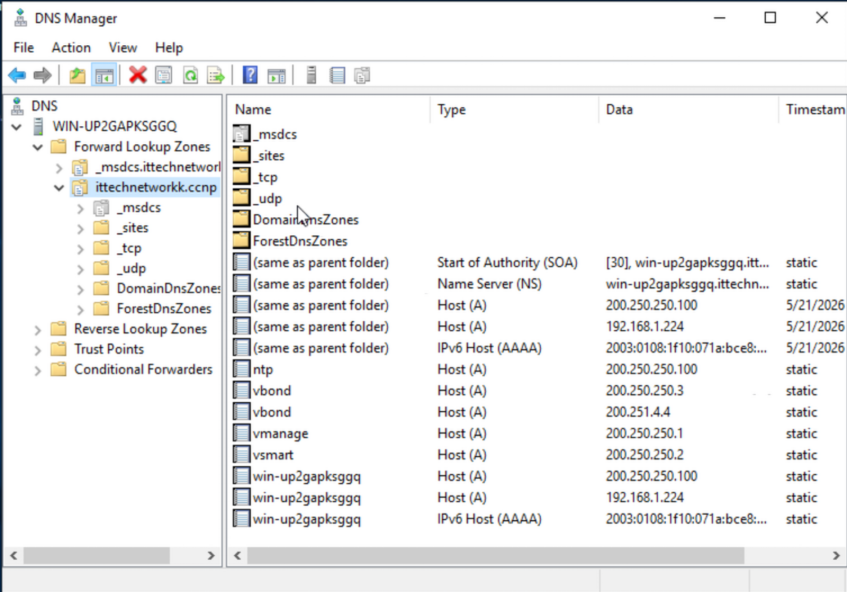
Add DNS Entries
| Hostname | IP Address |
|---|---|
vbond.ittechnetworkk.ccnp |
200.250.250.3 |
vbond.ittechnetworkk.ccnp |
200.251.4.4 |
vmanage.ittechnetworkk.ccnp |
200.250.250.1 |
vsmart.ittechnetworkk.ccnp |
200.250.250.2 |
ntp.ittechnetworkk.ccnp |
200.250.250.100 |
Install CA Role
- Add the Active Directory Certificate Services role:
- Certification Authority
- Certification Authority Web Enrollment
- Select Enterprise CA → Root CA
- Create a new private key: RSA 2048, SHA-256
Step 2 — Base System Configuration
Note: vBond and vEdge use the same image. On vBond devices, the
localkeyword is required: “vbond vbond.ittechnetworkk.ccnp local”
All devices use default credentials: admin / admin
vManage
config
system
 host-name vManage
 system-ip 10.255.255.1                            #like router-id IP
 site-id 250
 organization-name ittechnetworkk.ccnp
 clock timezone Europe/Istanbul
 vbond vbond.ittechnetworkk.ccnp                   #Could be identified IP
 ntp server ntp.ittechnetworkk.ccnp
 exit
exit
show configuration                                  #Check
commit
vSmart
config
system
 host-name vSmart
 system-ip 10.255.255.2
 site-id 250
 organization-name ittechnetworkk.ccnp
 clock timezone Europe/Istanbul
 vbond vbond.ittechnetworkk.ccnp
 ntp server ntp.ittechnetworkk.ccnp
 exit
exit
show configuration
commit
vBond1
config
system
 host-name vBond1
 system-ip 10.255.255.3
 site-id 250
 organization-name ittechnetworkk.ccnp
 clock timezone Europe/Istanbul
 vbond vbond.ittechnetworkk.ccnp local
 ntp server ntp.ittechnetworkk.ccnp
 exit
exit
show configuration
commit
vBond2
config
system
 host-name vBond2
 system-ip 10.255.255.4
 site-id 251
 organization-name ittechnetworkk.ccnp
 clock timezone Europe/Istanbul
 vbond vbond.ittechnetworkk.ccnp local
 ntp server ntp.ittechnetworkk.ccnp
 exit
exit
show configuration
commit
Step 3 — WAN (VPN 0) Interface & Tunnel Configuration
- VPN 0 is used for transport (WAN side)
- VPN 512 is used for management
- VRF 0 = VPN 0
Warning:
allow-service allshould not be used in production environments.
vManage
config
vpn 0
 int eth0
  ip addr 200.250.250.1/24
  no shutdown
  tunnel-interface
   allow-service all
  exit
 ip route 0.0.0.0/0 200.250.250.254
 dns 200.250.250.100
show configuration
commit
vSmart
config
vpn 0
 int eth0
  ip addr 200.250.250.2/24
  no shutdown
  tunnel-interface
   allow-service all
  exit
 ip route 0.0.0.0/0 200.250.250.254
 dns 200.250.250.100
show configuration
commit
vBond1
config
vpn 0
 int ge0/0
  ip addr 200.250.250.3/24
  no shutdown
  tunnel-interface
   encapsulation ipsec
   allow-service all
  exit
 ip route 0.0.0.0/0 200.250.250.254
 dns 200.250.250.100
show configuration
commit
Verify connectivity:
do ping vmanage.ittechnetworkk.ccnpvBond2
config
vpn 0
 int ge0/0
  ip addr 192.168.253.4/24
  no shutdown
  tunnel-interface
   encapsulation ipsec
   allow-service all
  exit
 ip route 0.0.0.0/0 192.168.253.253
 dns 200.250.250.100
show configuration
commit
Verify connectivity:
do ping ntp.ittechnetworkk.ccnp
do ping vmanage.ittechnetworkk.ccnp
Step 4 — Upload Root Certificate to Devices
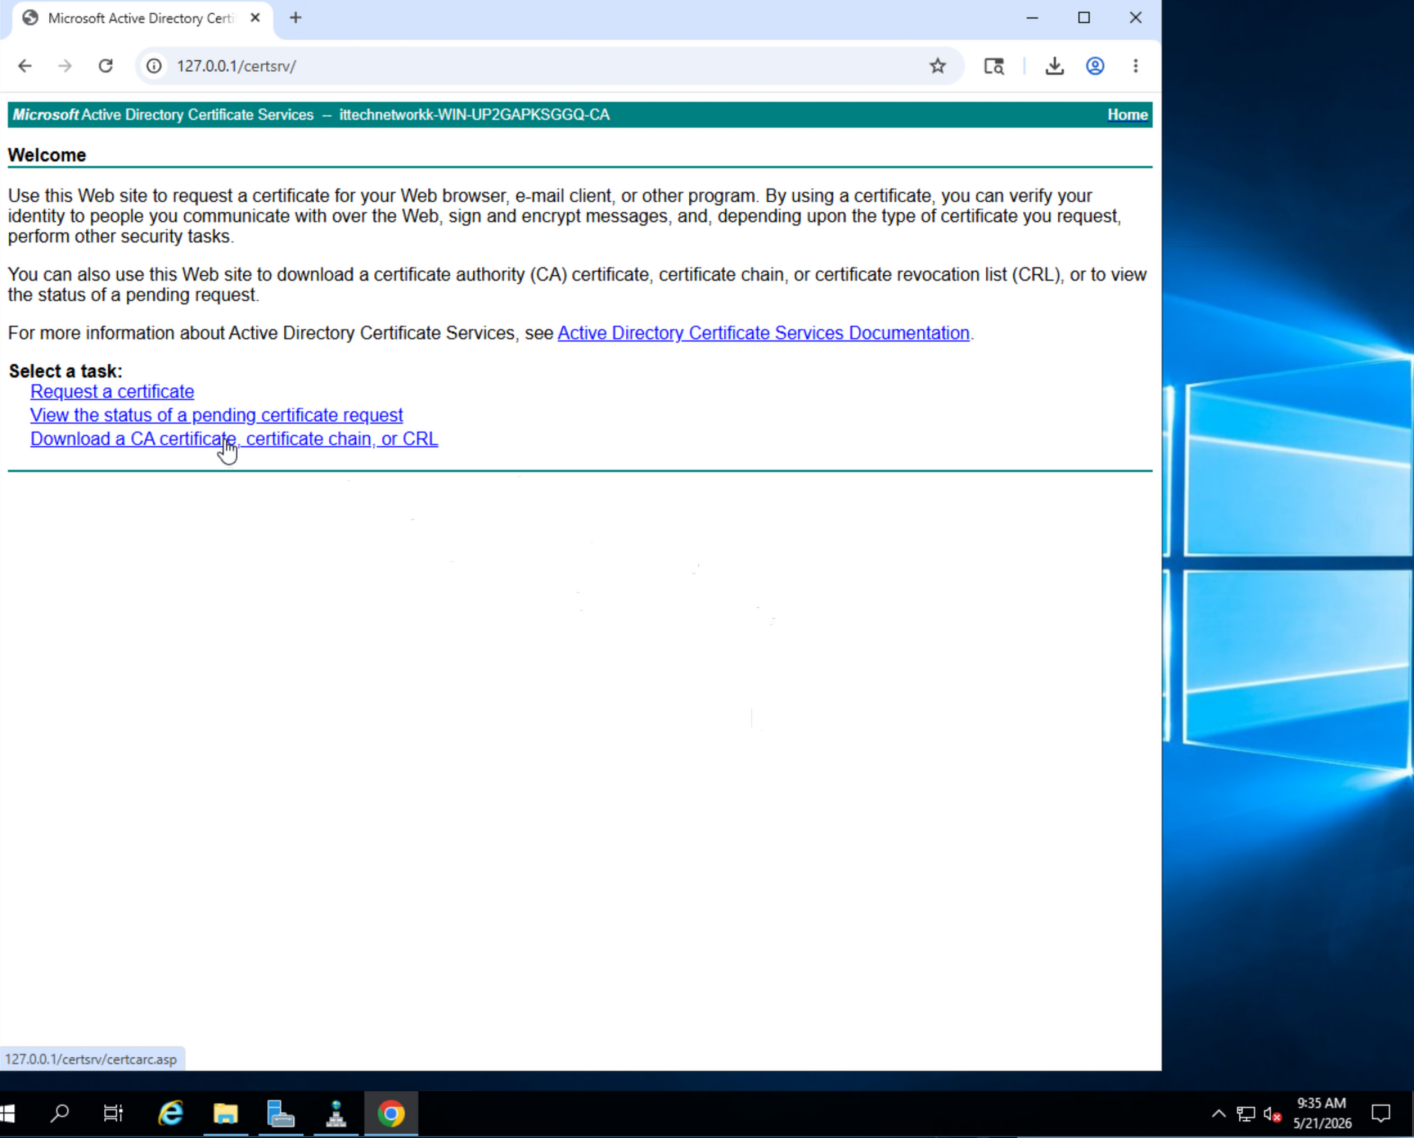
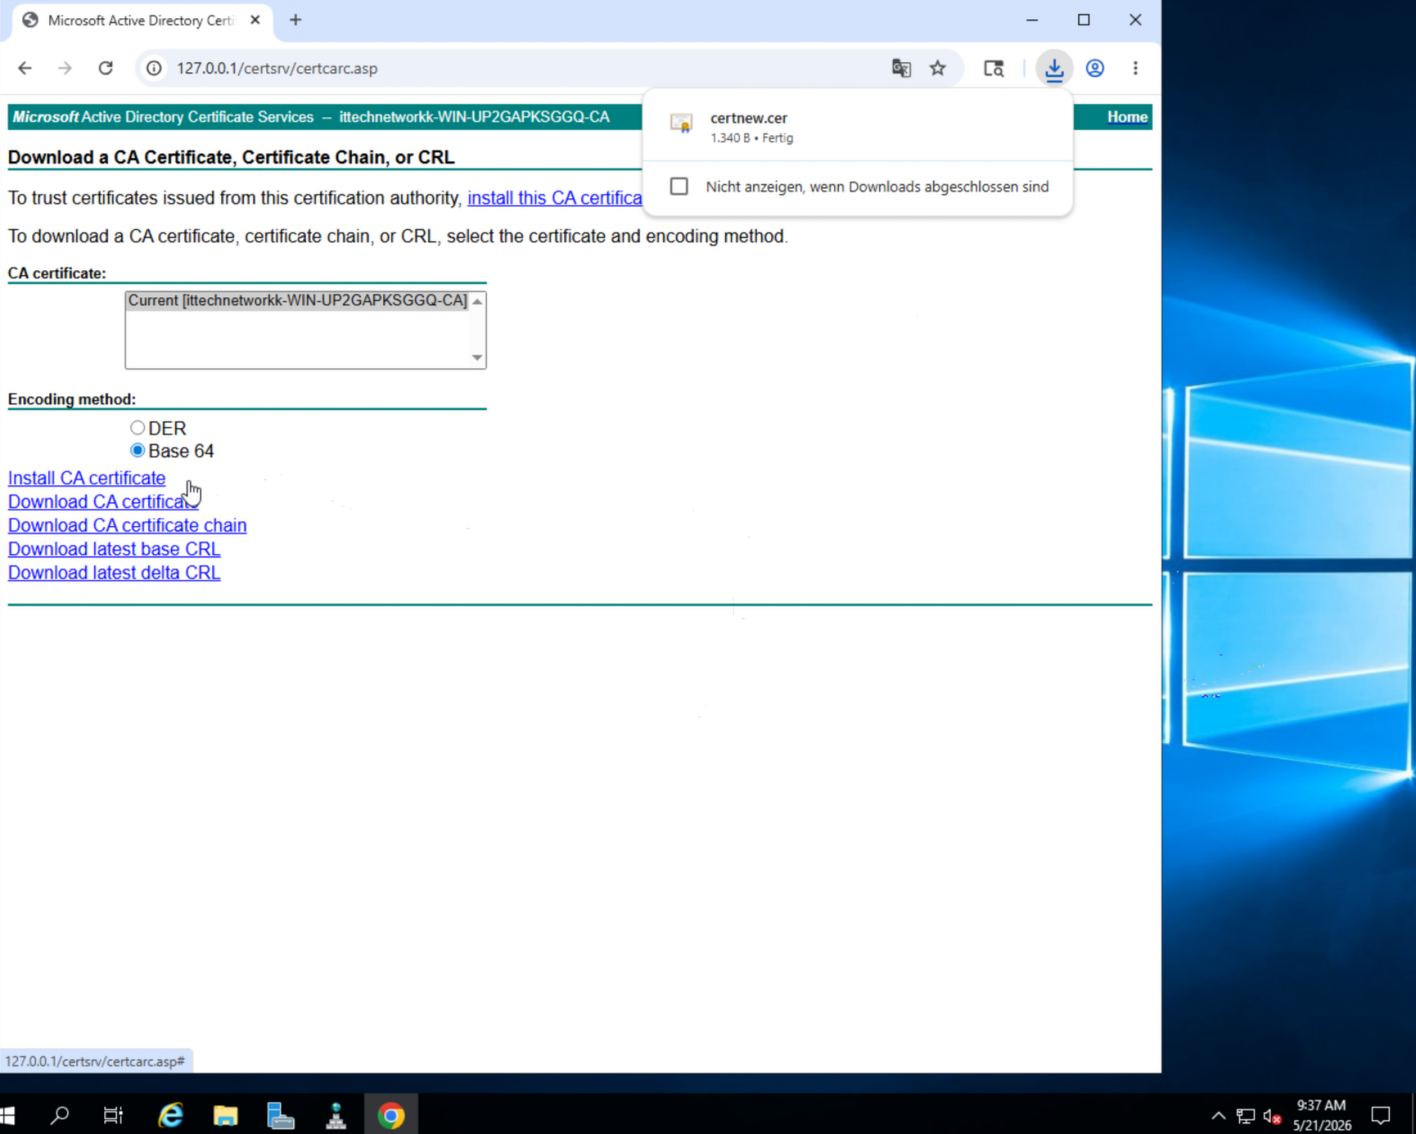
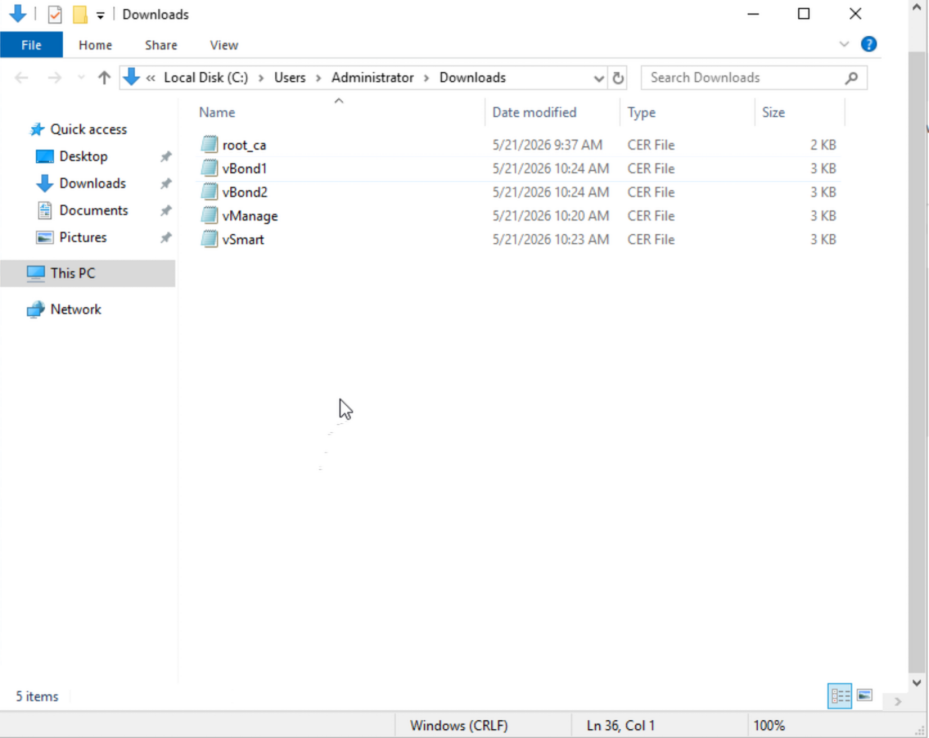
Download the Root Certificate
- Browse to
http://127.0.0.1/certsrv(credentials:administrator/Test123) - Click Download a CA certificate
- Select Base64 encoding → Download
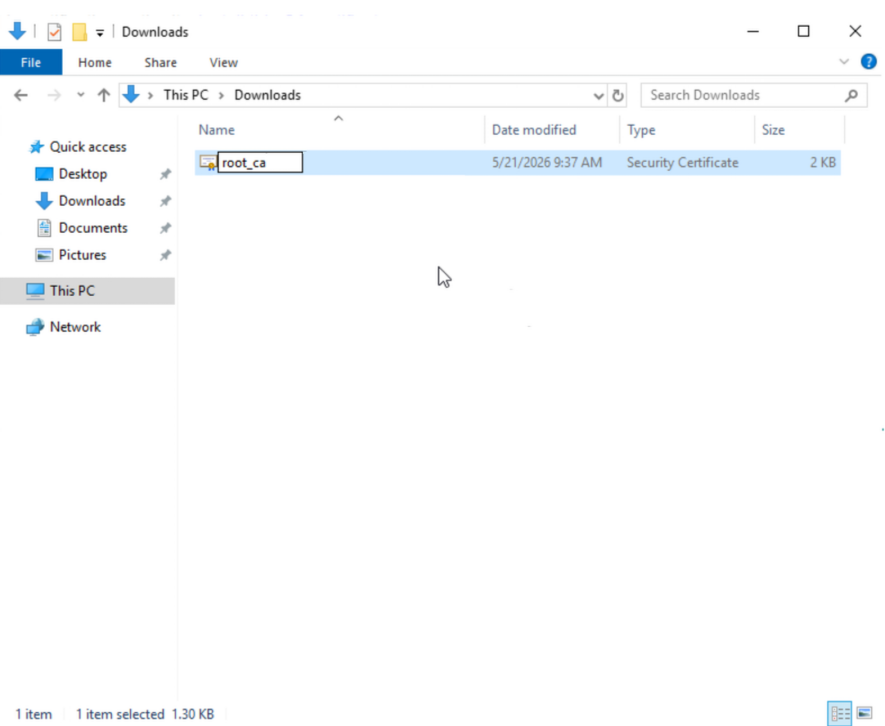
- Rename the file to
root_ca.cer
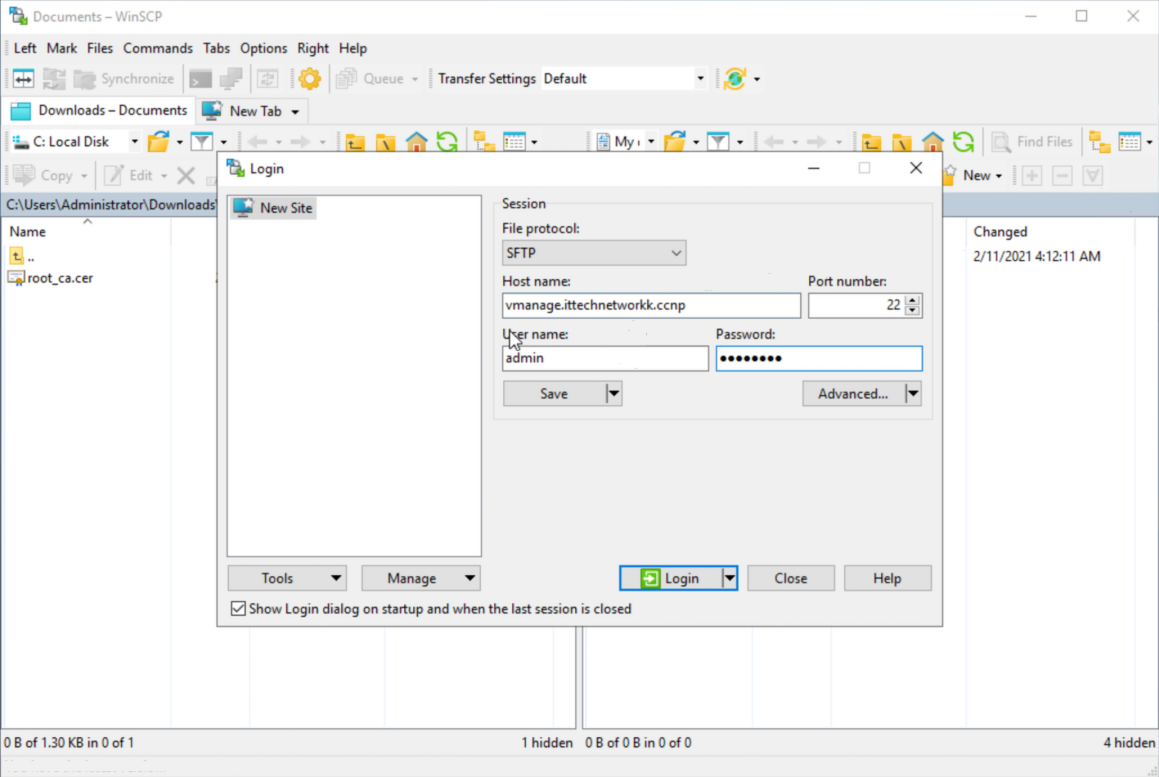
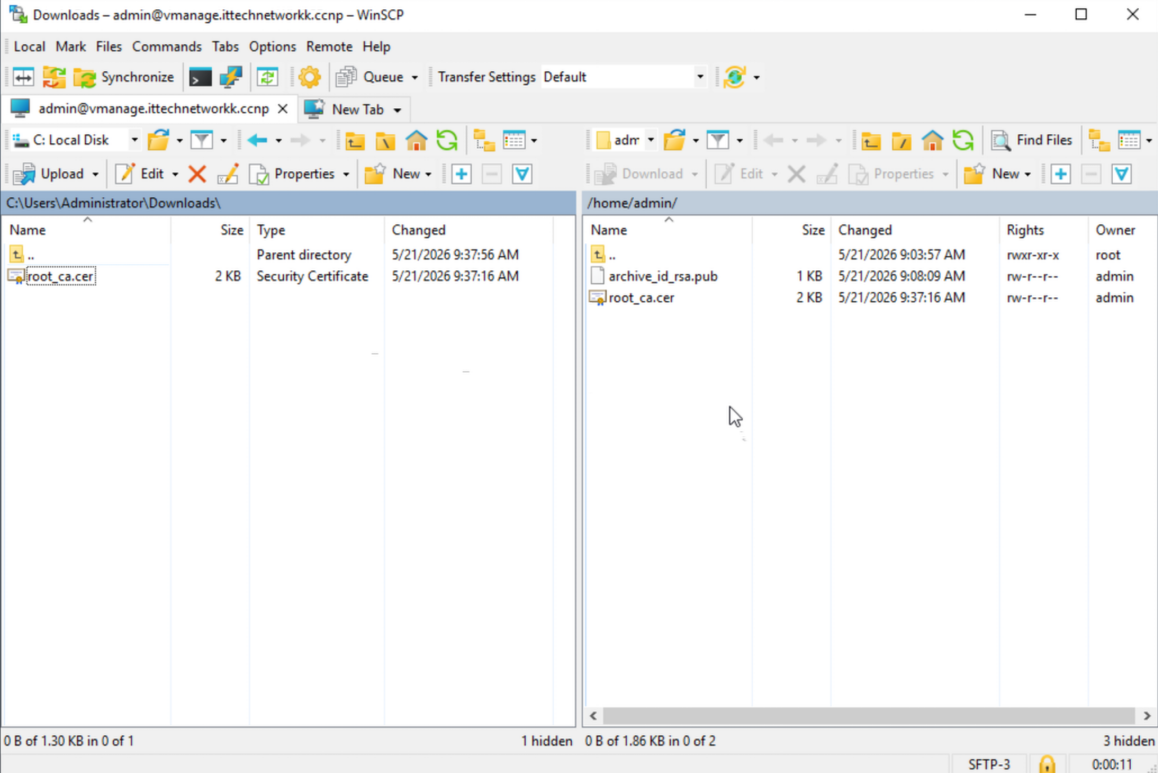
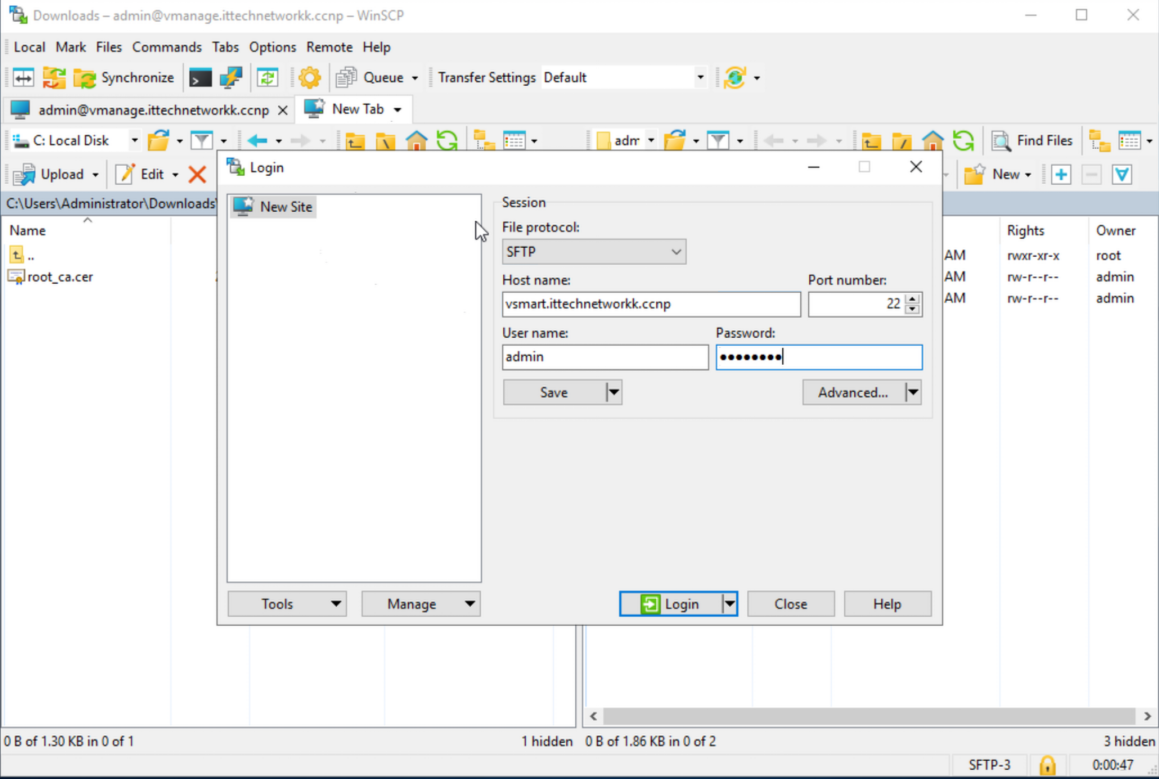
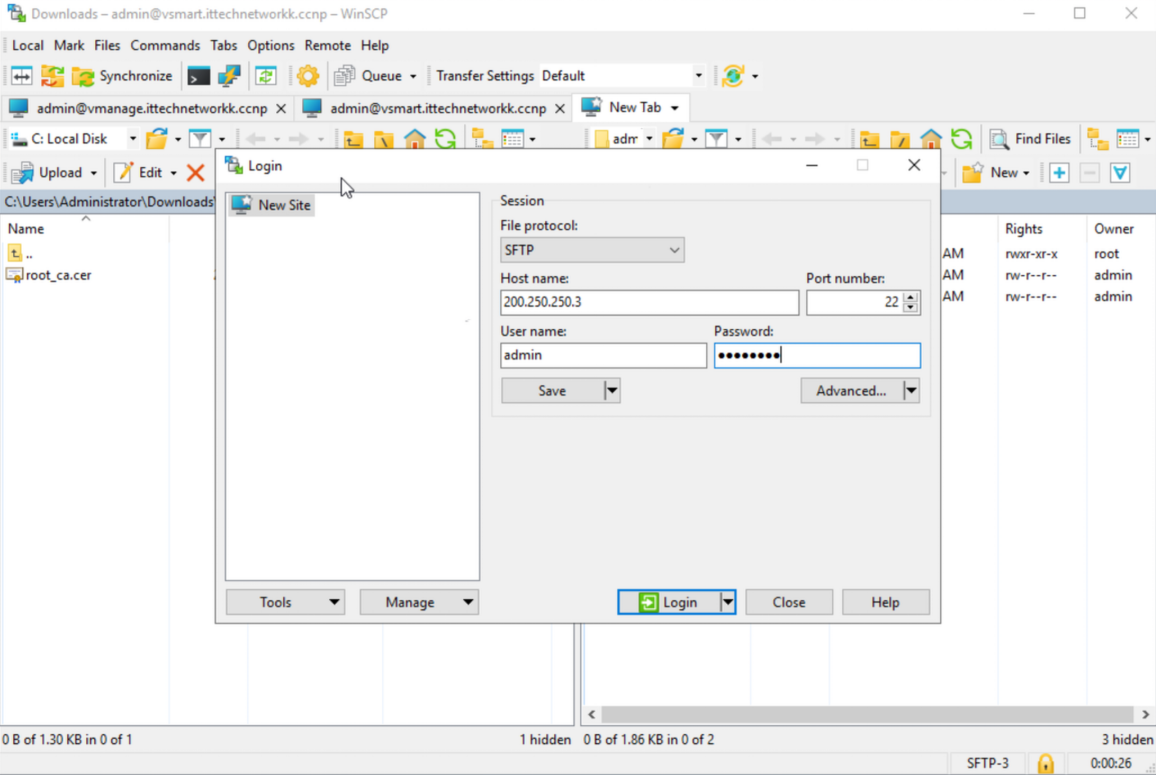
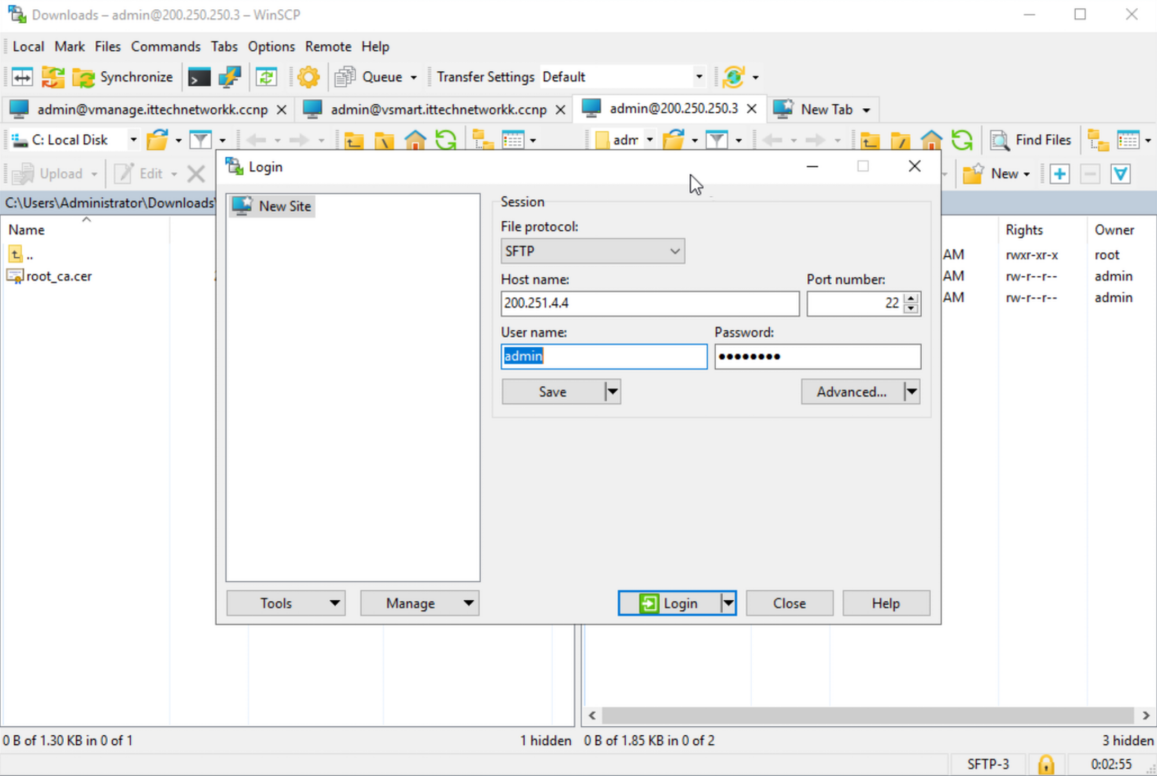
Upload to Devices
Upload root_ca.cer to each controller device using one of these methods:
- SFTP — transfer the file to
/home/admin/ - Copy-paste — copy the certificate content directly into the file on the device
Step 5 — Install Root Certificate on Controllers
Run the following on each controller (vManage, vSmart, vBond1, vBond2):
end
request root-cert-chain install /home/admin/root_ca.cer
Then sync the certificate chain via vManage API:
https://vmanage.ittechnetworkk.ccnp/dataservice/system/device/sync/rootcertchainExpected response: {"syncRootCertChain":"done"}
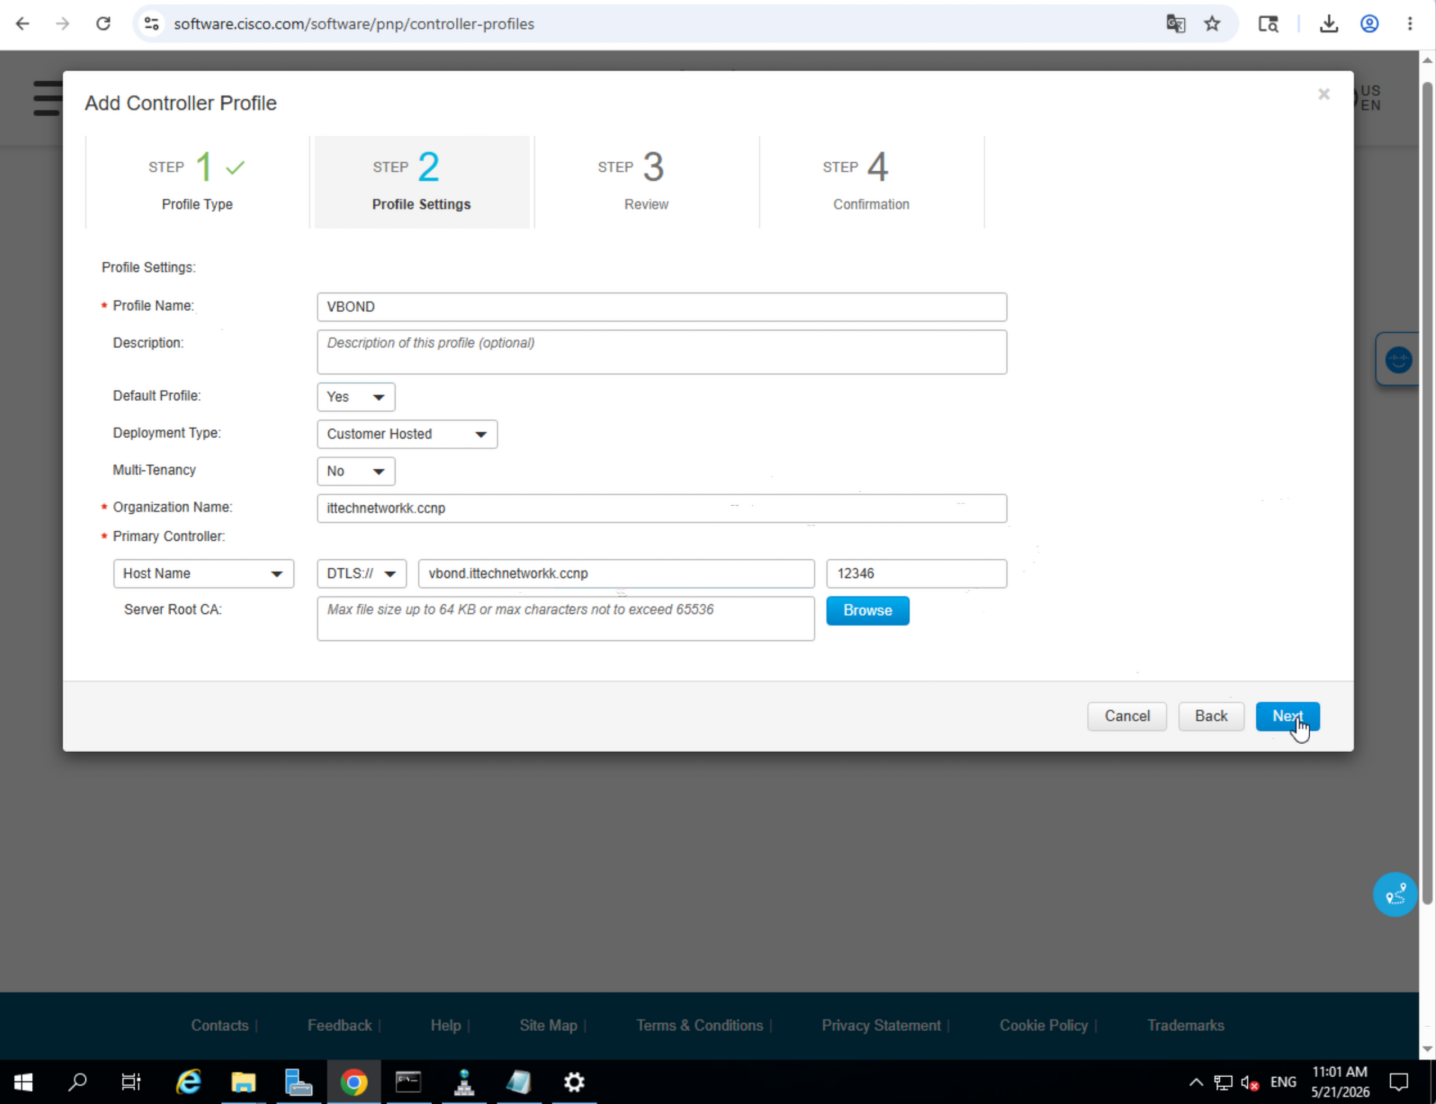
Step 6 — Add Controllers & Configure Settings in vManage GUI
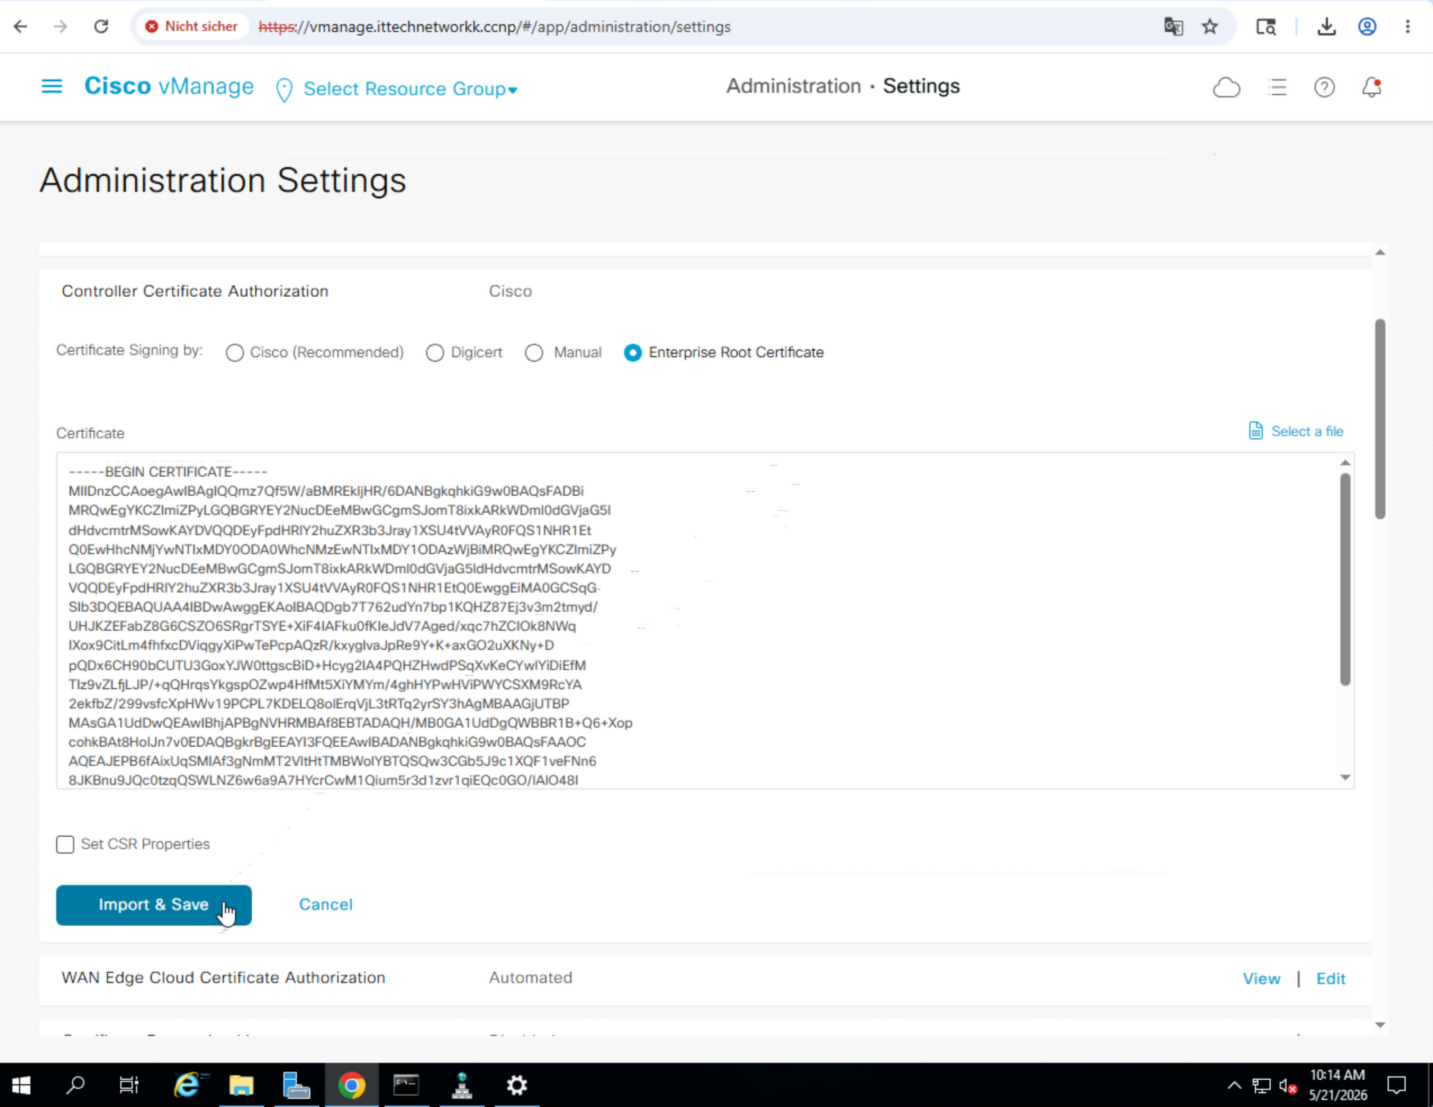
Configure Organization Settings
Navigate to Administration » Settings and configure:
| Setting | Value |
|---|---|
| Organization Name | ittechnetworkk.ccnp |
| vBond | vbond.ittechnetworkk.ccnp:12346 |
| Controller Certificate Authorization | Enterprise Root Certificate — upload root_ca.cer |

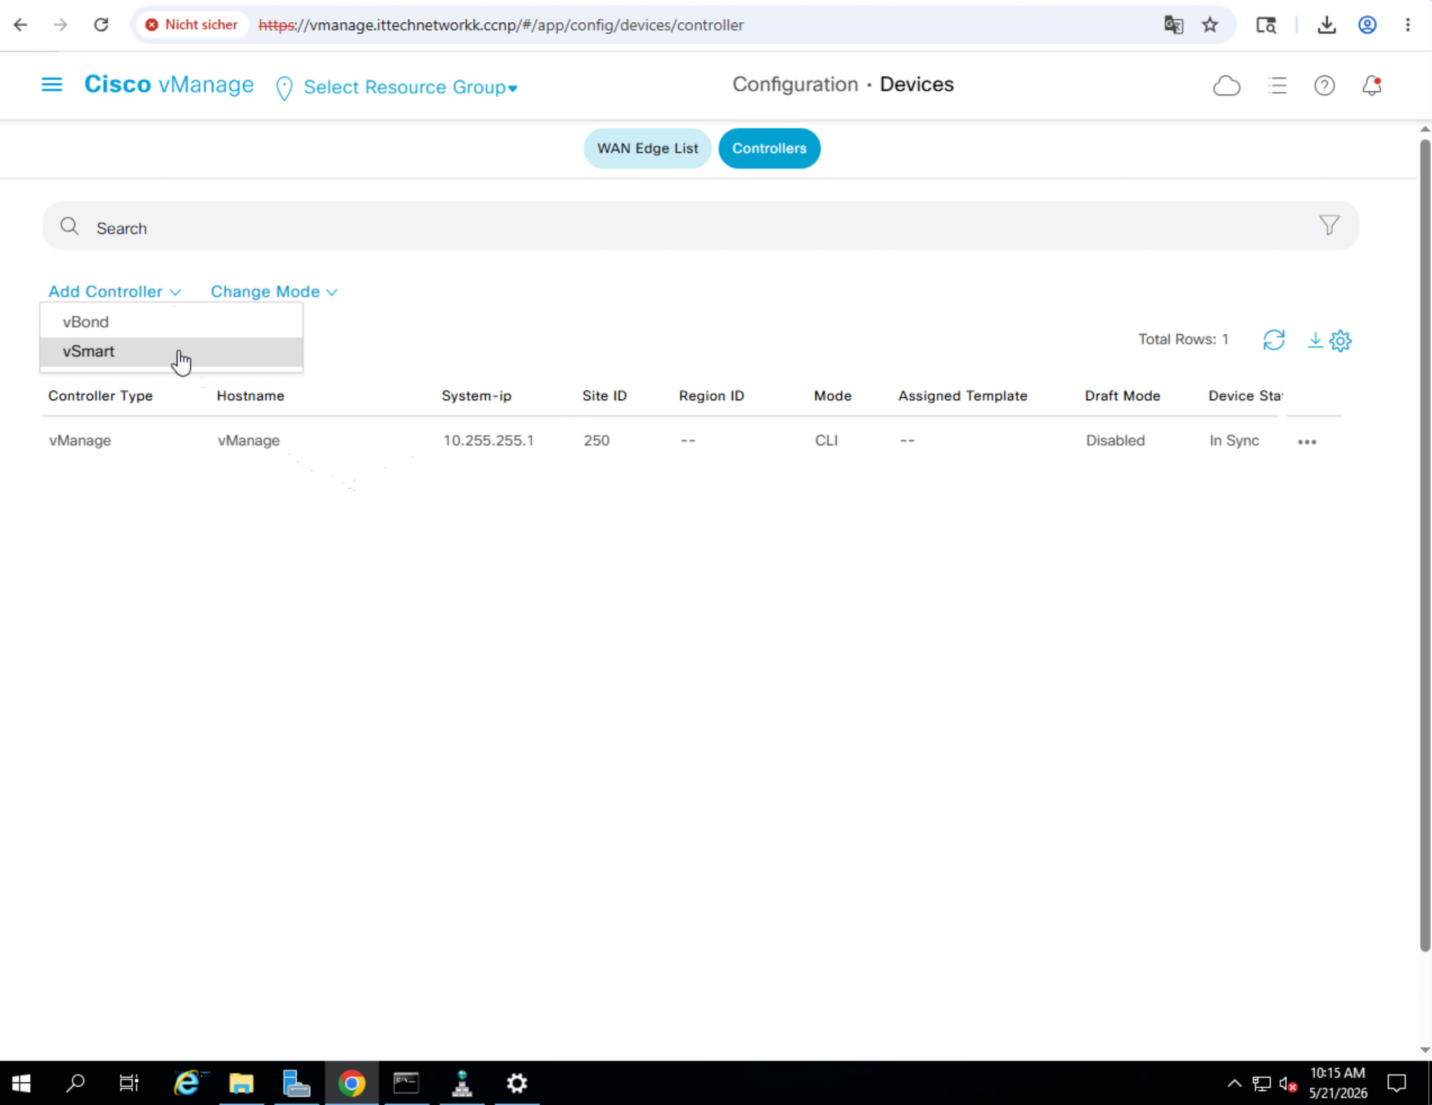
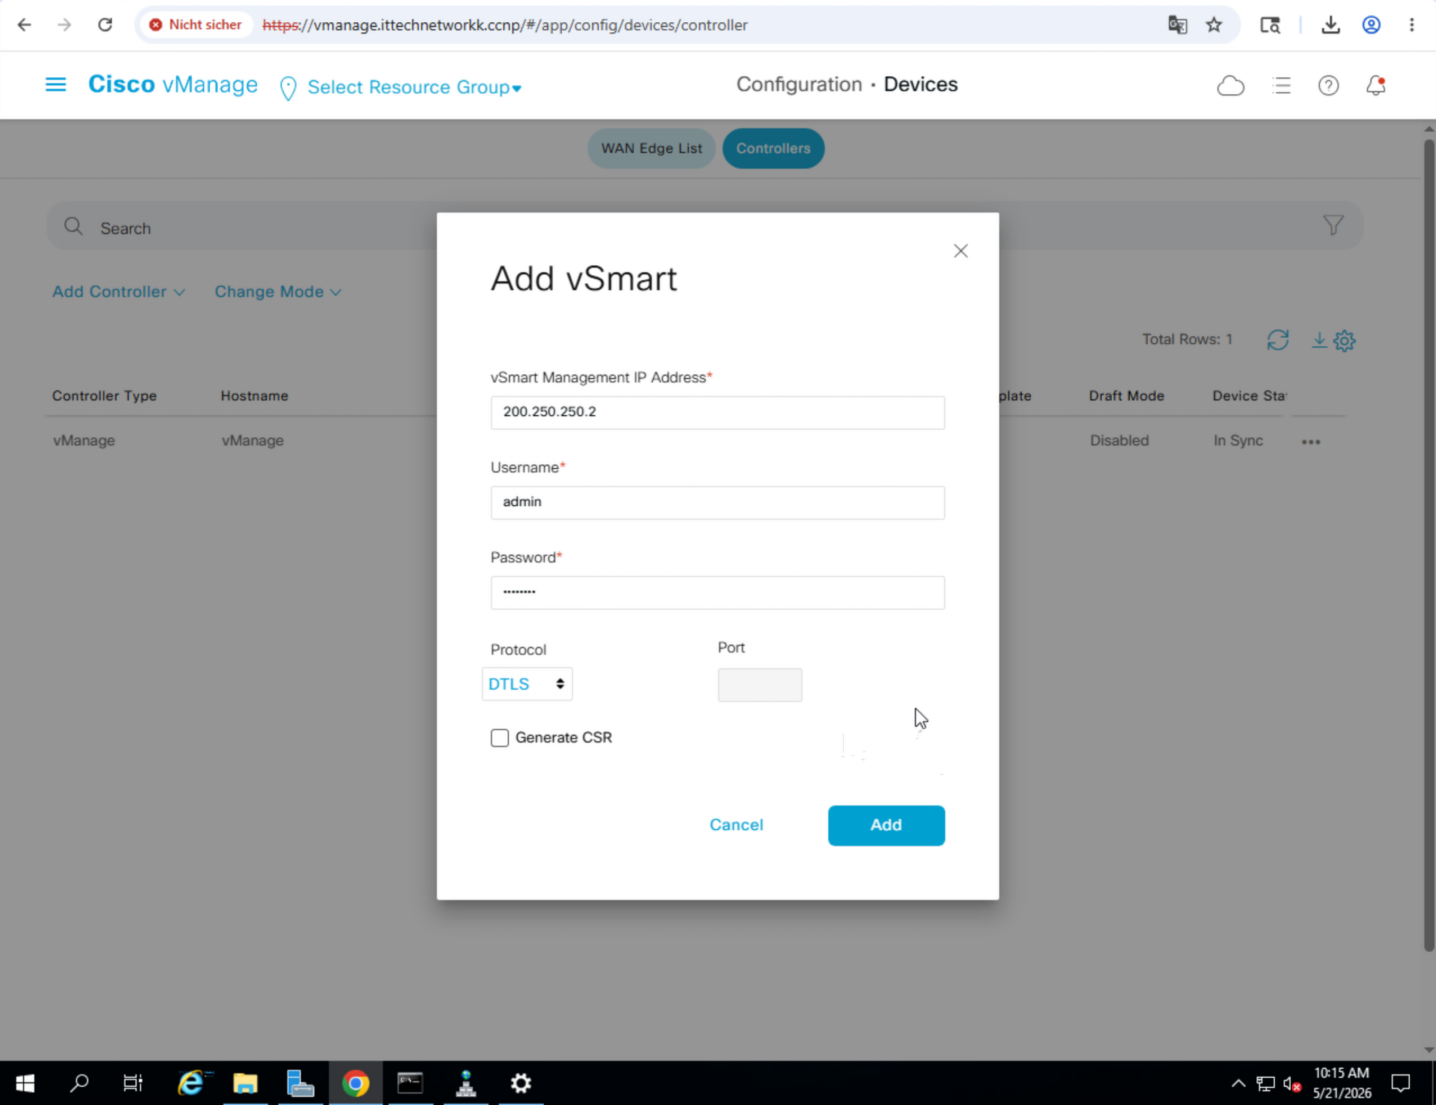
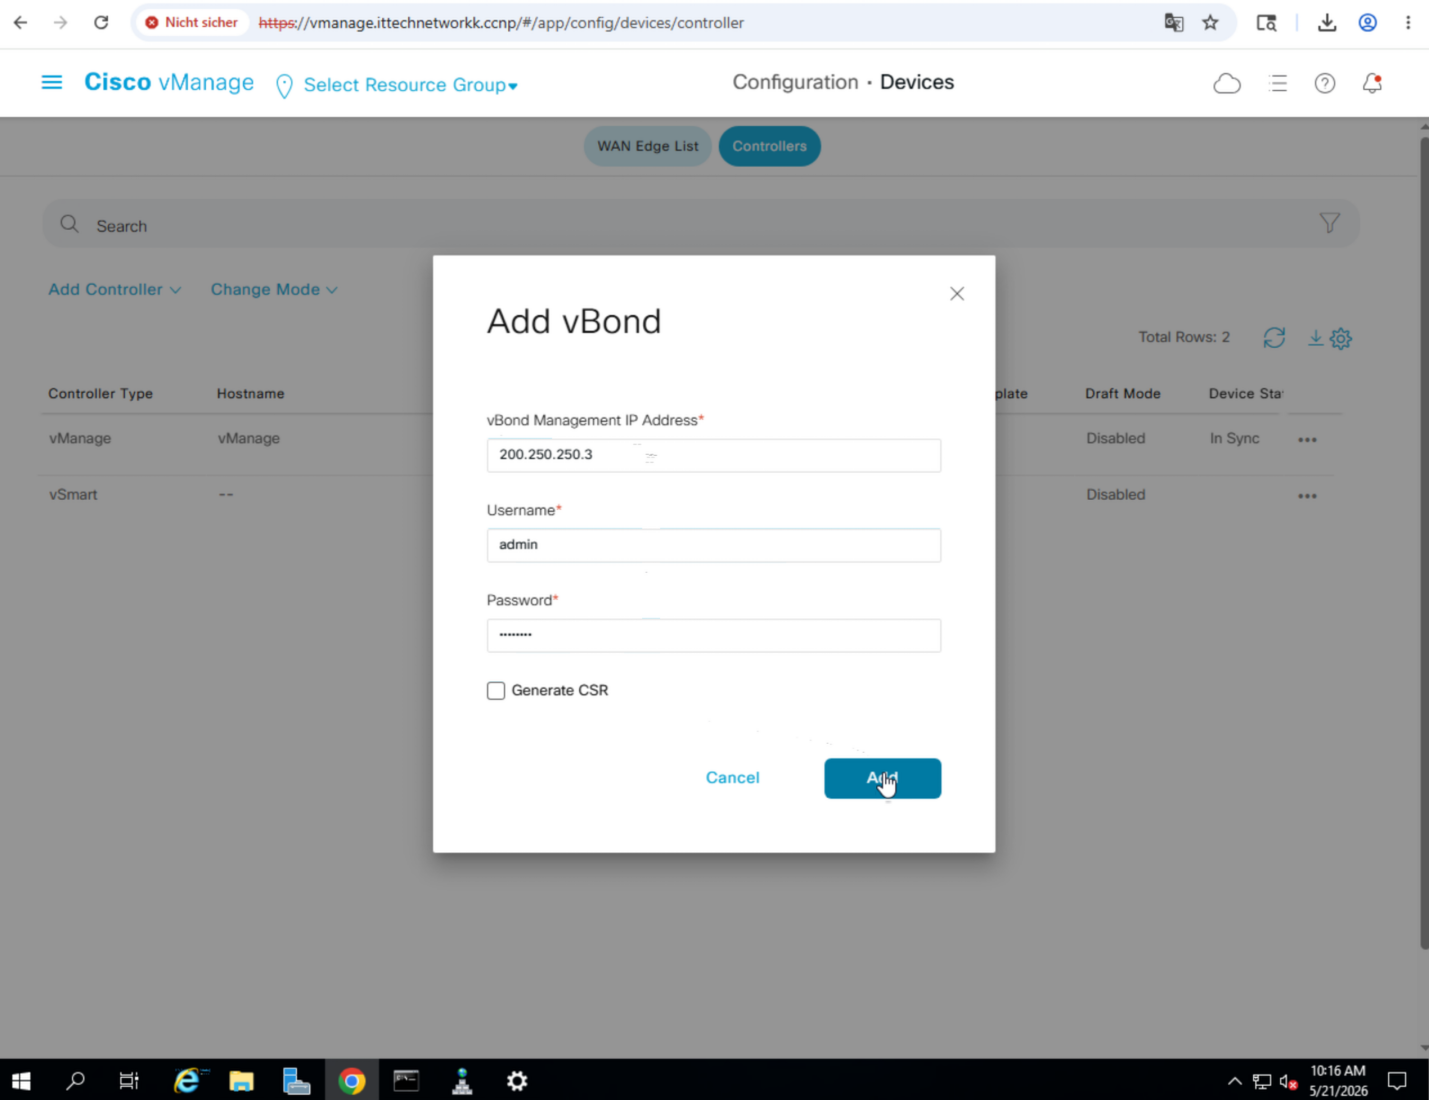
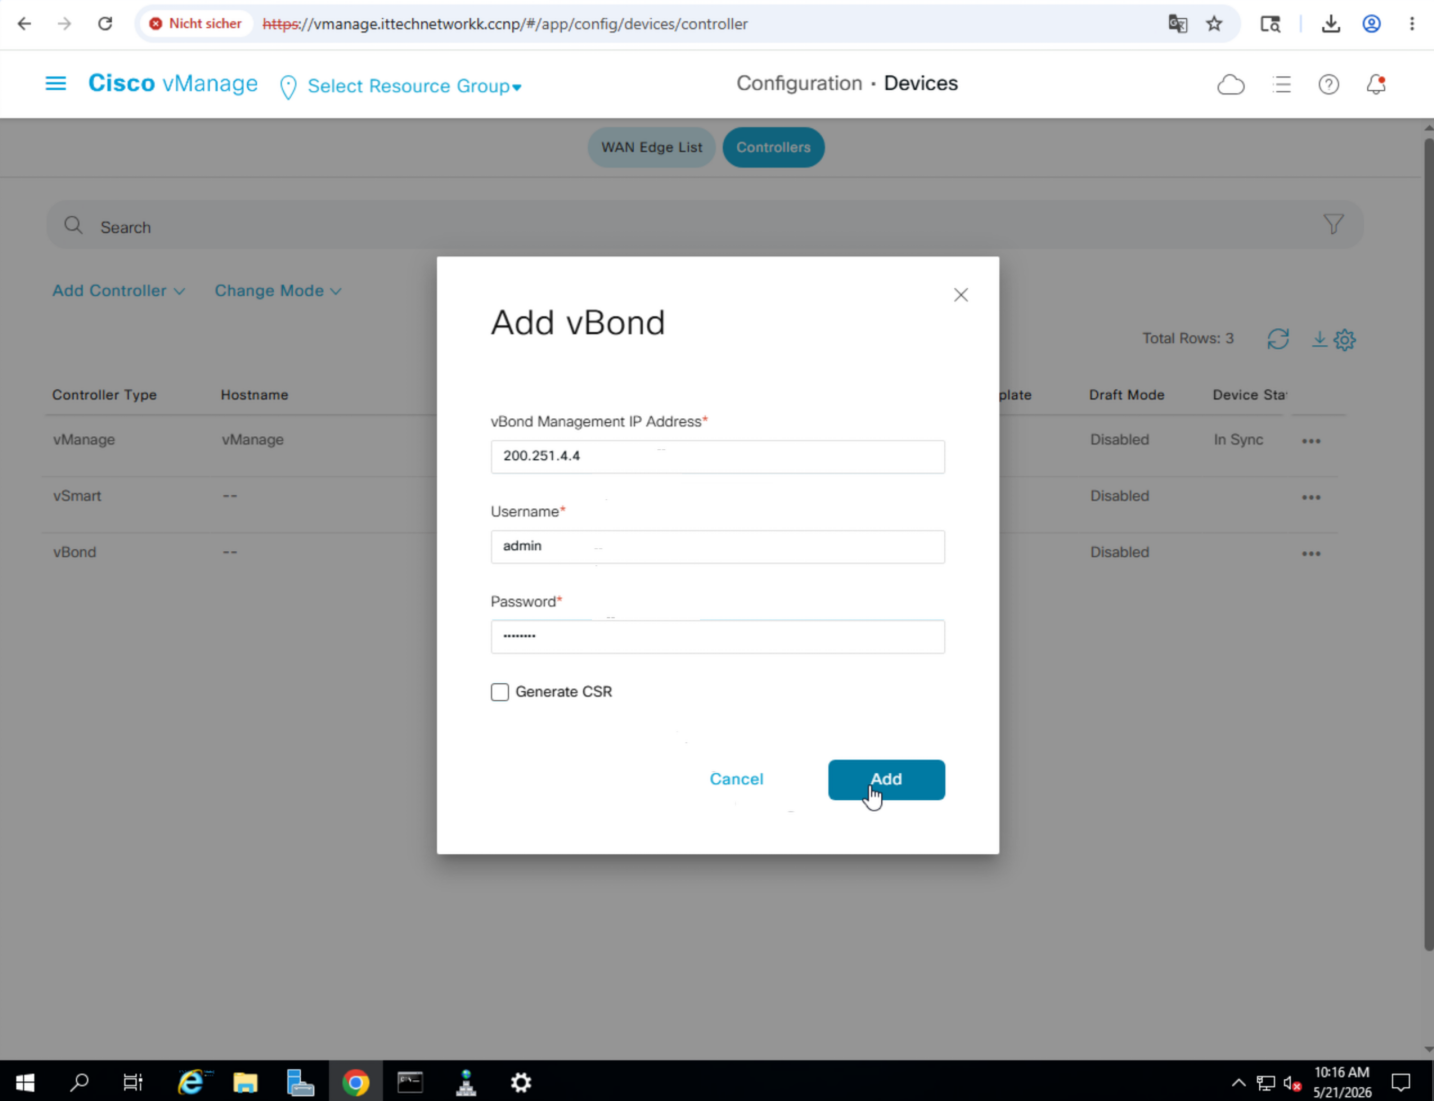
Add Controllers
Navigate to Configuration » Devices » Controllers and add:
| Type | IP Address | Credentials | Protocol | Generate CSR |
|---|---|---|---|---|
| vSmart | 200.250.250.2 | admin / admin | DTLS | Unchecked |
| vBond | 200.250.250.3 | admin / admin | — | Unchecked |
| vBond | 200.251.4.4 | admin / admin | — | Unchecked |
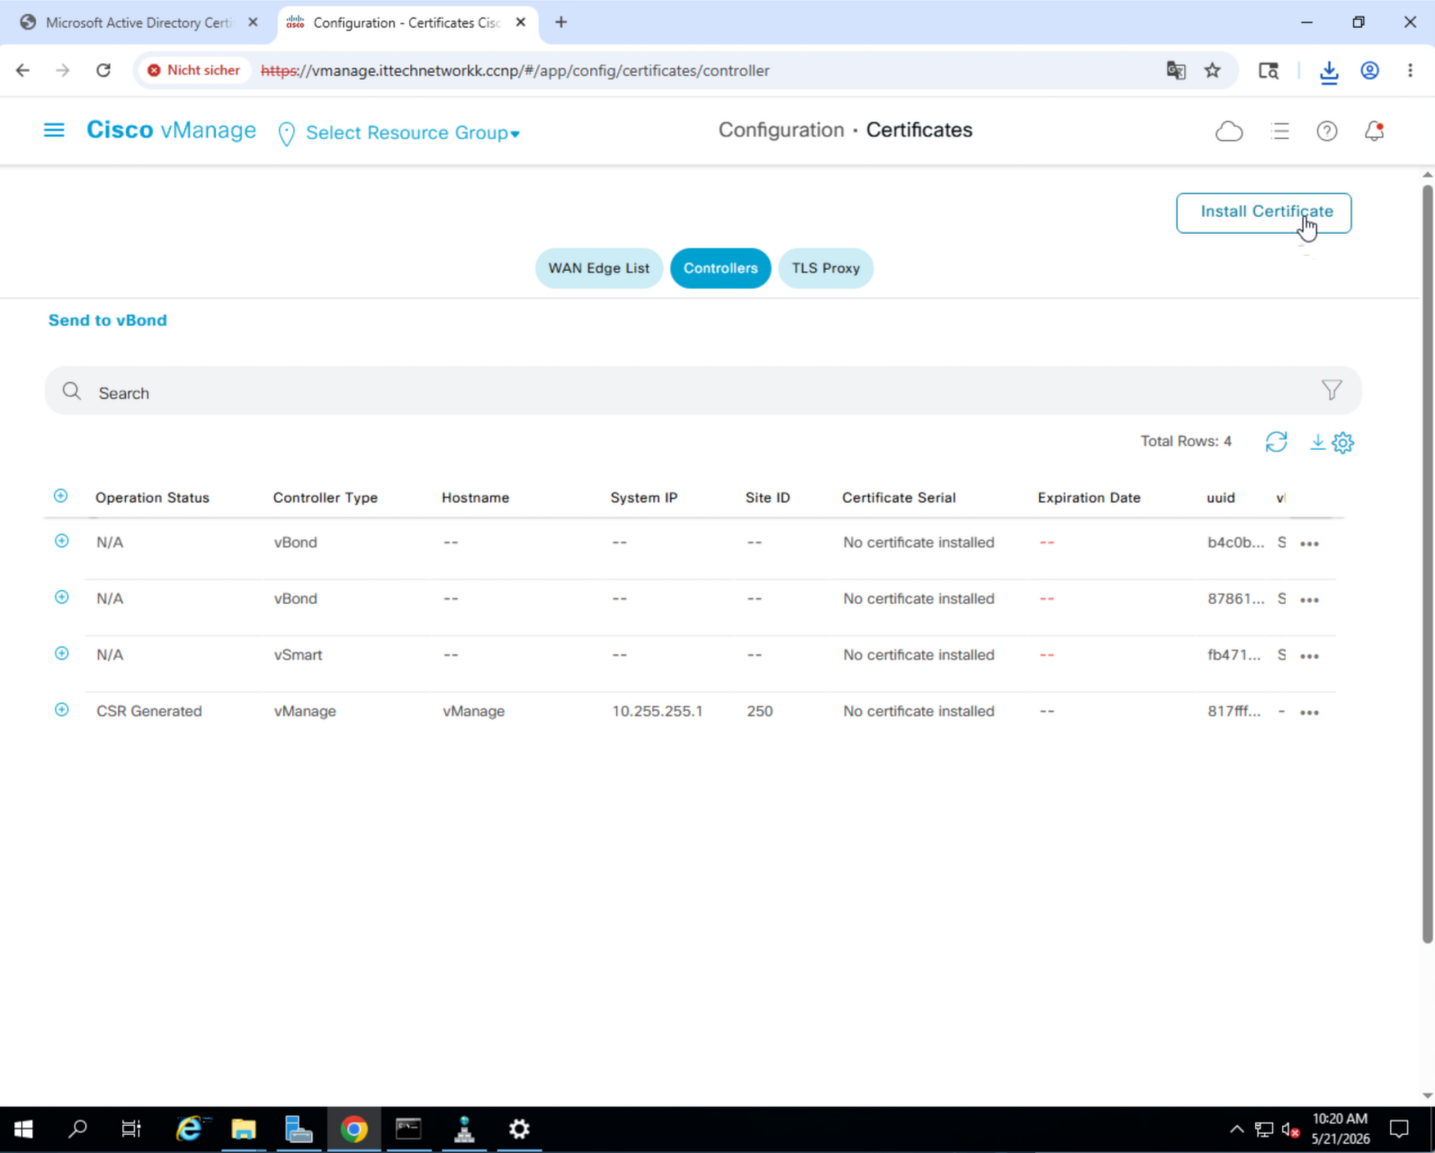
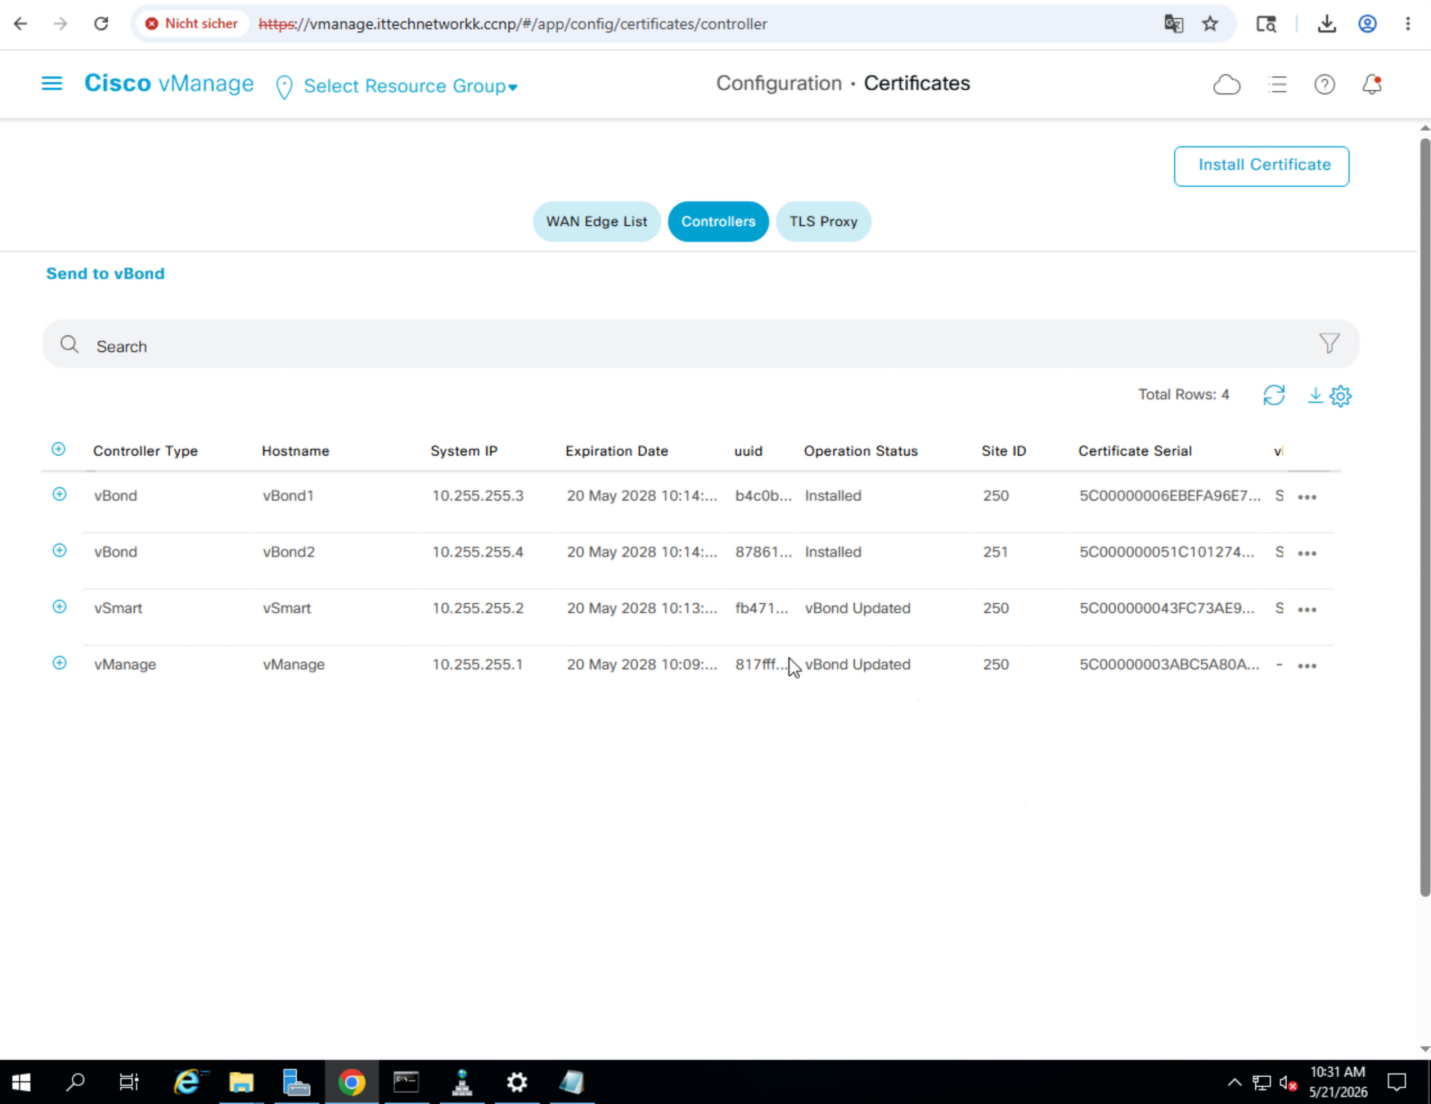
Step 7 — Generate & Install Controller Certificates
Generate CSR and Obtain Certificates
Navigate to Configuration » Certificates » Controllers.
Repeat the following for each controller (vManage, vSmart, vBond1, vBond2):
- Click on the device → Generate CSR
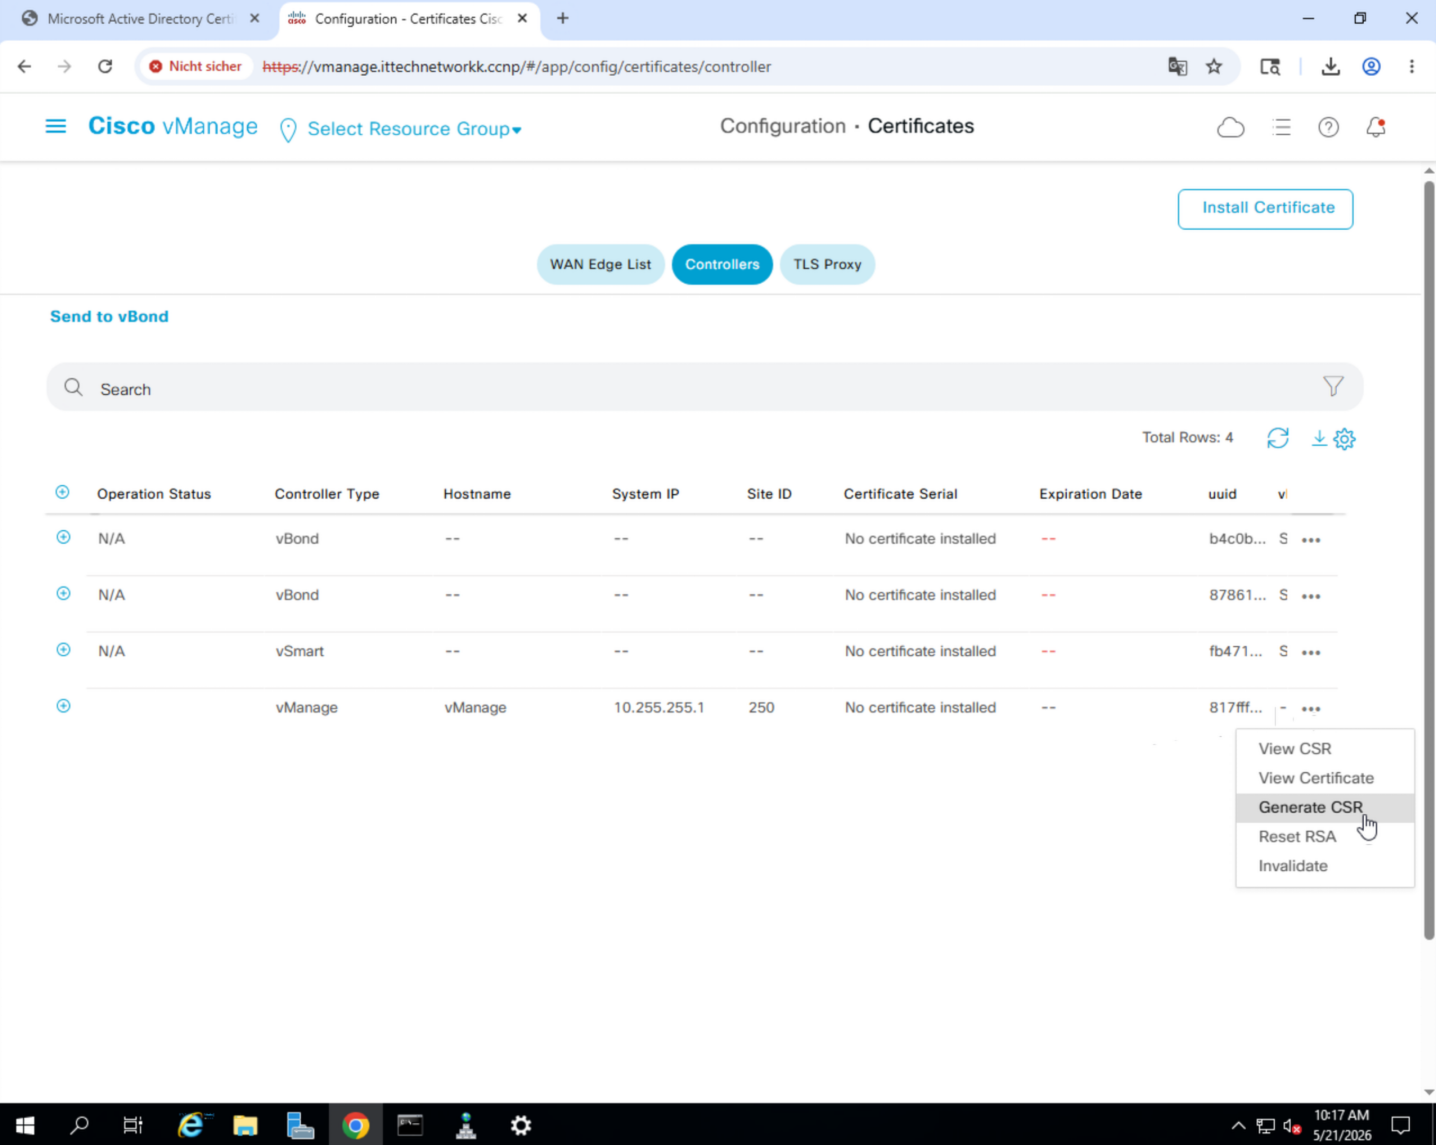
- Copy the CSR content
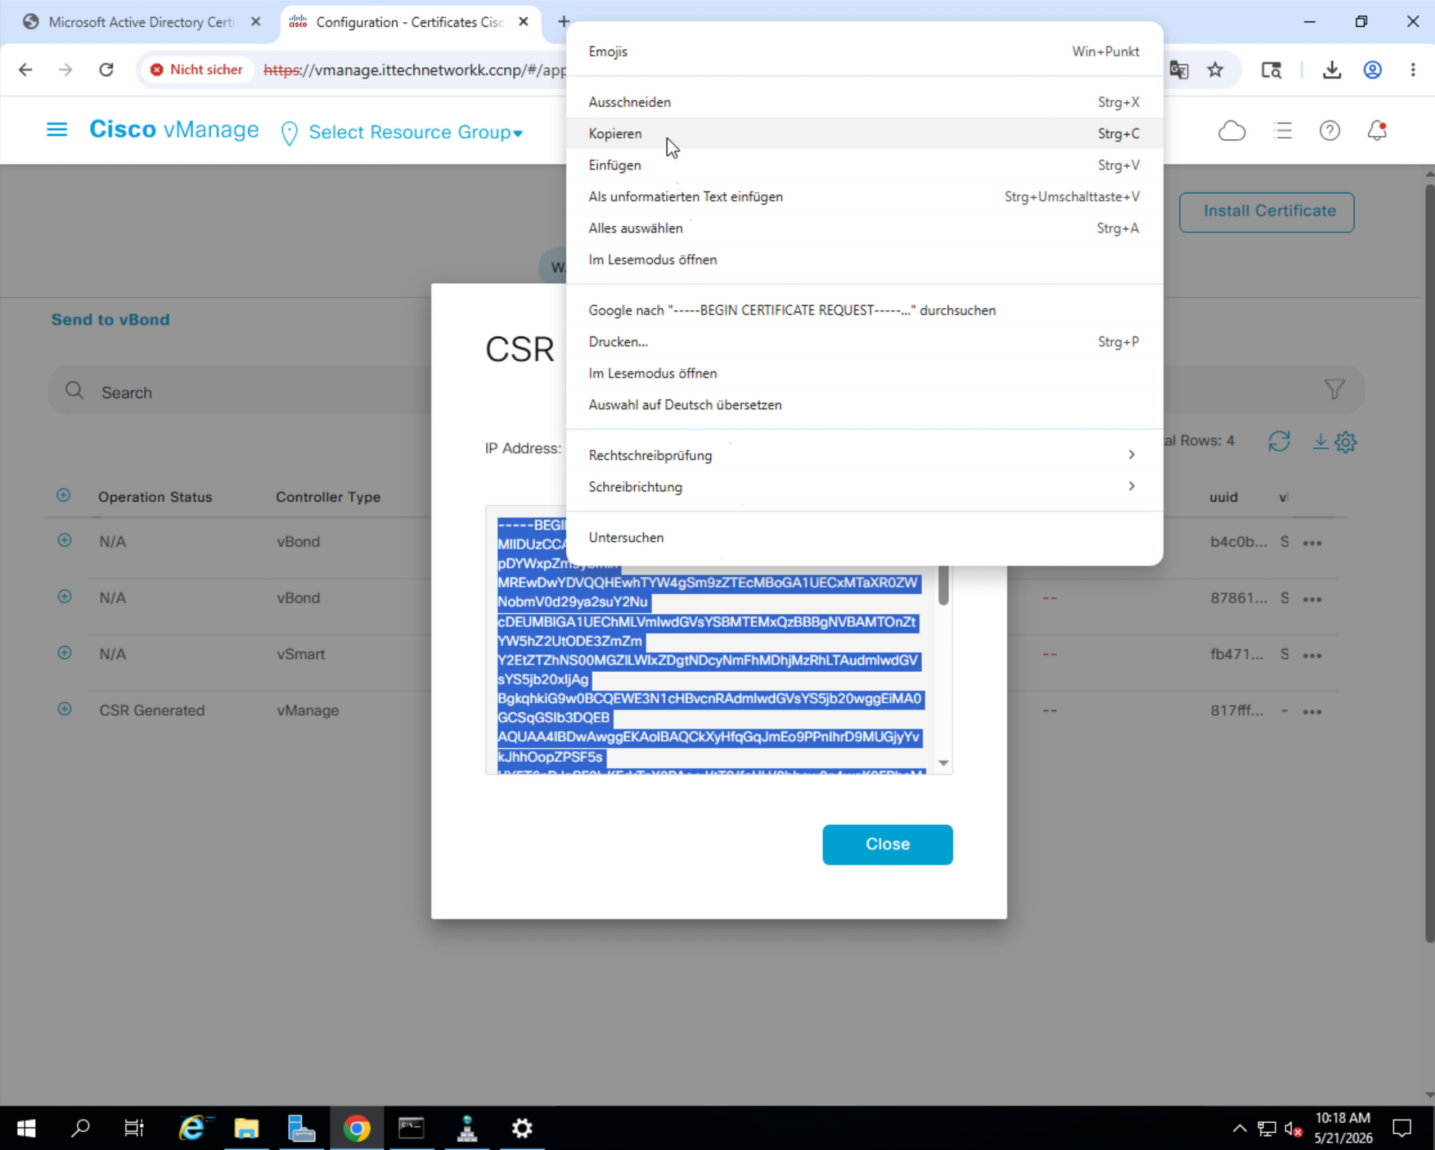
- Go to the CA web enrollment page (
http://127.0.0.1/certsrv) - Click Request a certificate → Advanced certificate request
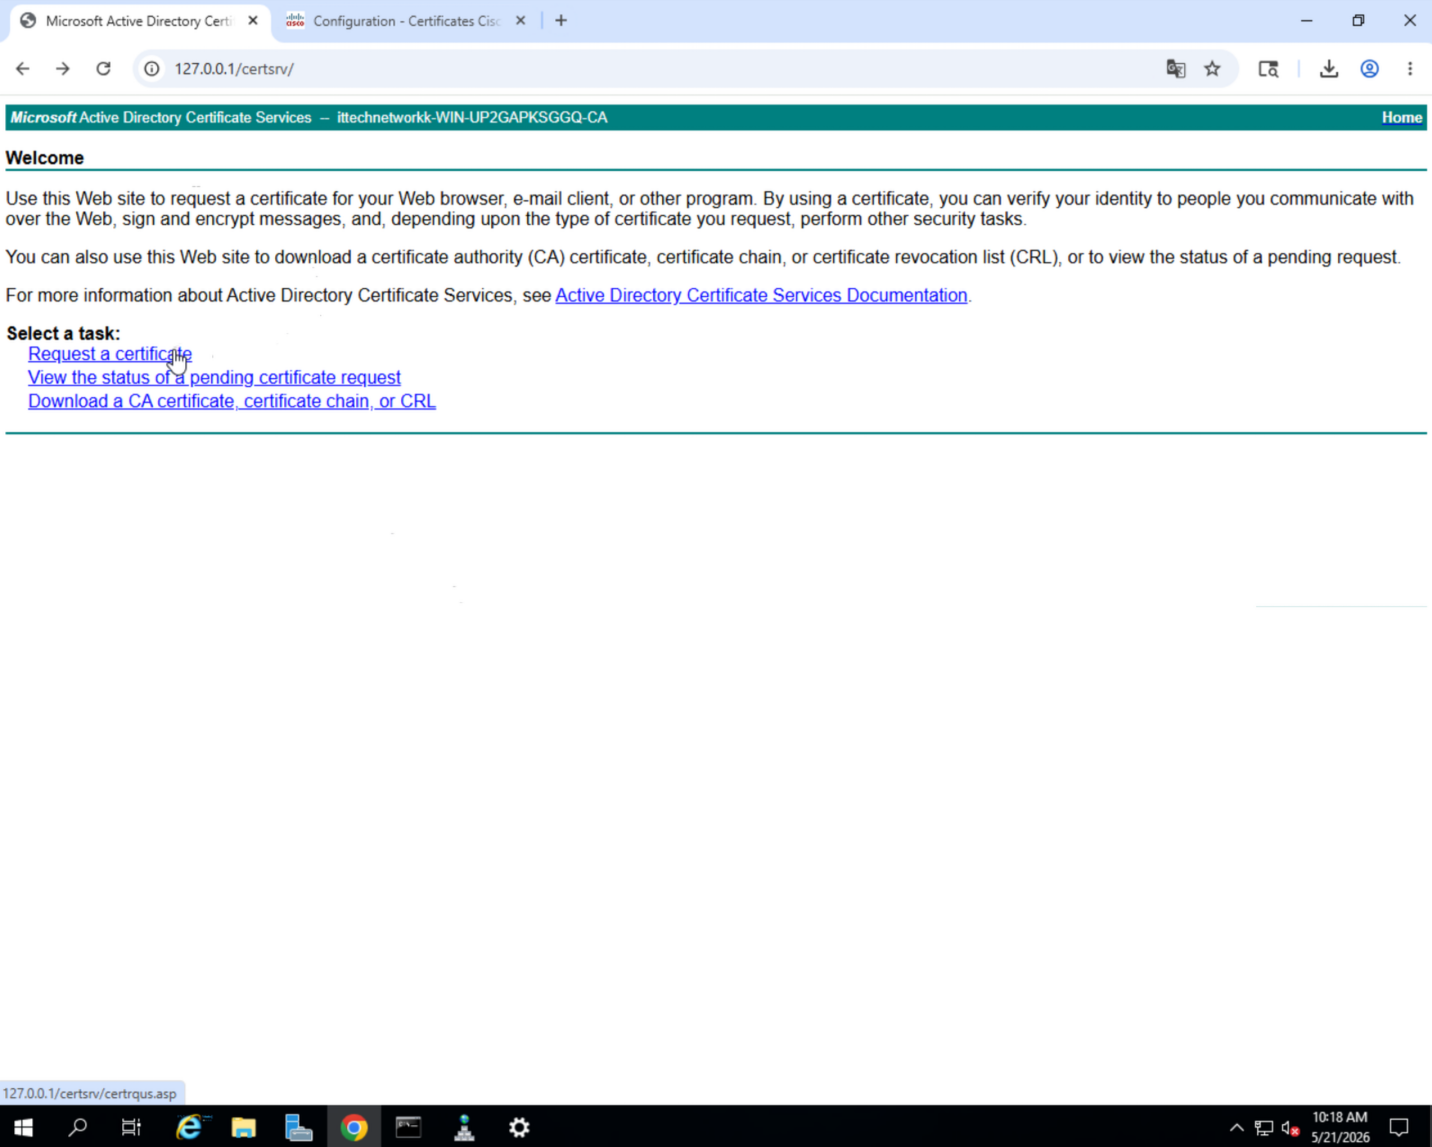
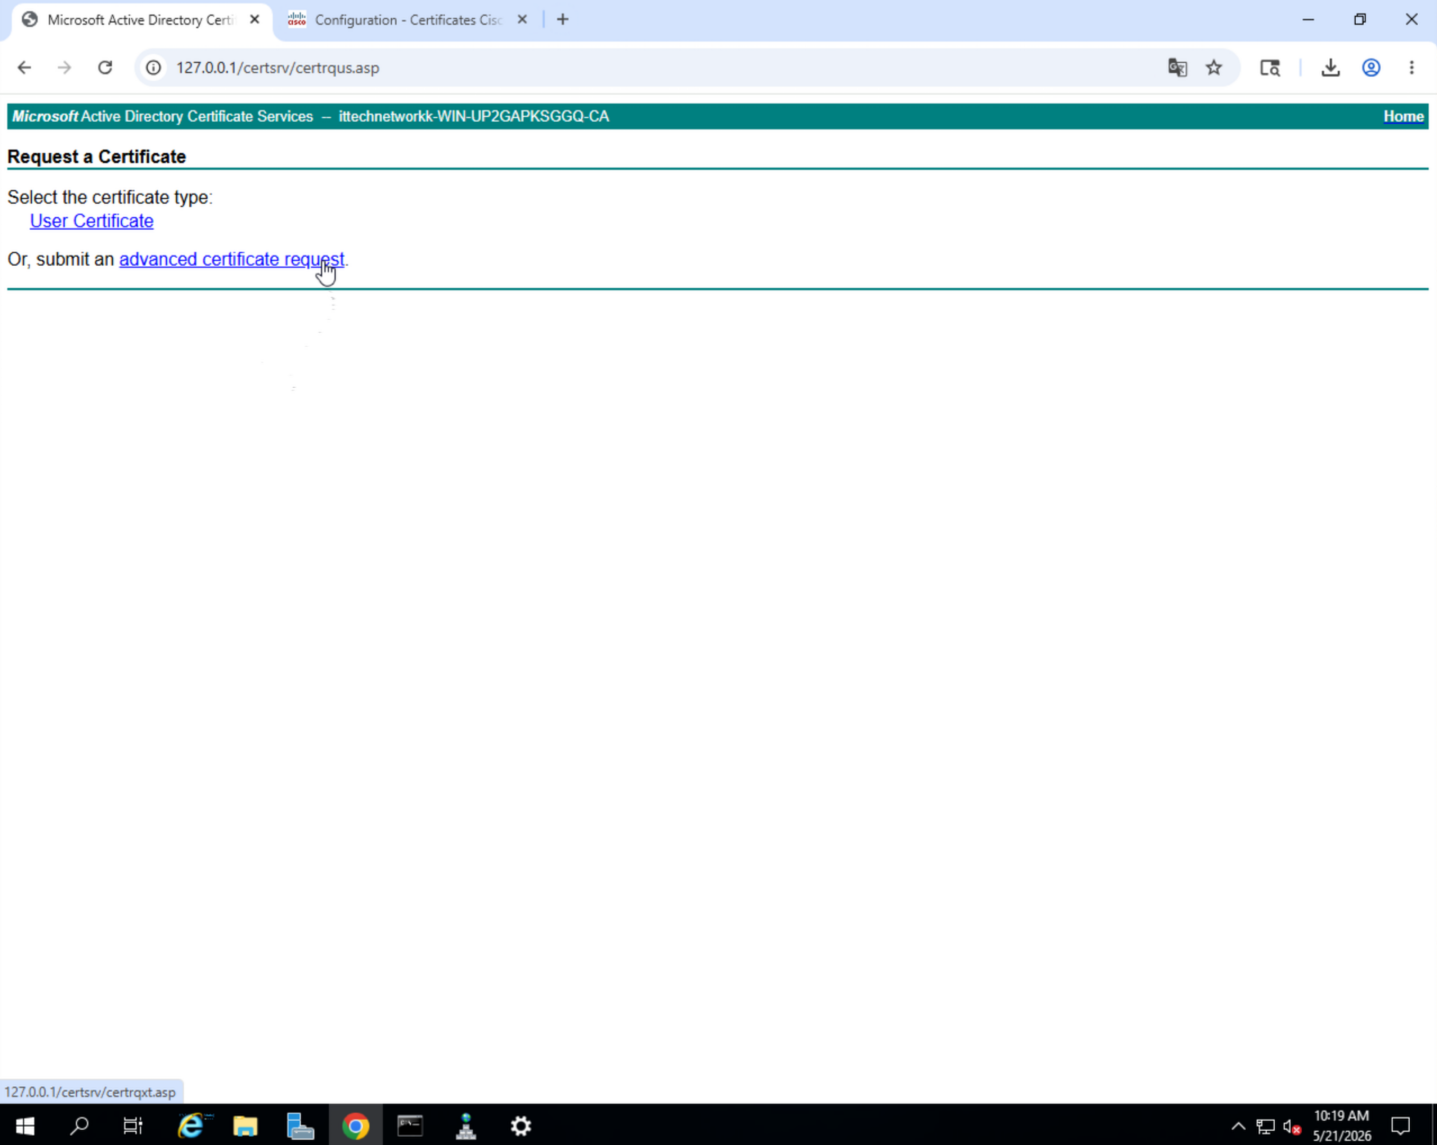
- Paste the CSR
- Certificate Template: Web Server
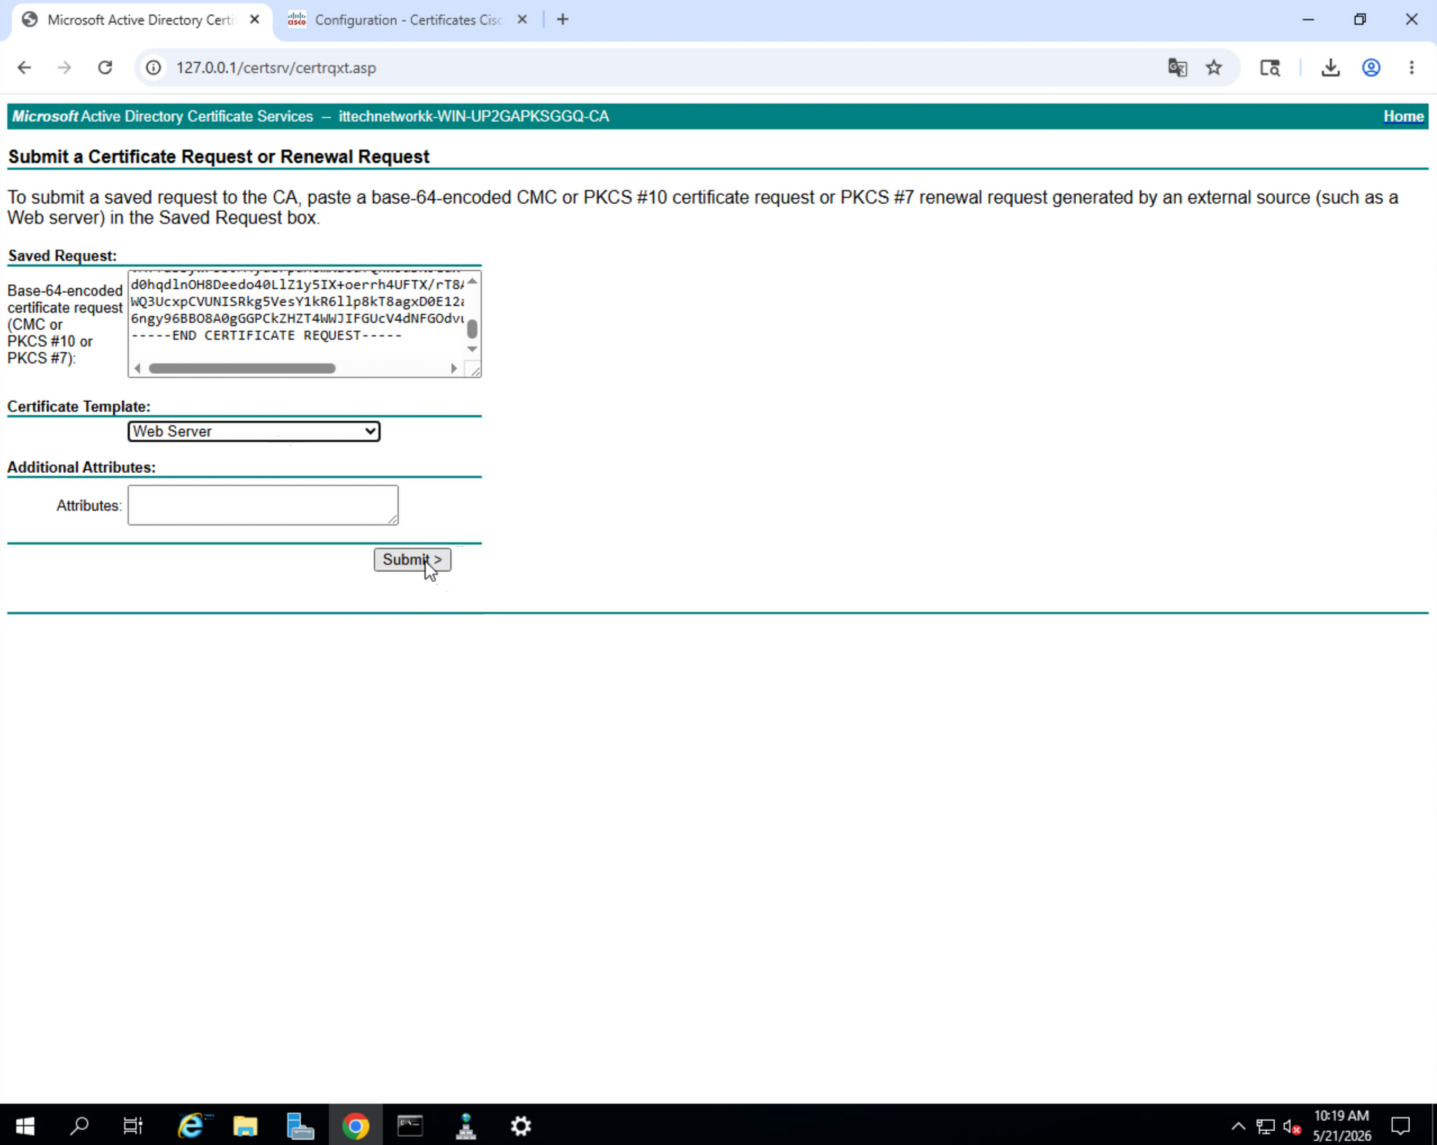
- Submit → Select Base 64 encoding → Download
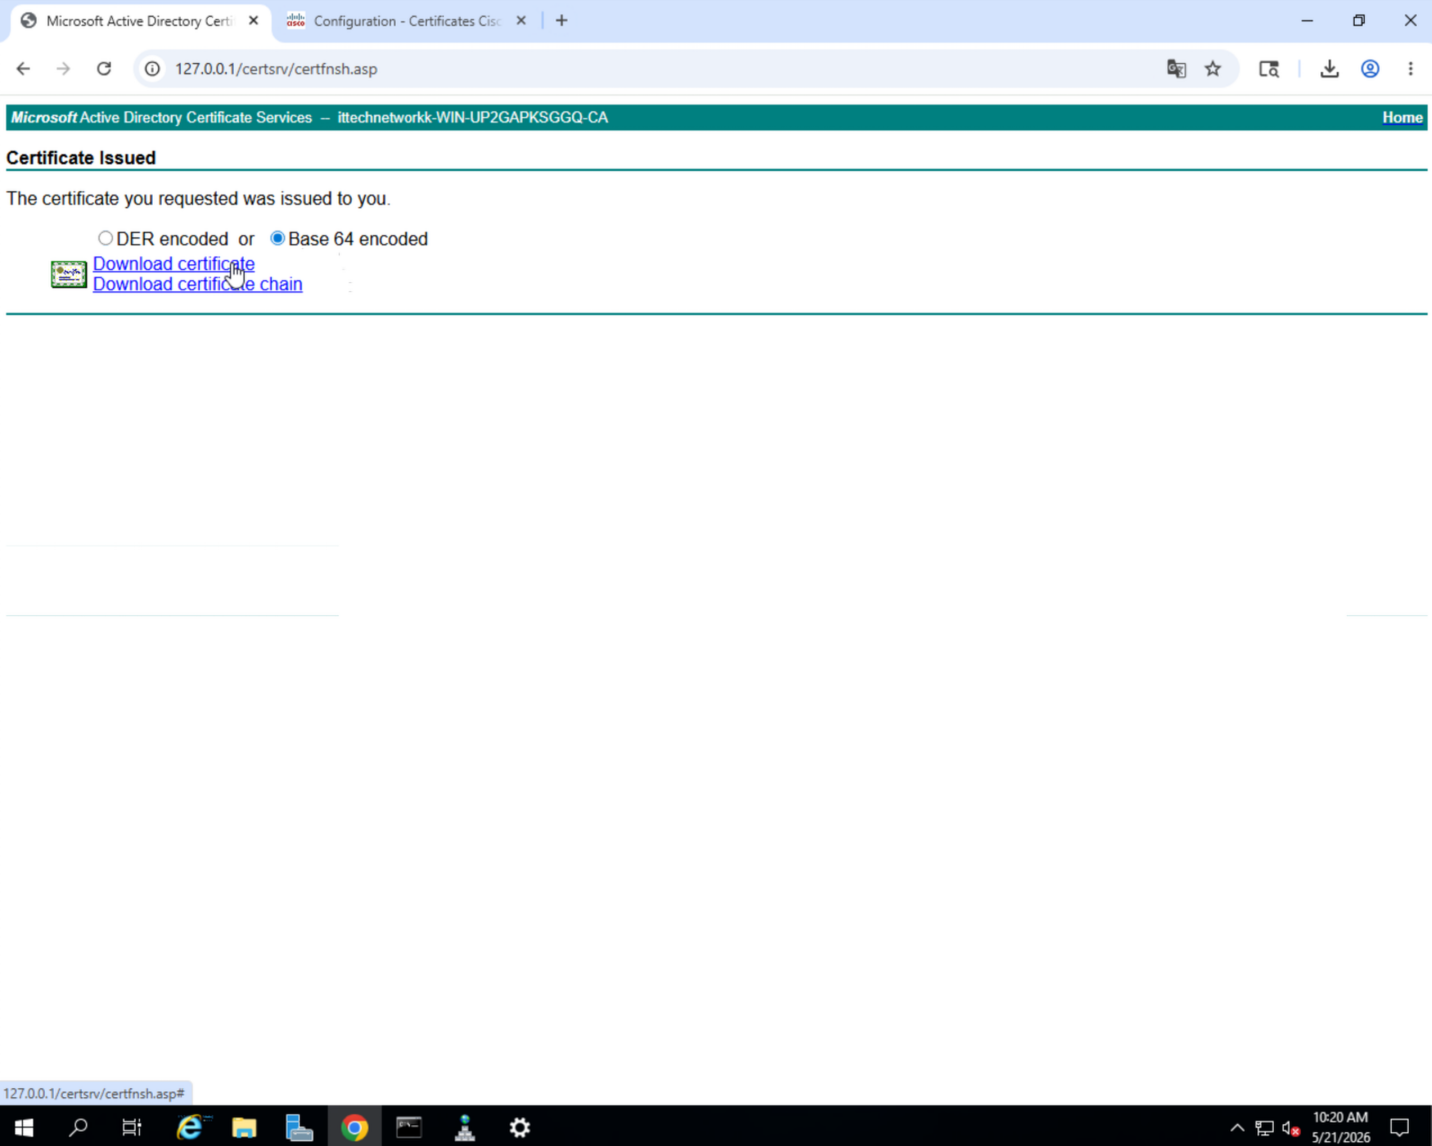
- Rename the downloaded file to match the device name (e.g.,
vManage,vSmart,vBond1,vBond2)
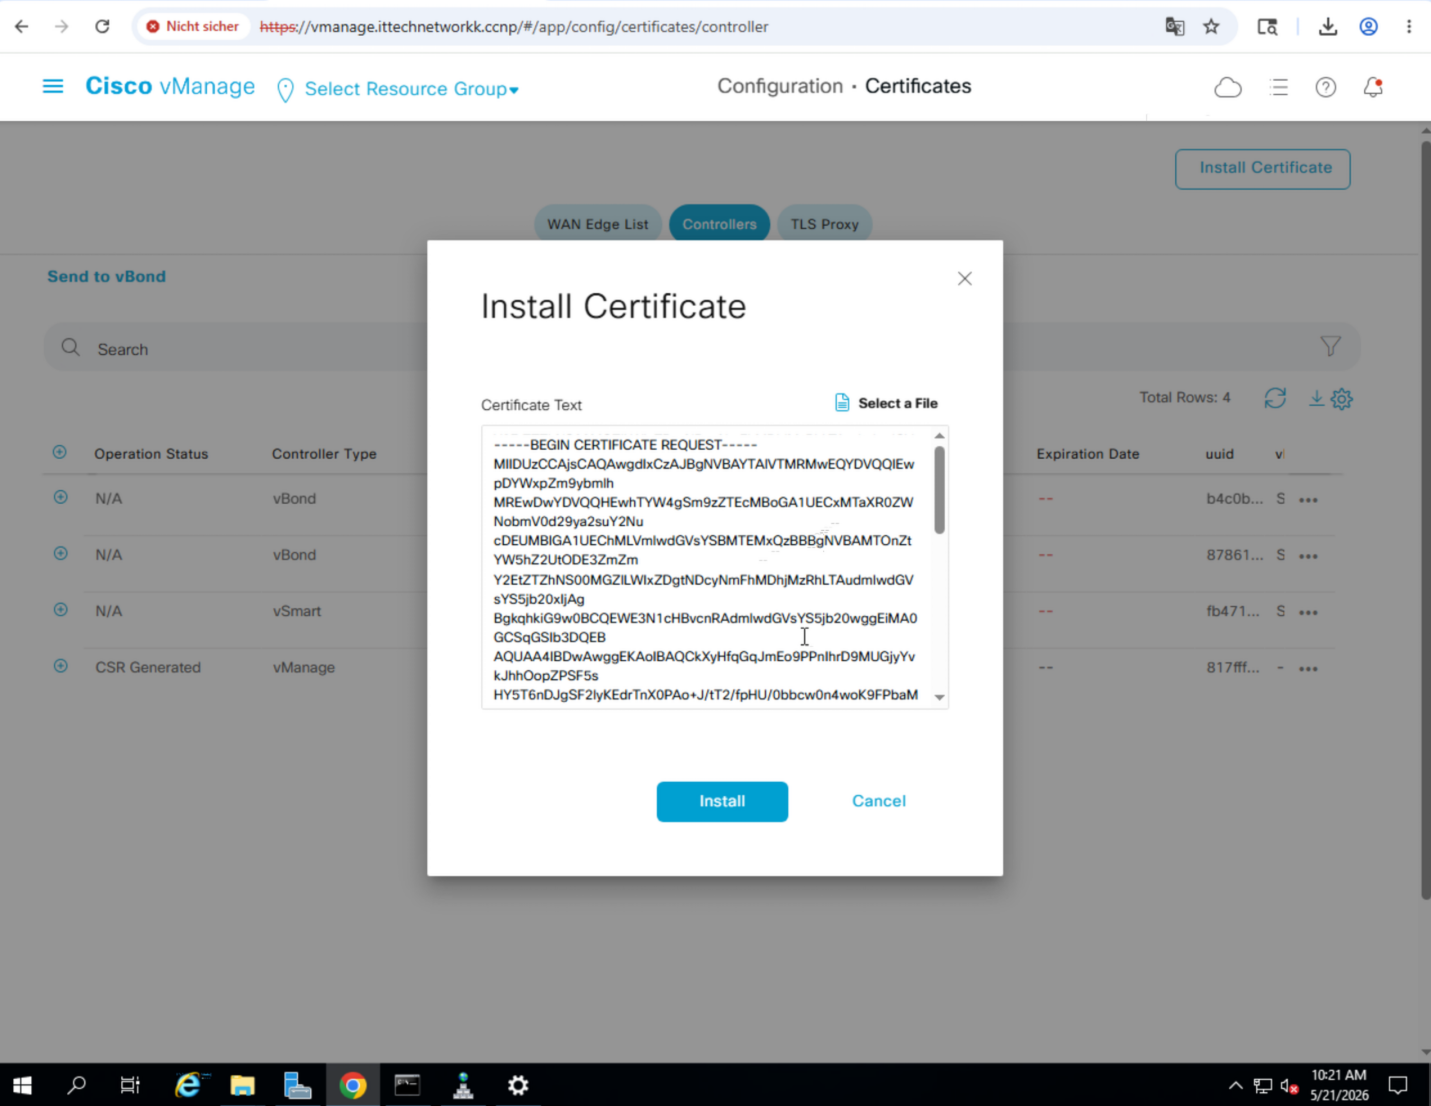
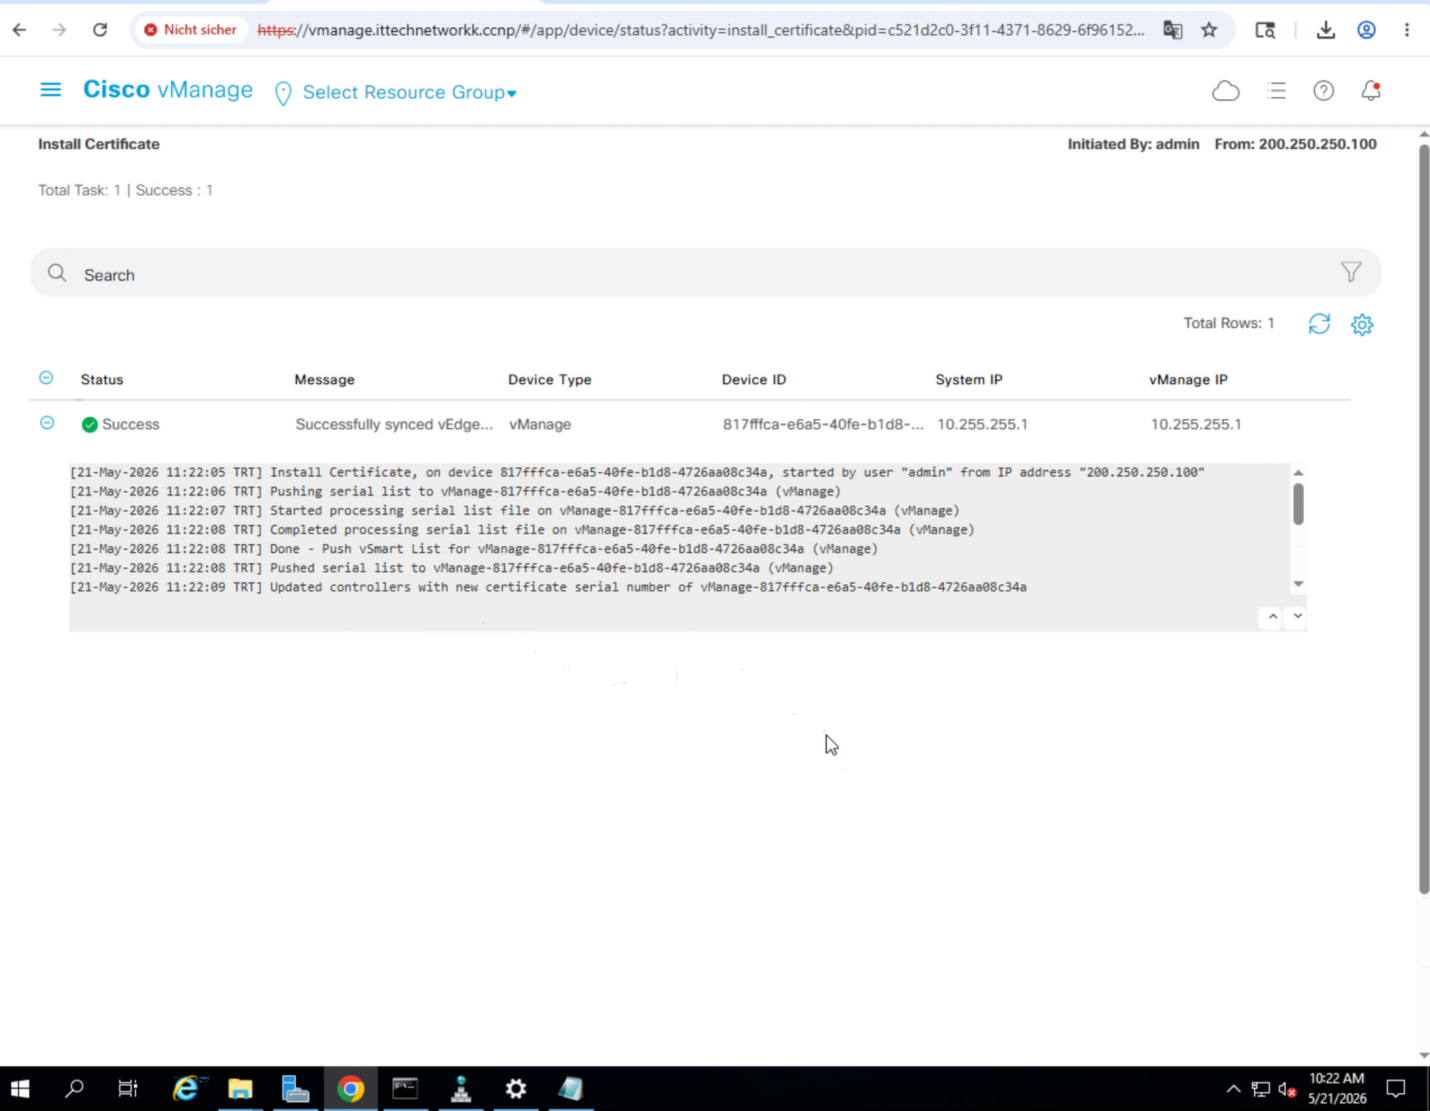
Install Certificates
Back in Configuration » Certificates » Controllers:
For each controller, click on the device → Install Certificate → choose the matching certificate file → refresh and confirm Success.
You can either copy-paste or select a file.
Step 8 — Serial Numbers & WAN Edge List
Edge devices cannot be onboarded without a serial/chassis number.
- Physical devices: retrieve the chassis number from the device and register it on the Cisco portal.
- Lab devices: request virtual chassis numbers from Cisco.
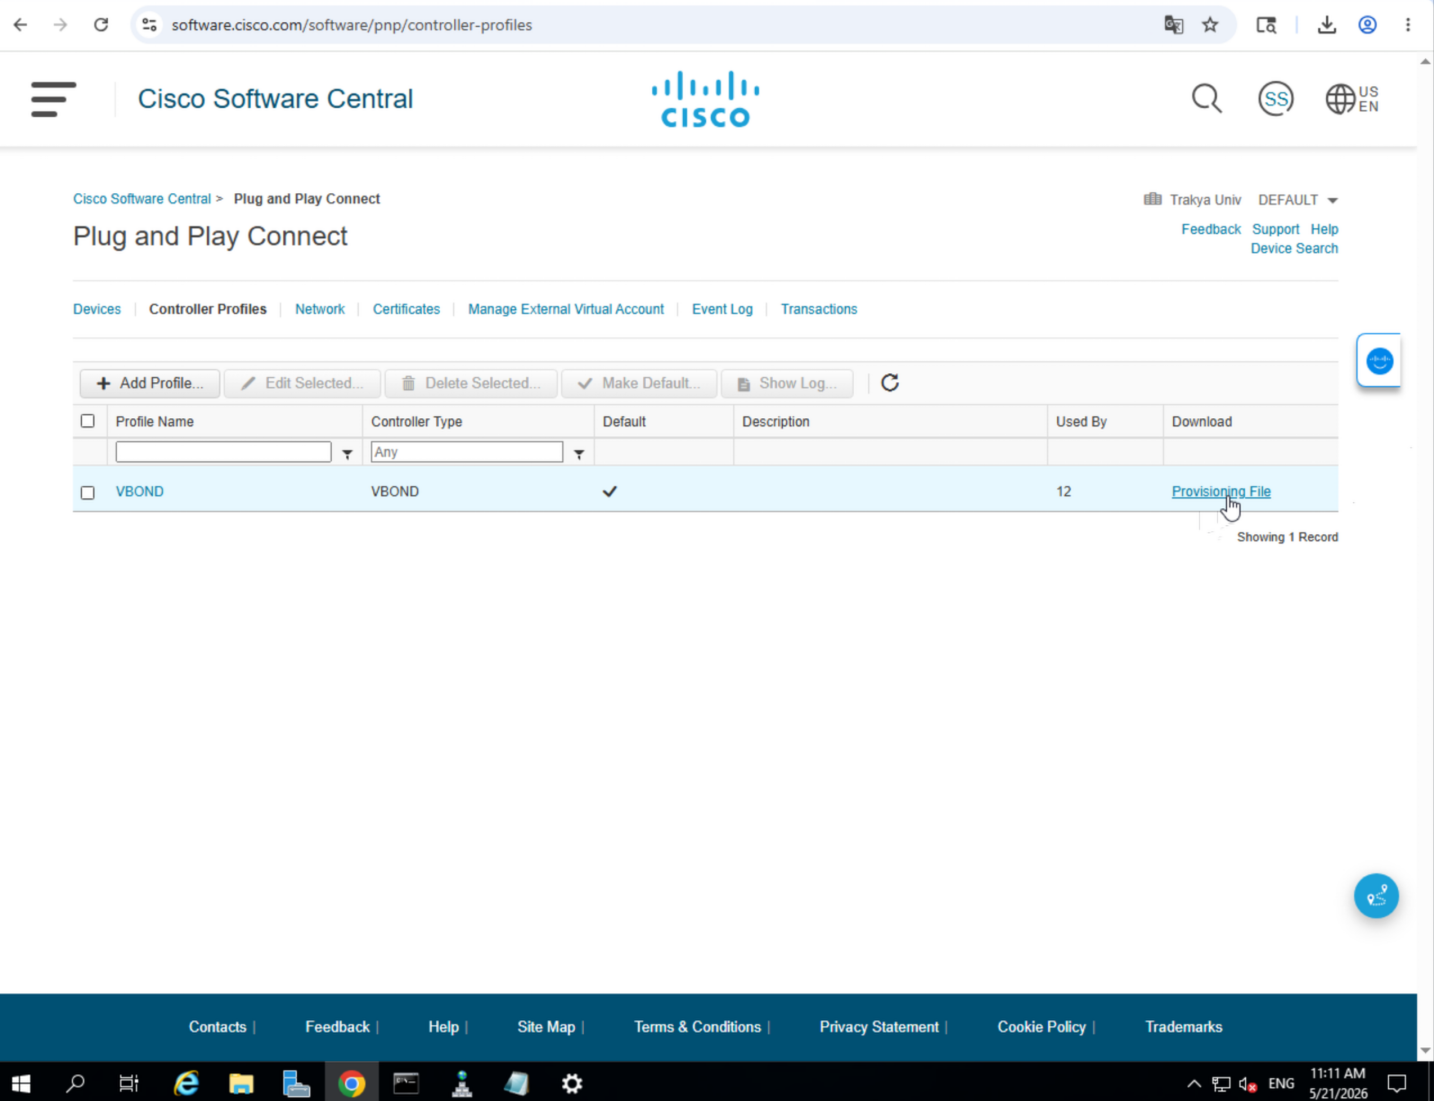
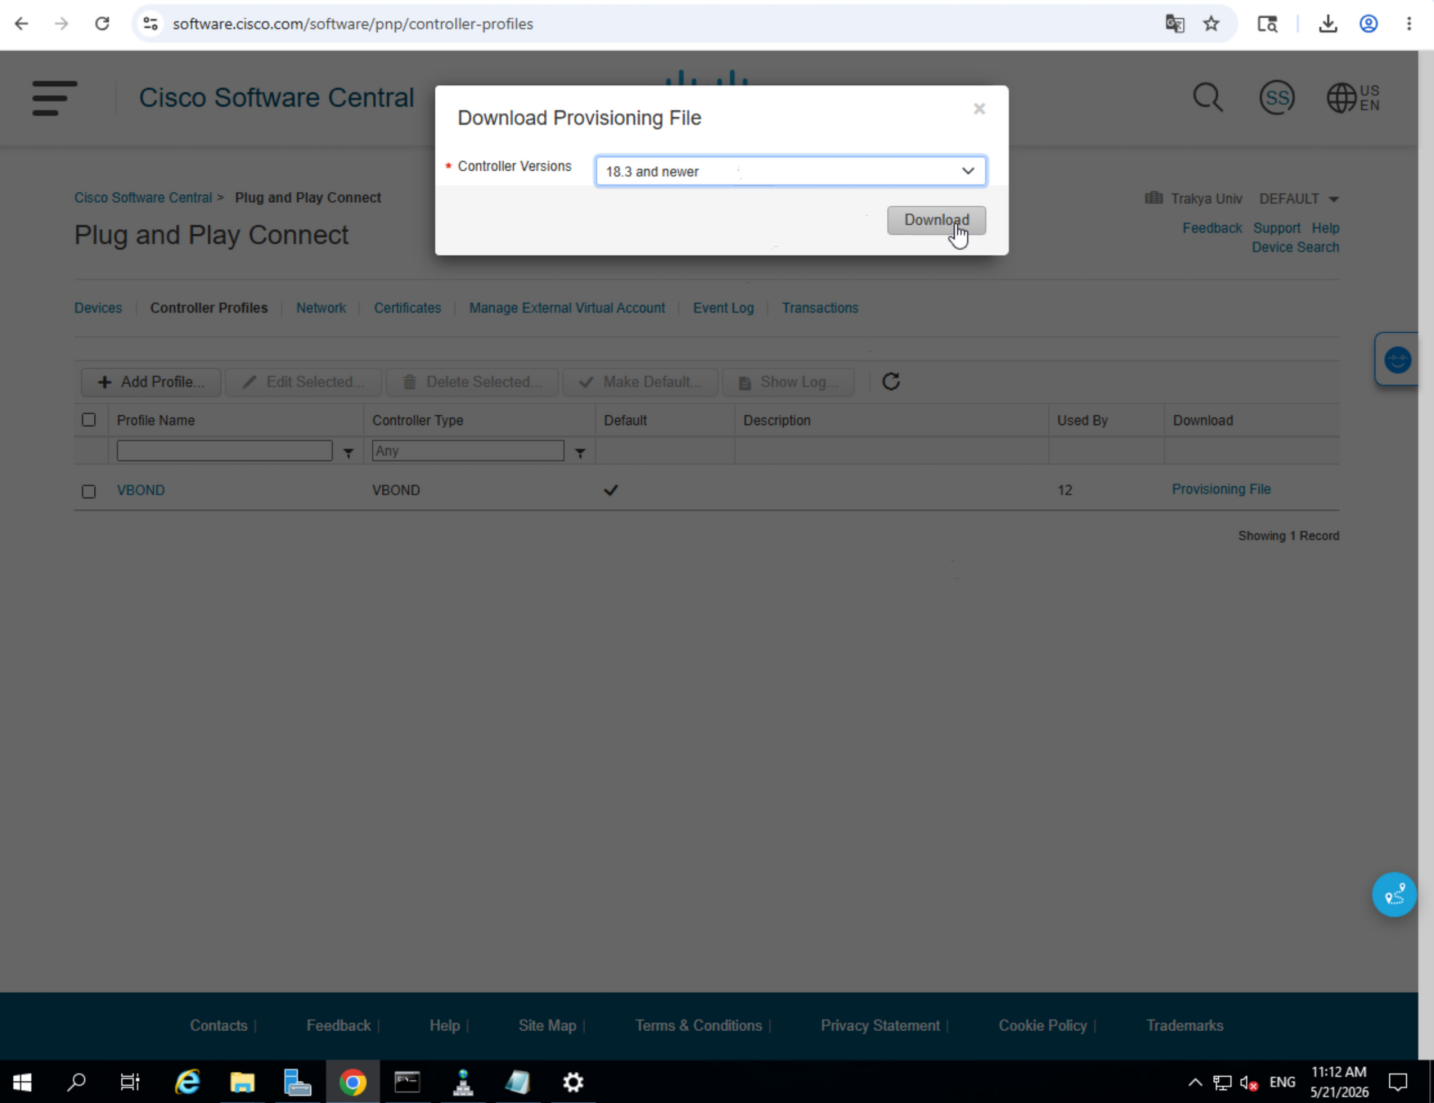
Obtain Serial Numbers from Cisco Smart Account
Navigate to software.cisco.com → Network Plug and Play → Controller Profiles
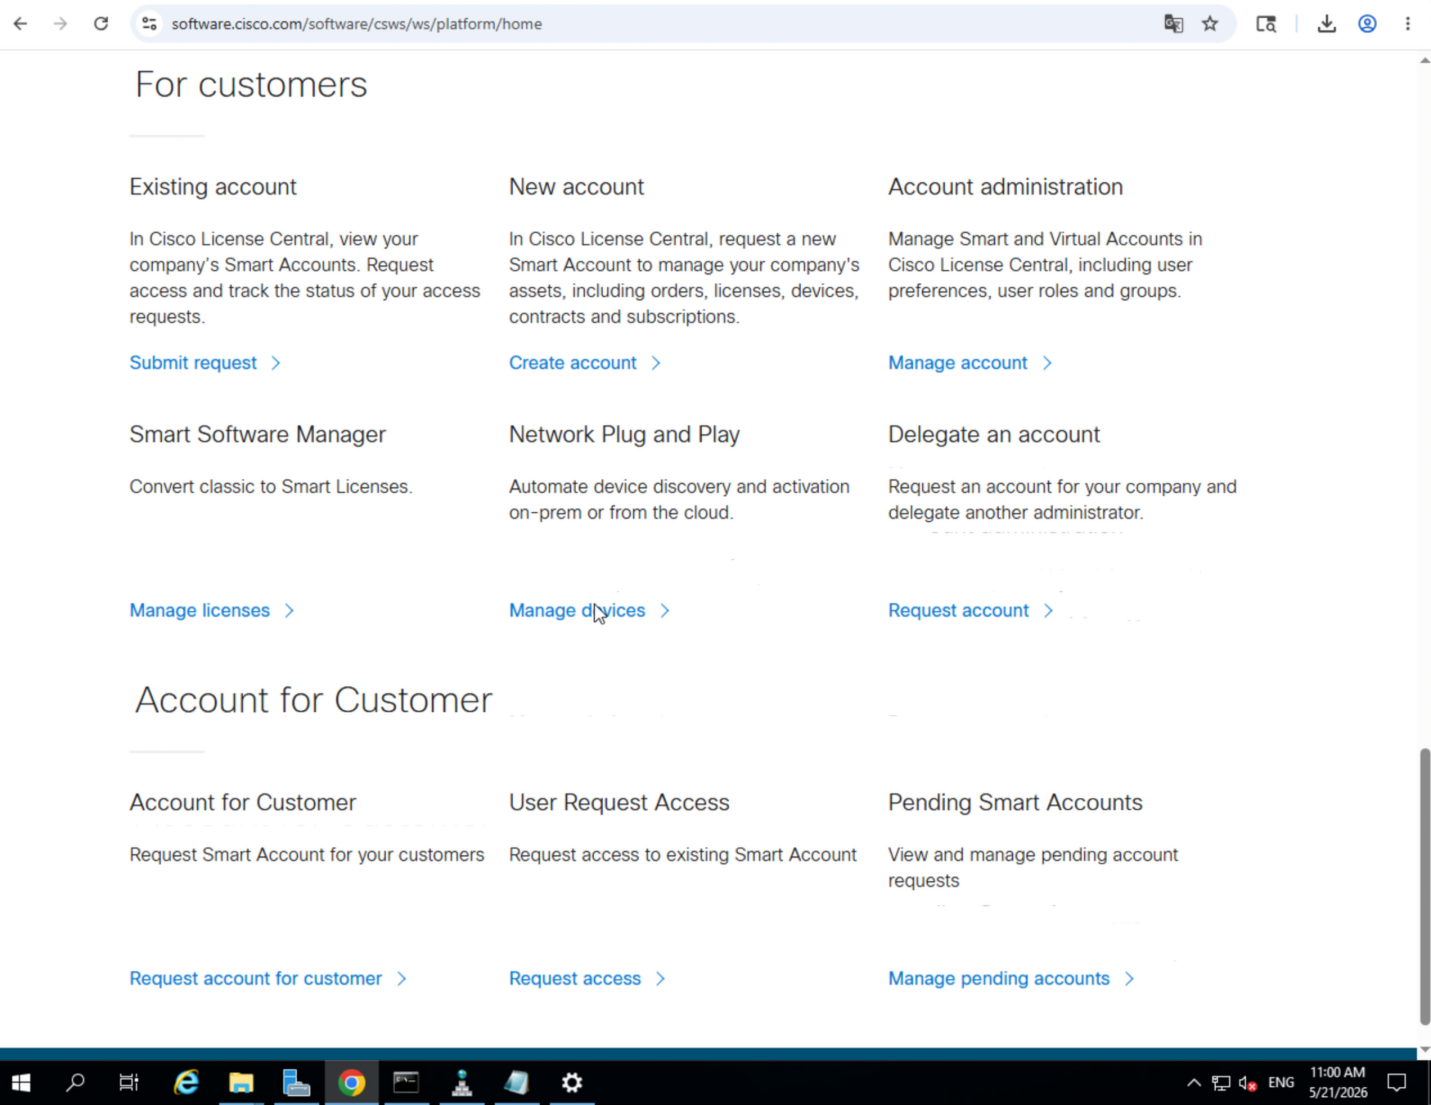
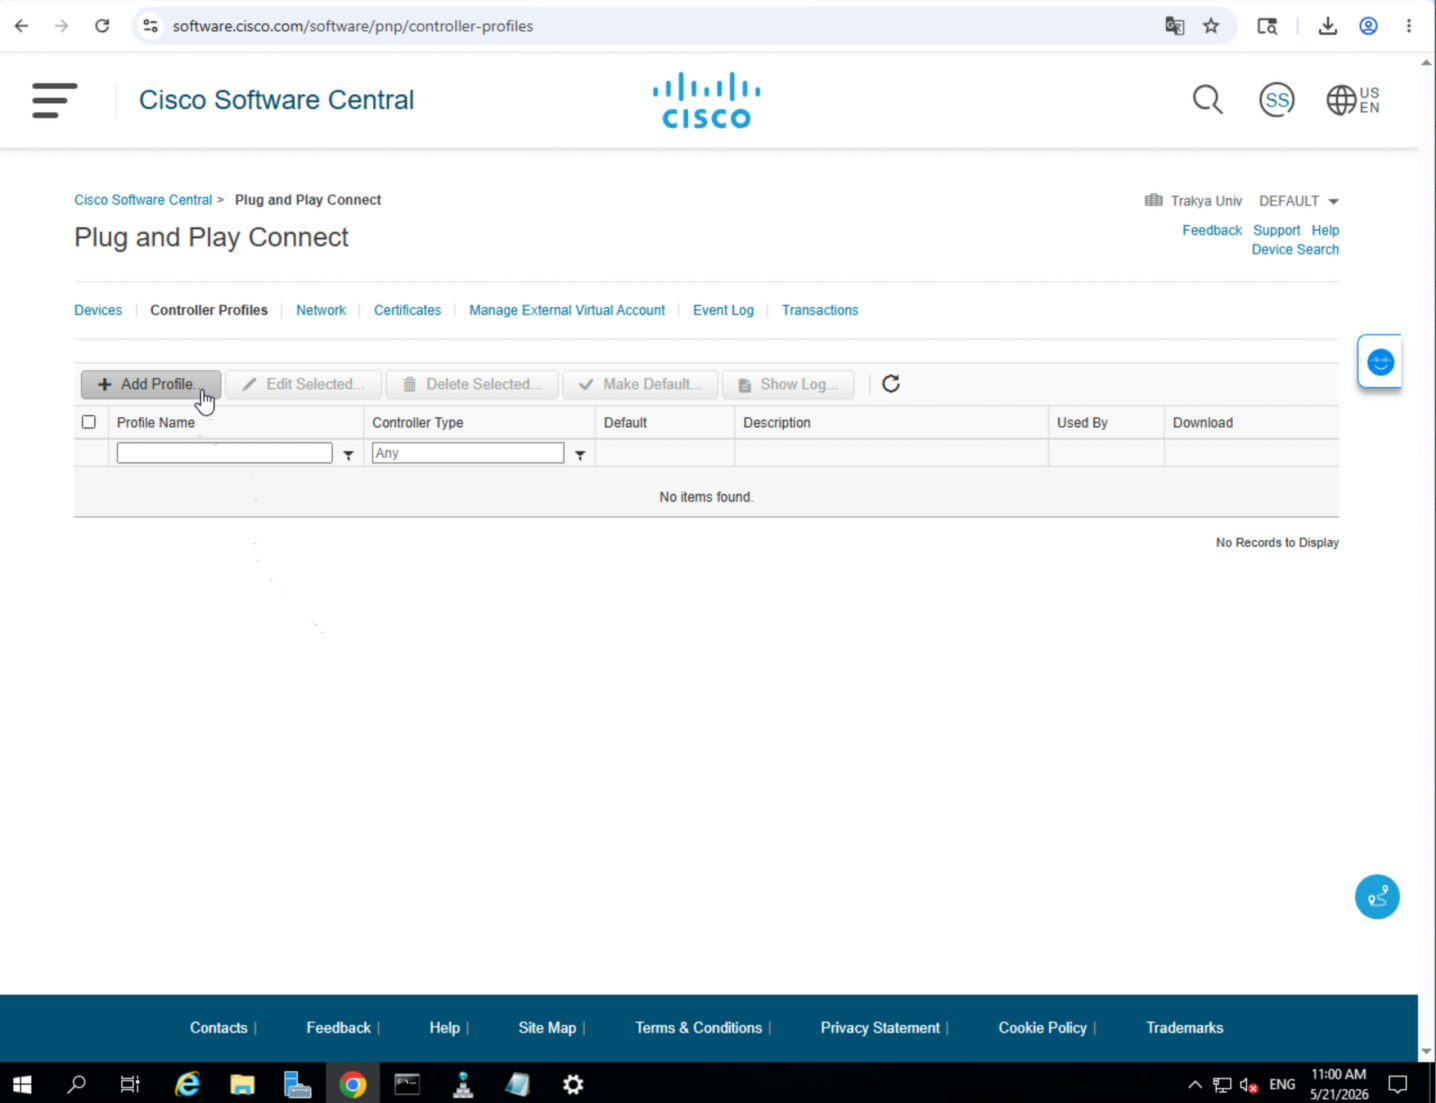
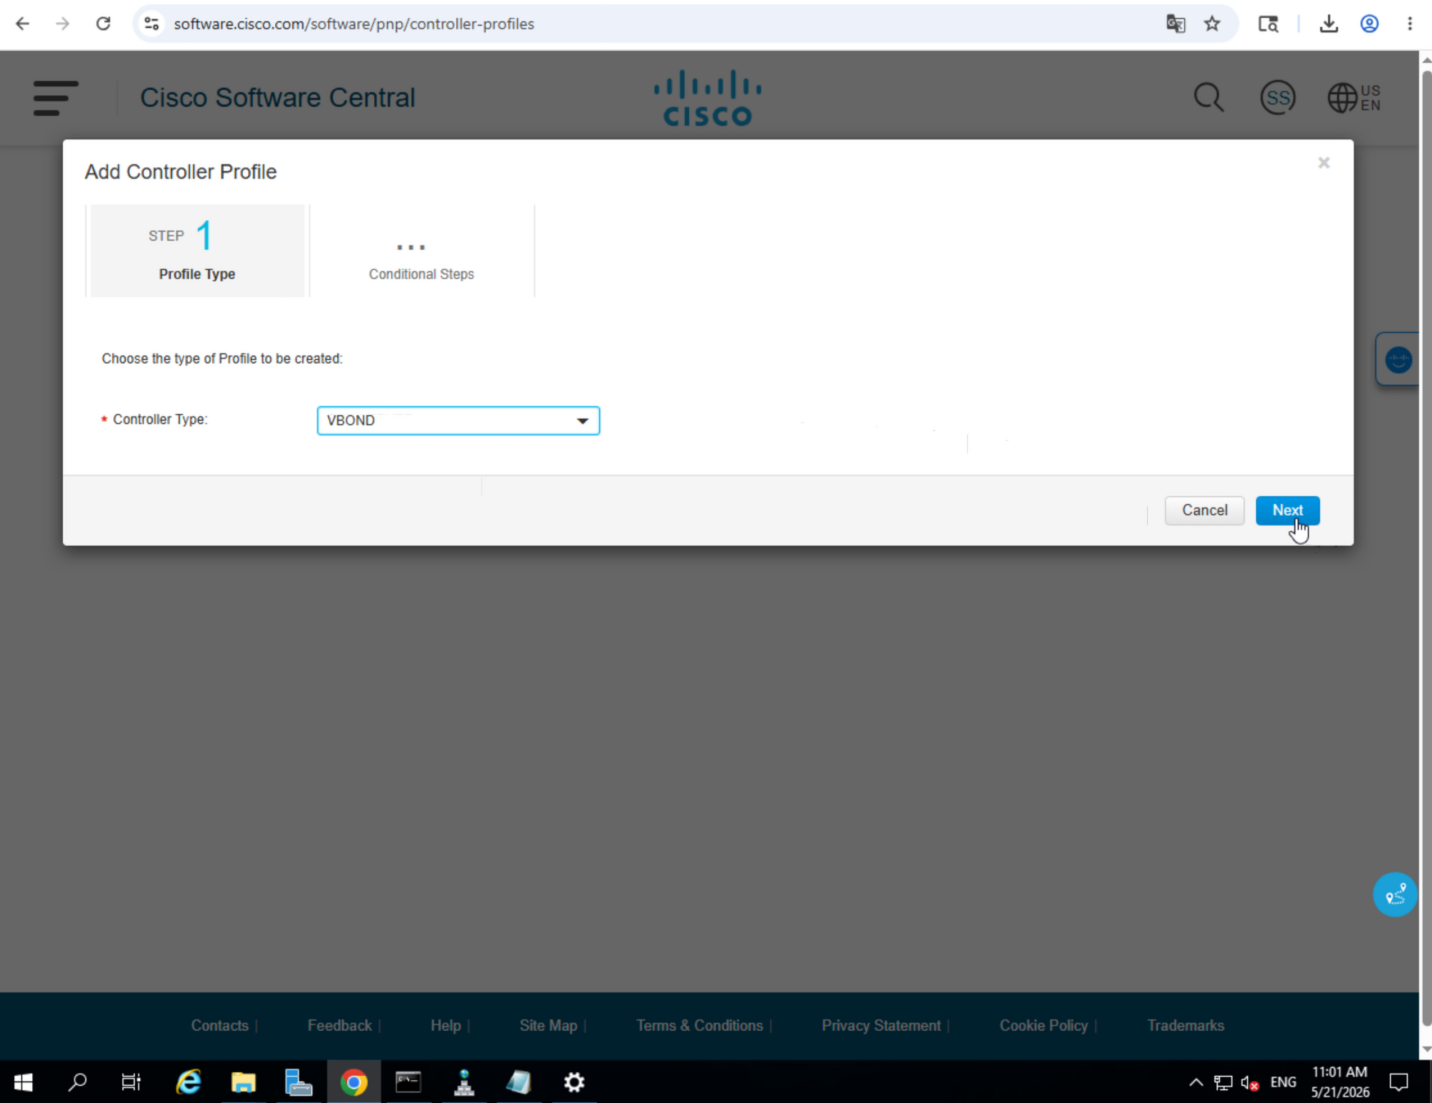
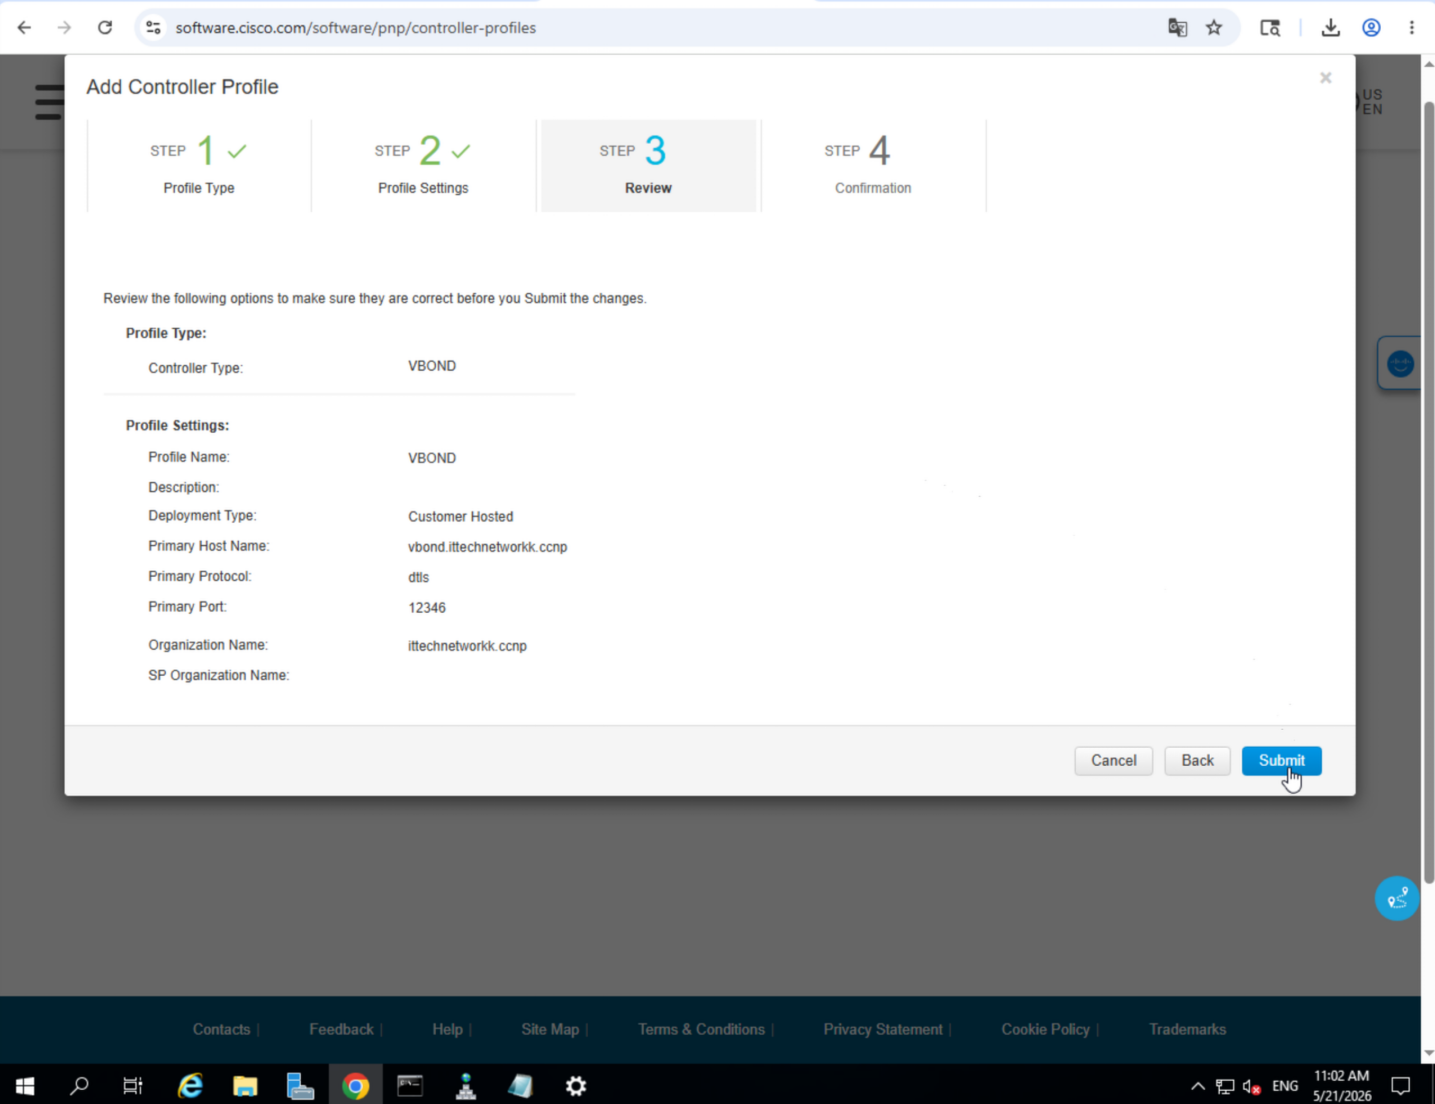
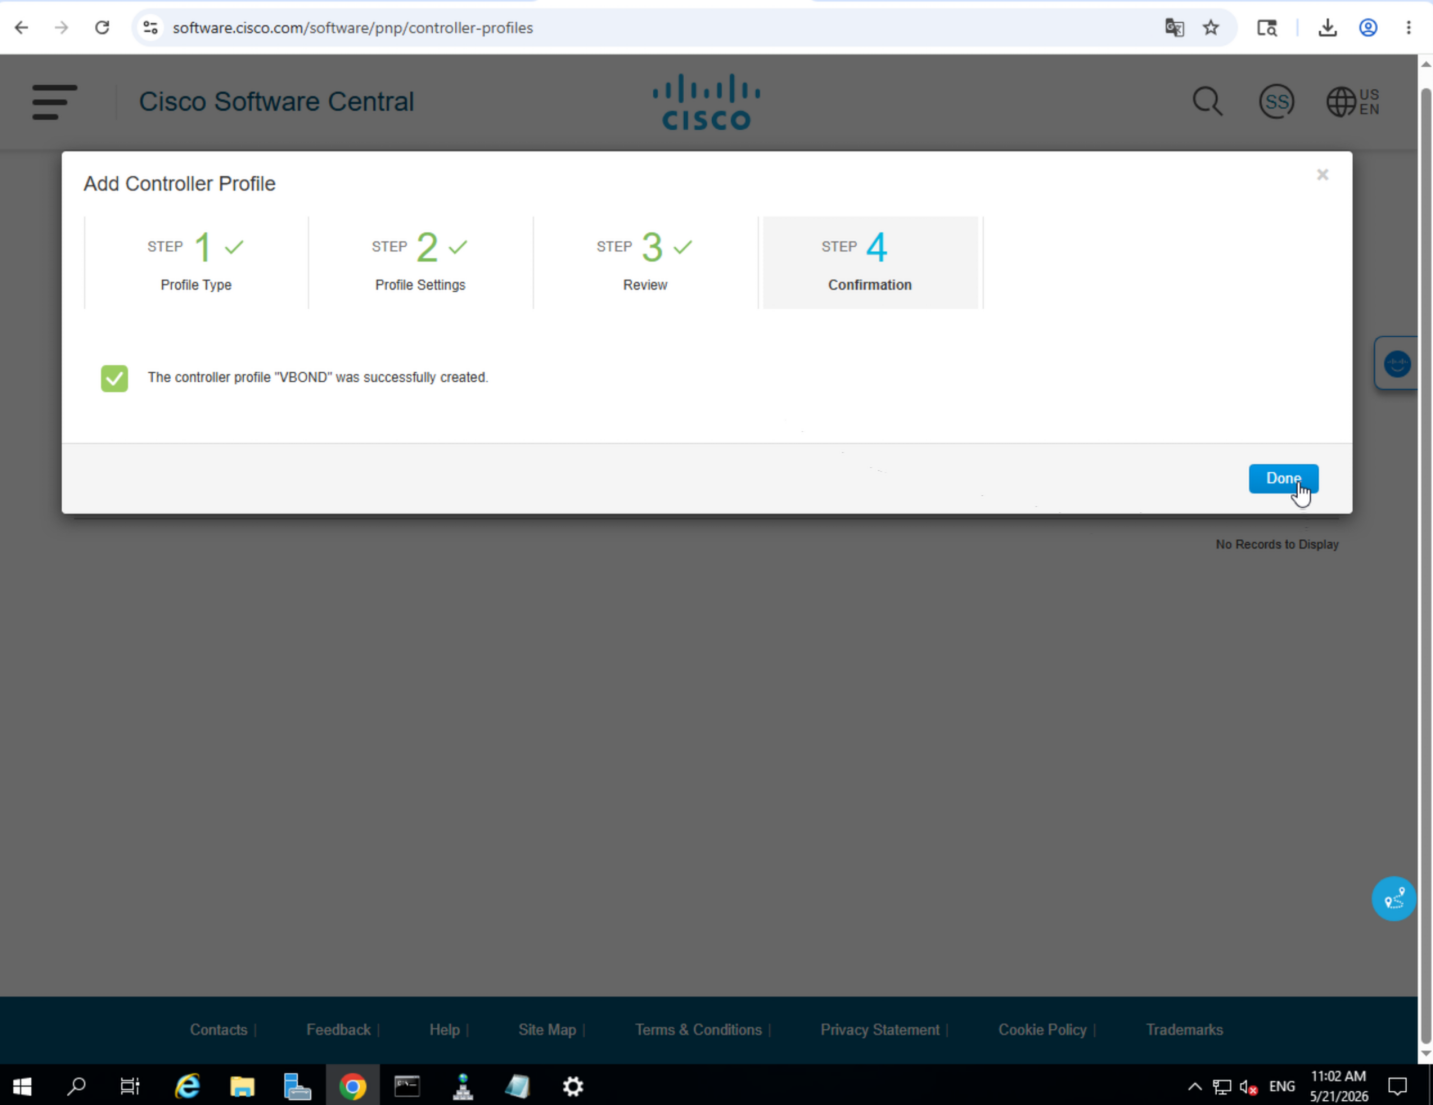
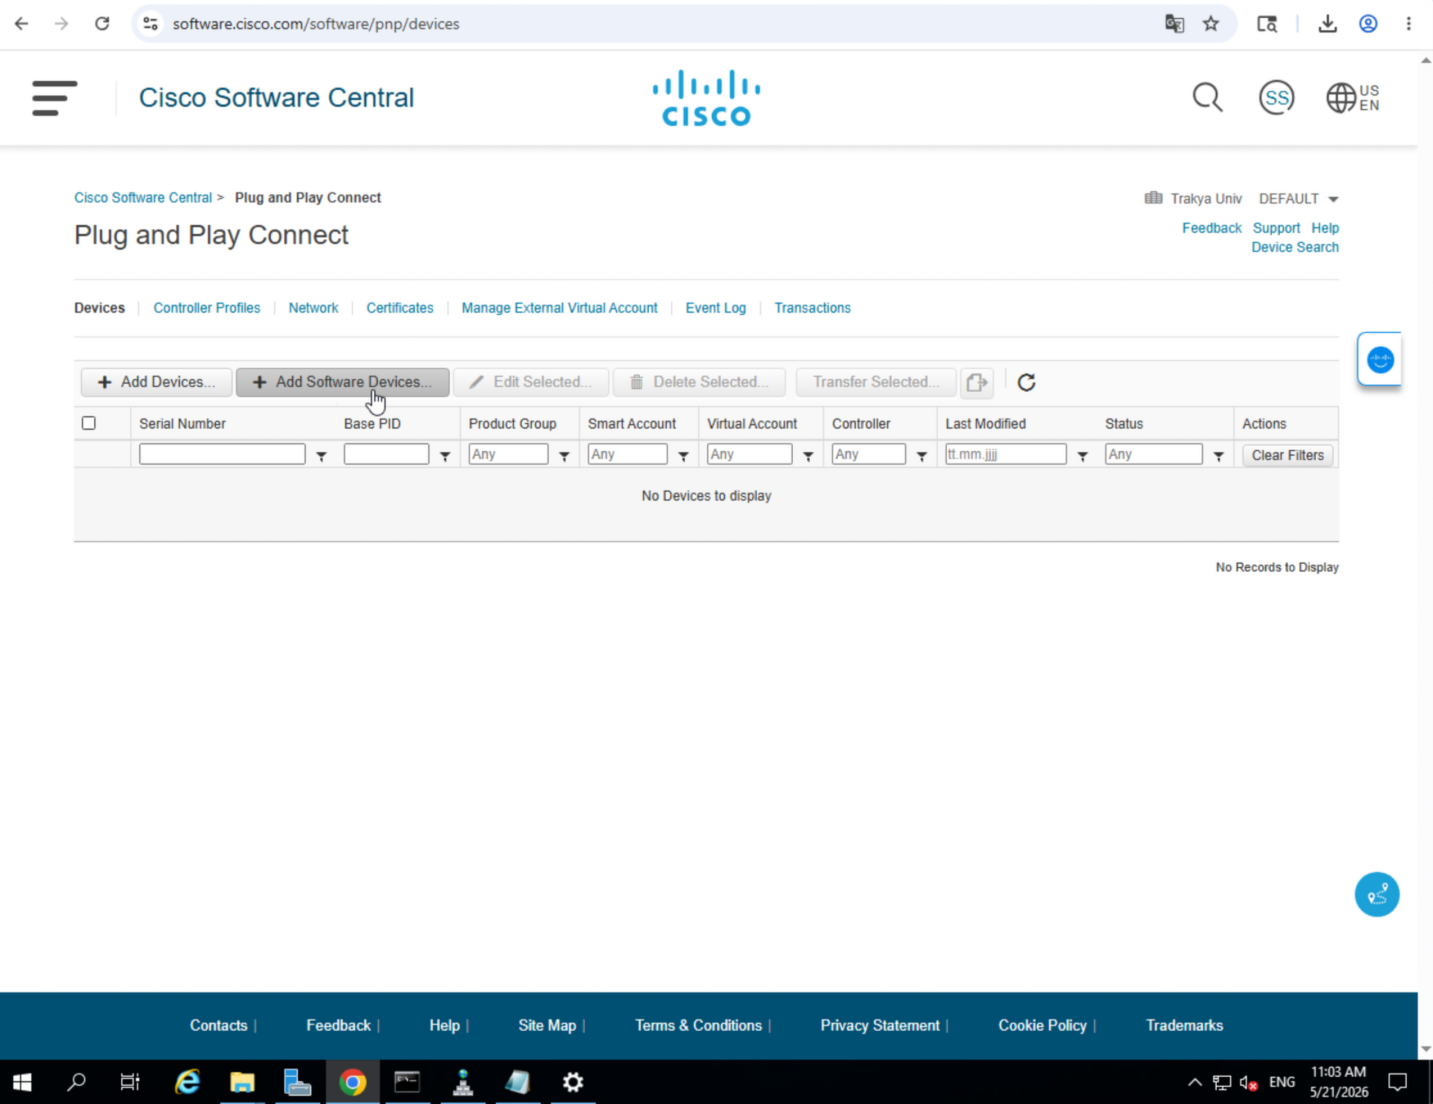
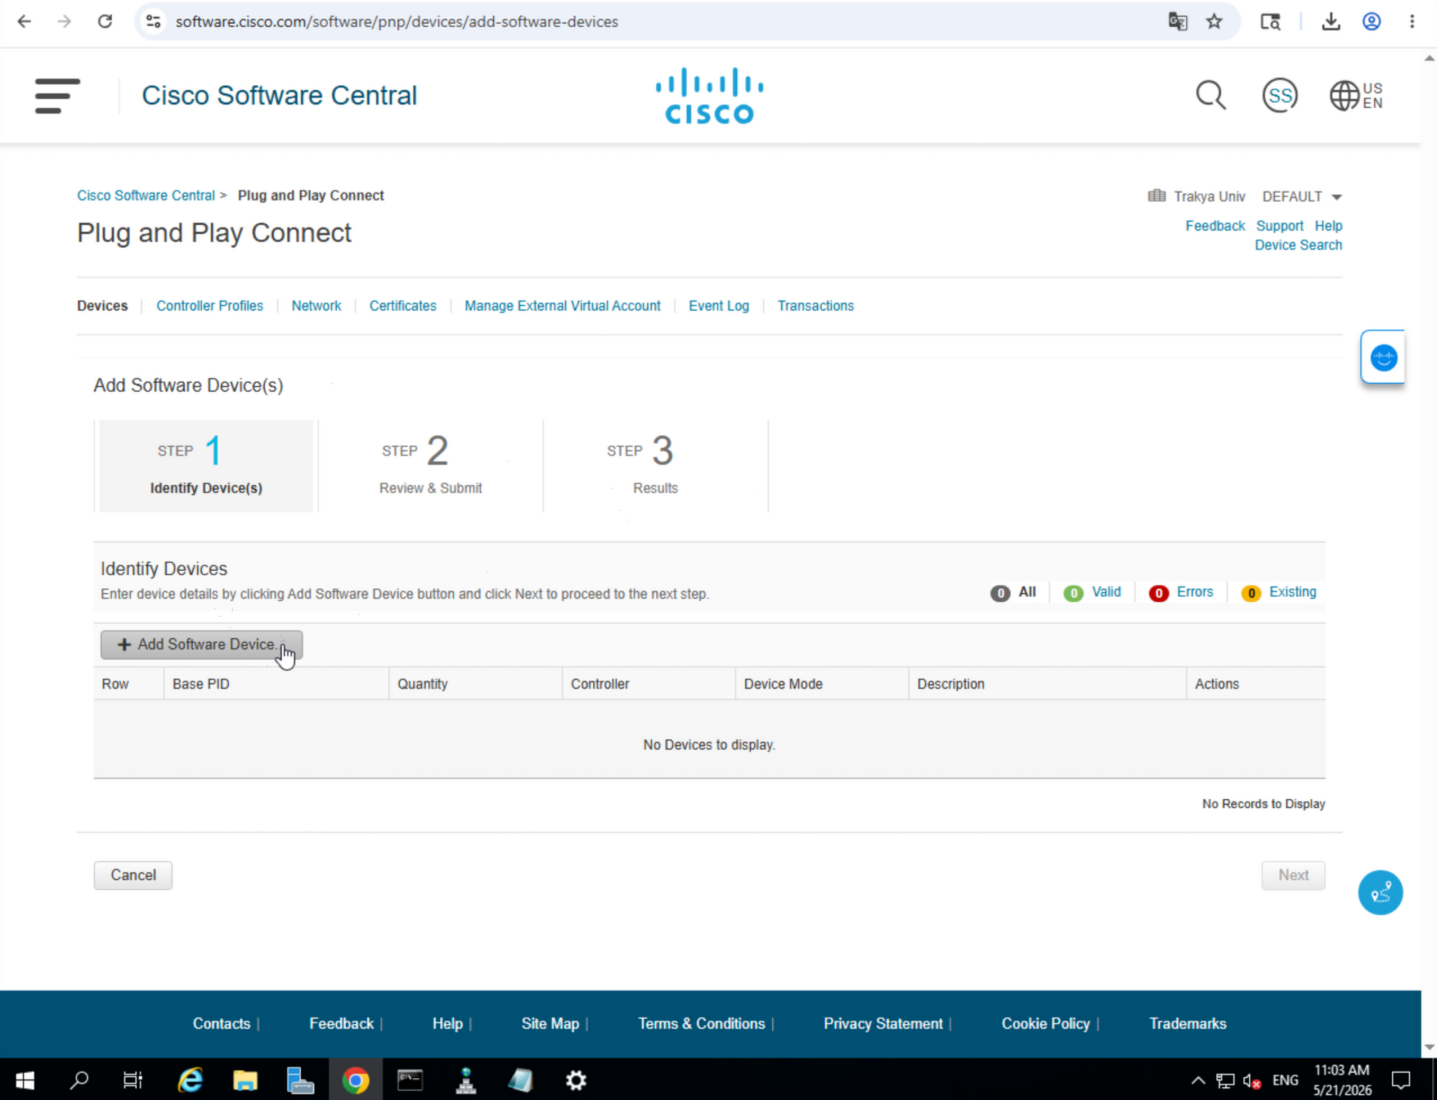
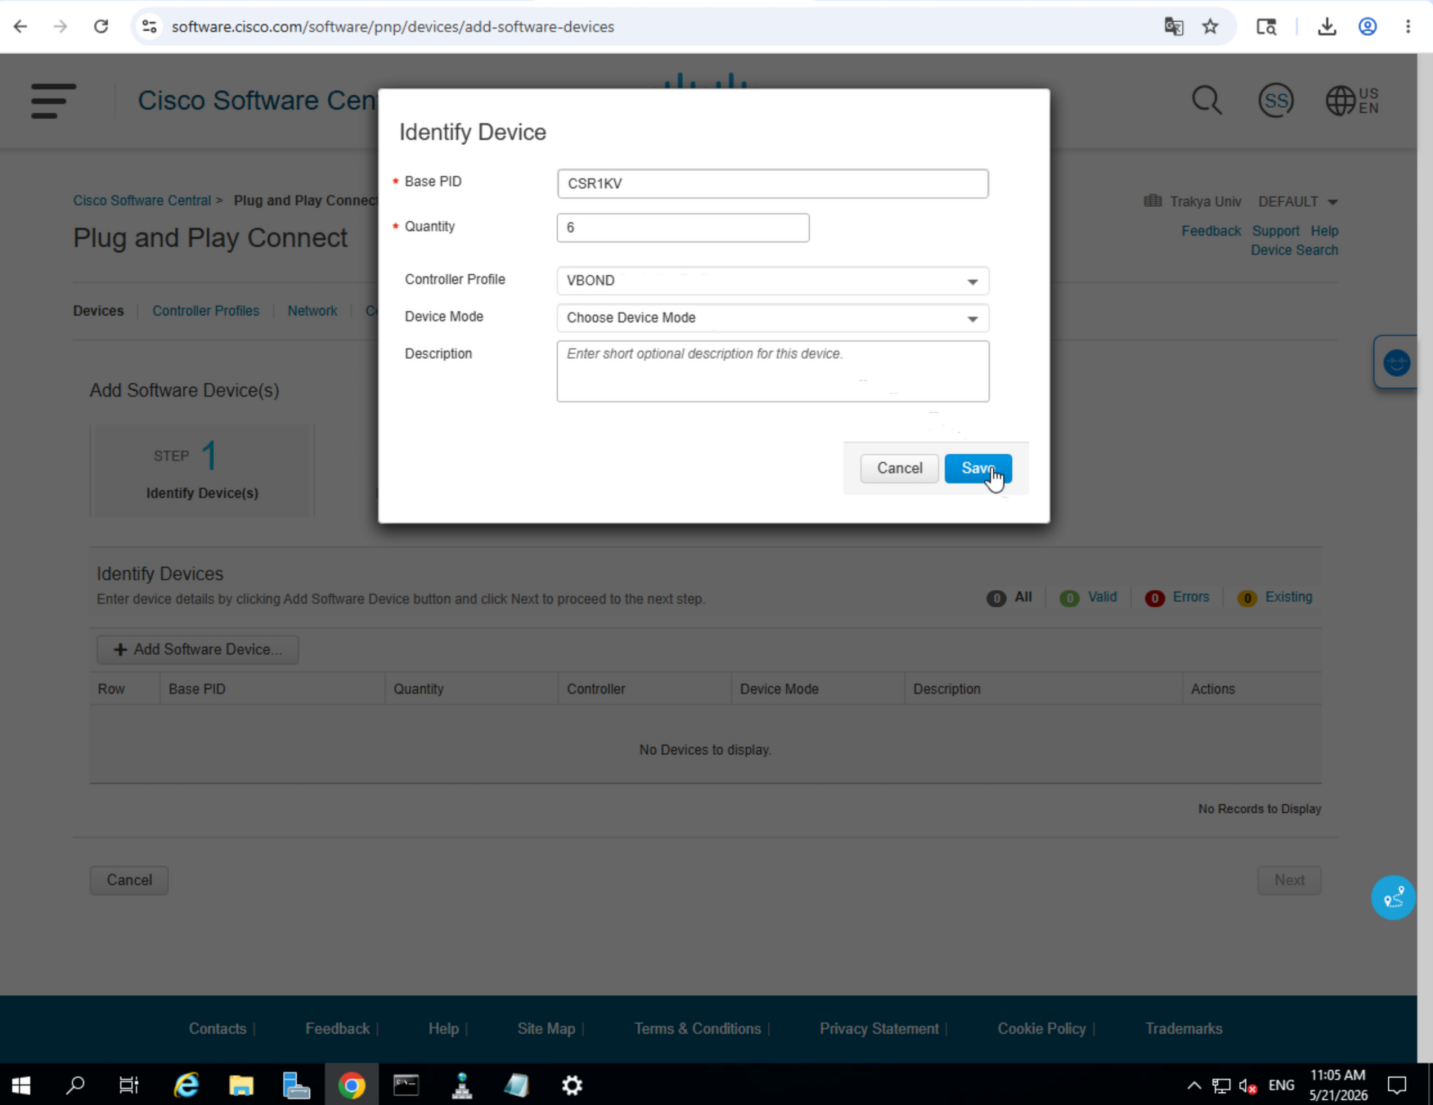

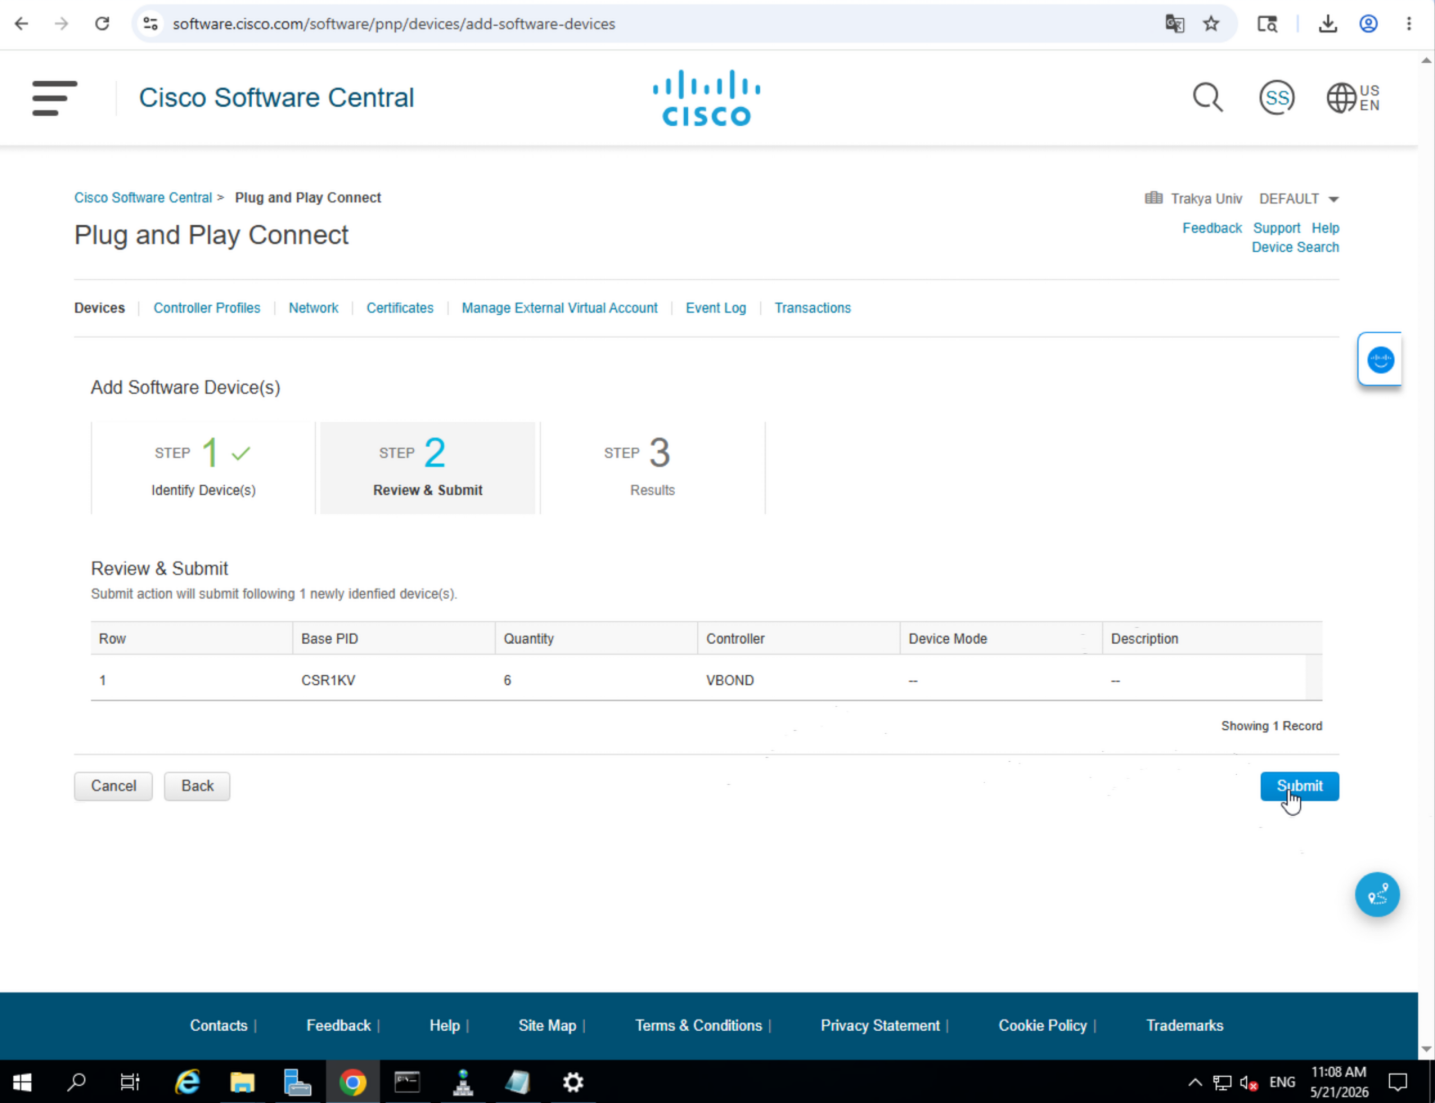
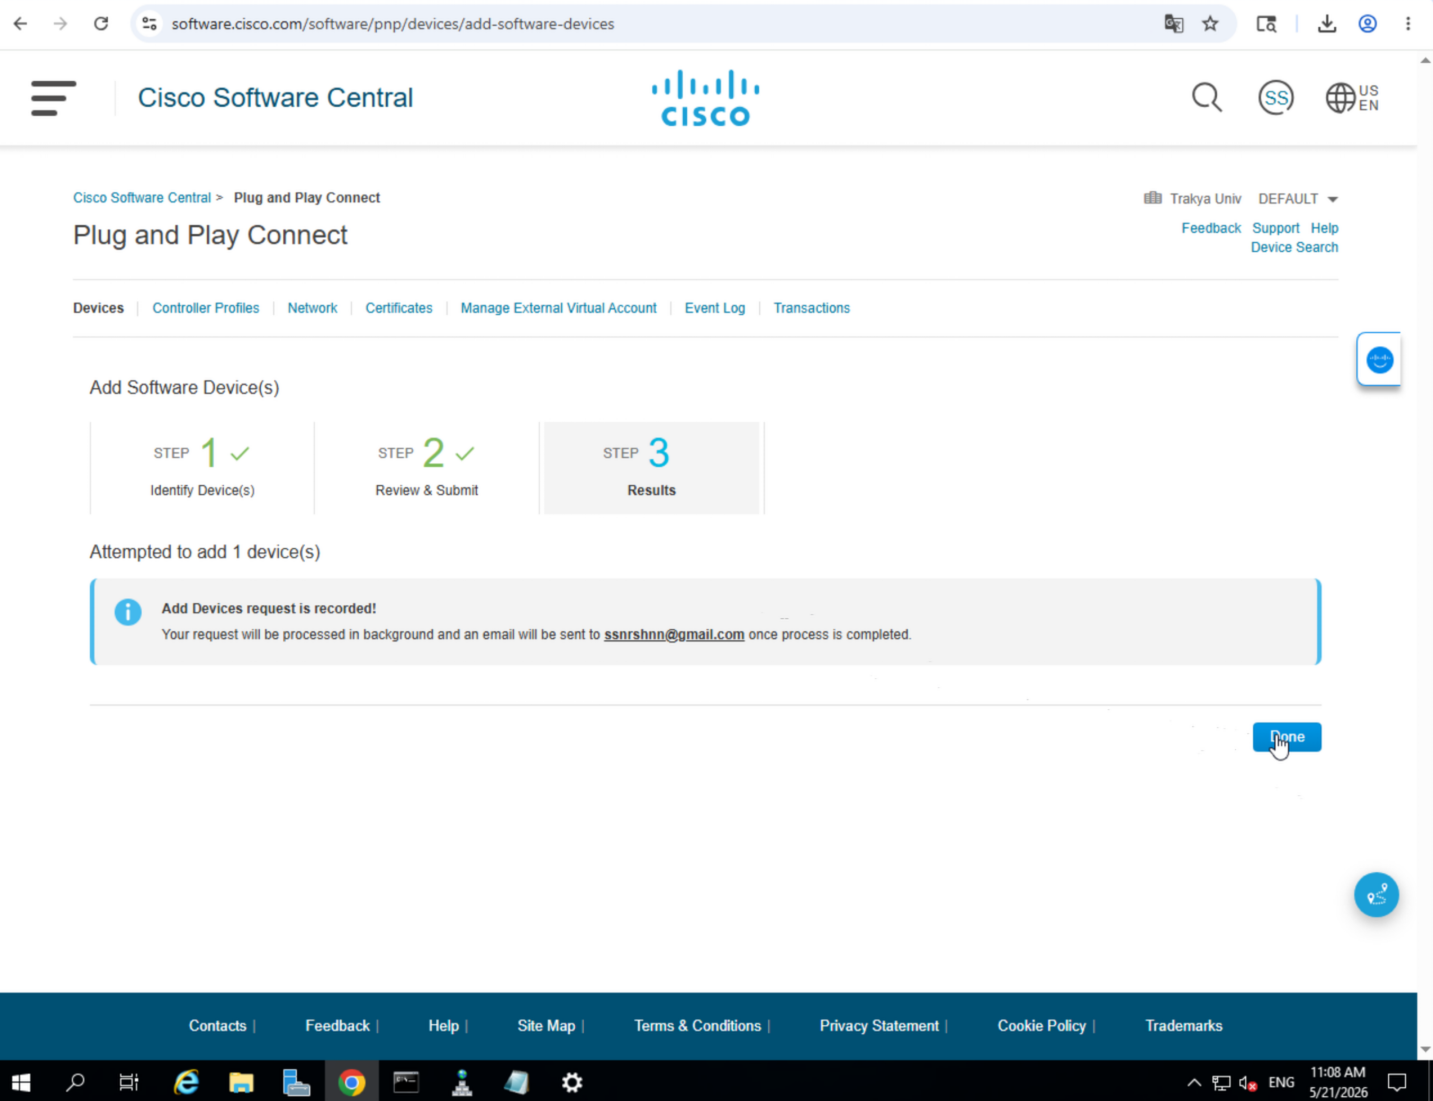
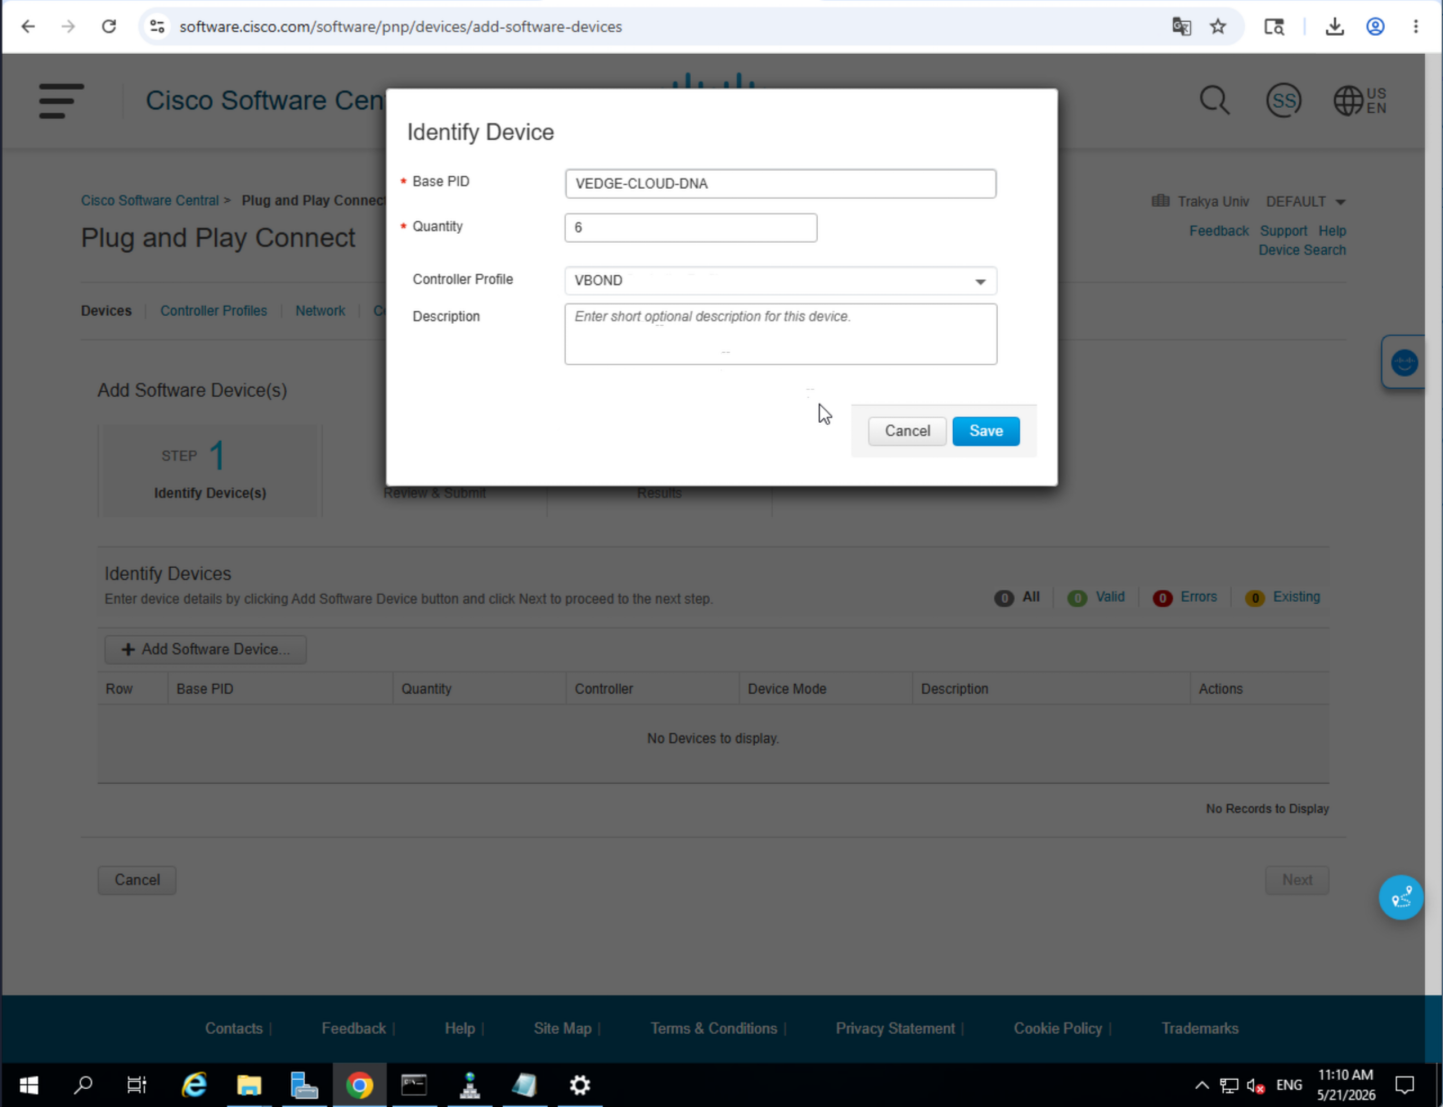
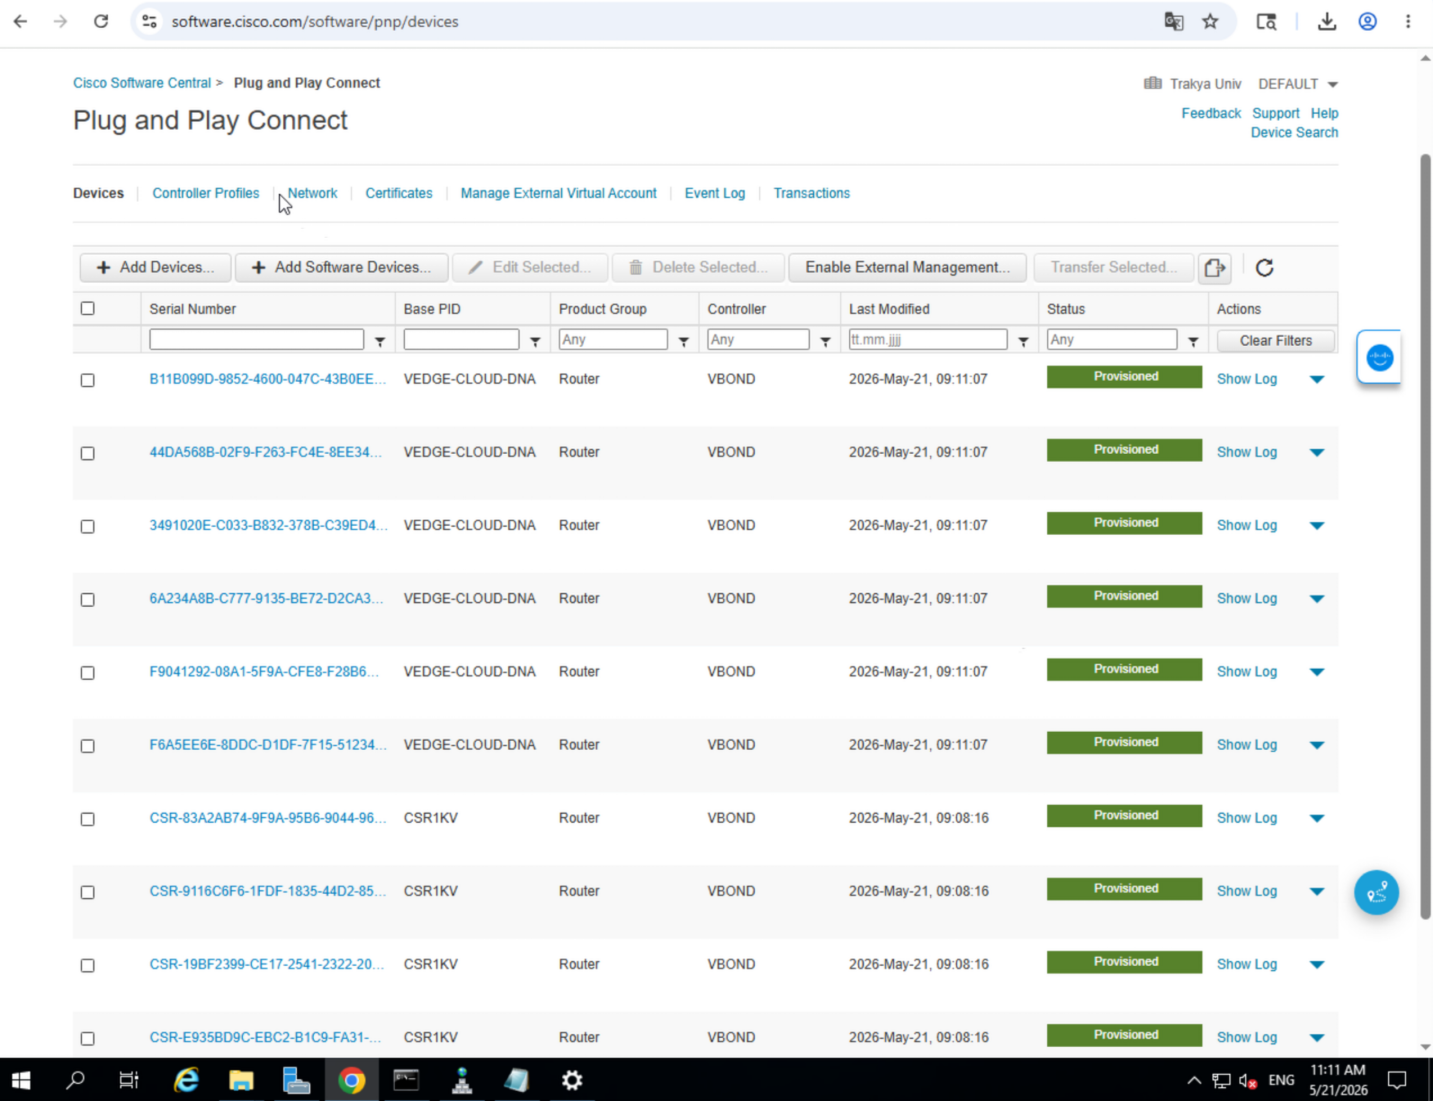
Download the serial file(s) and transfer them to the WinServer.
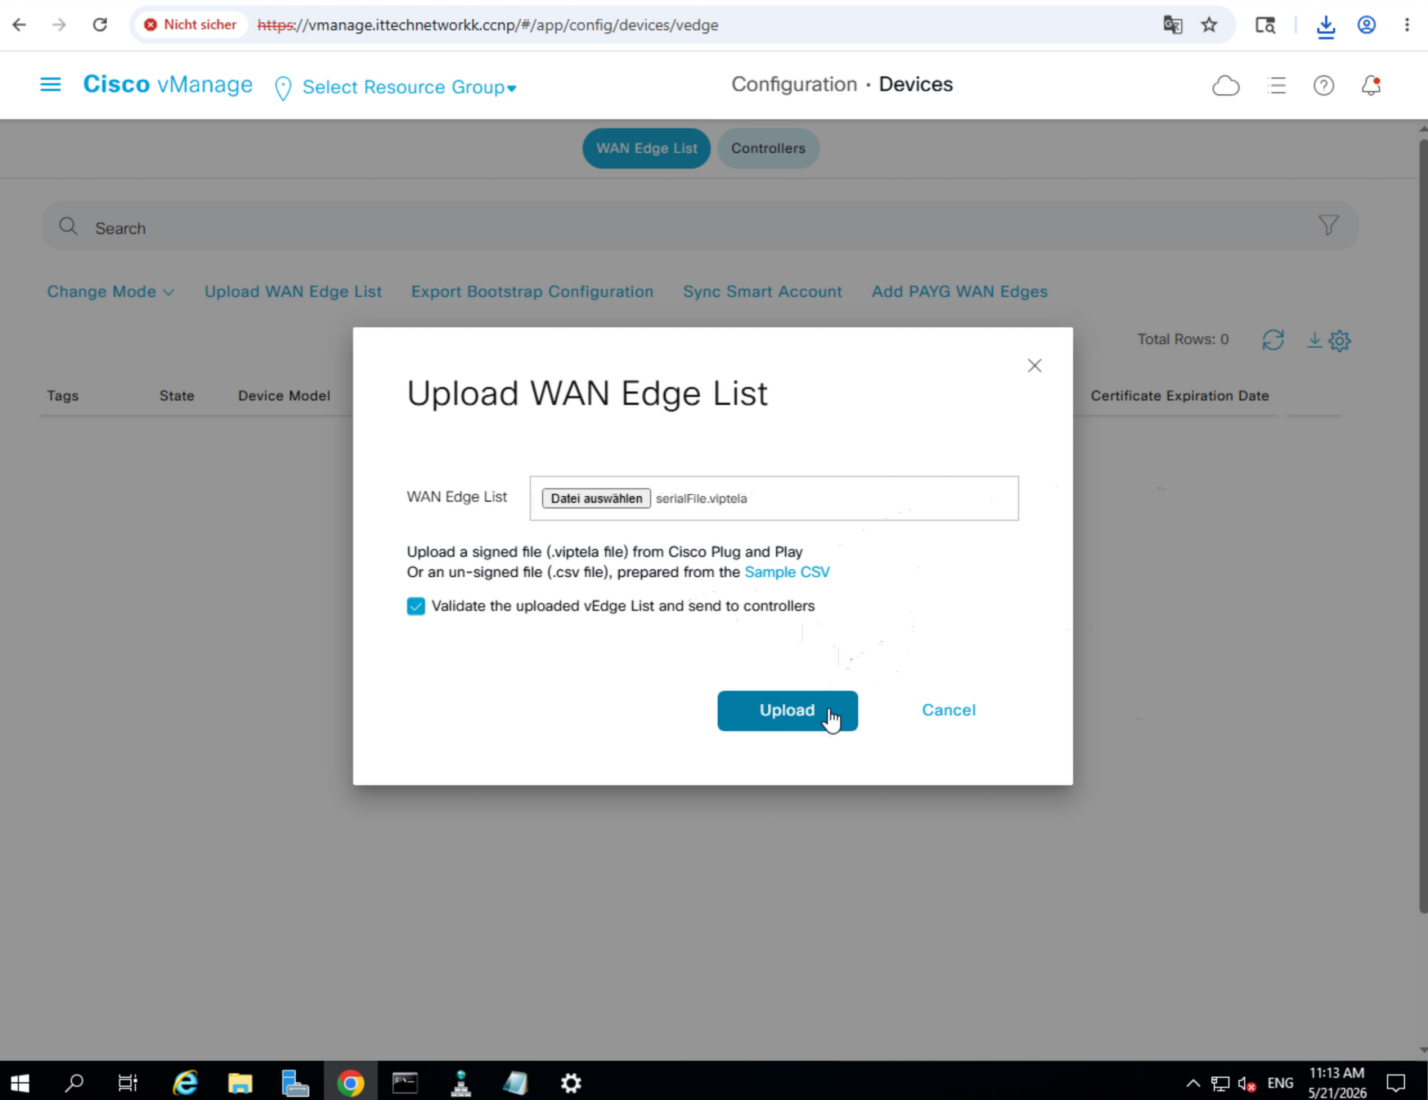
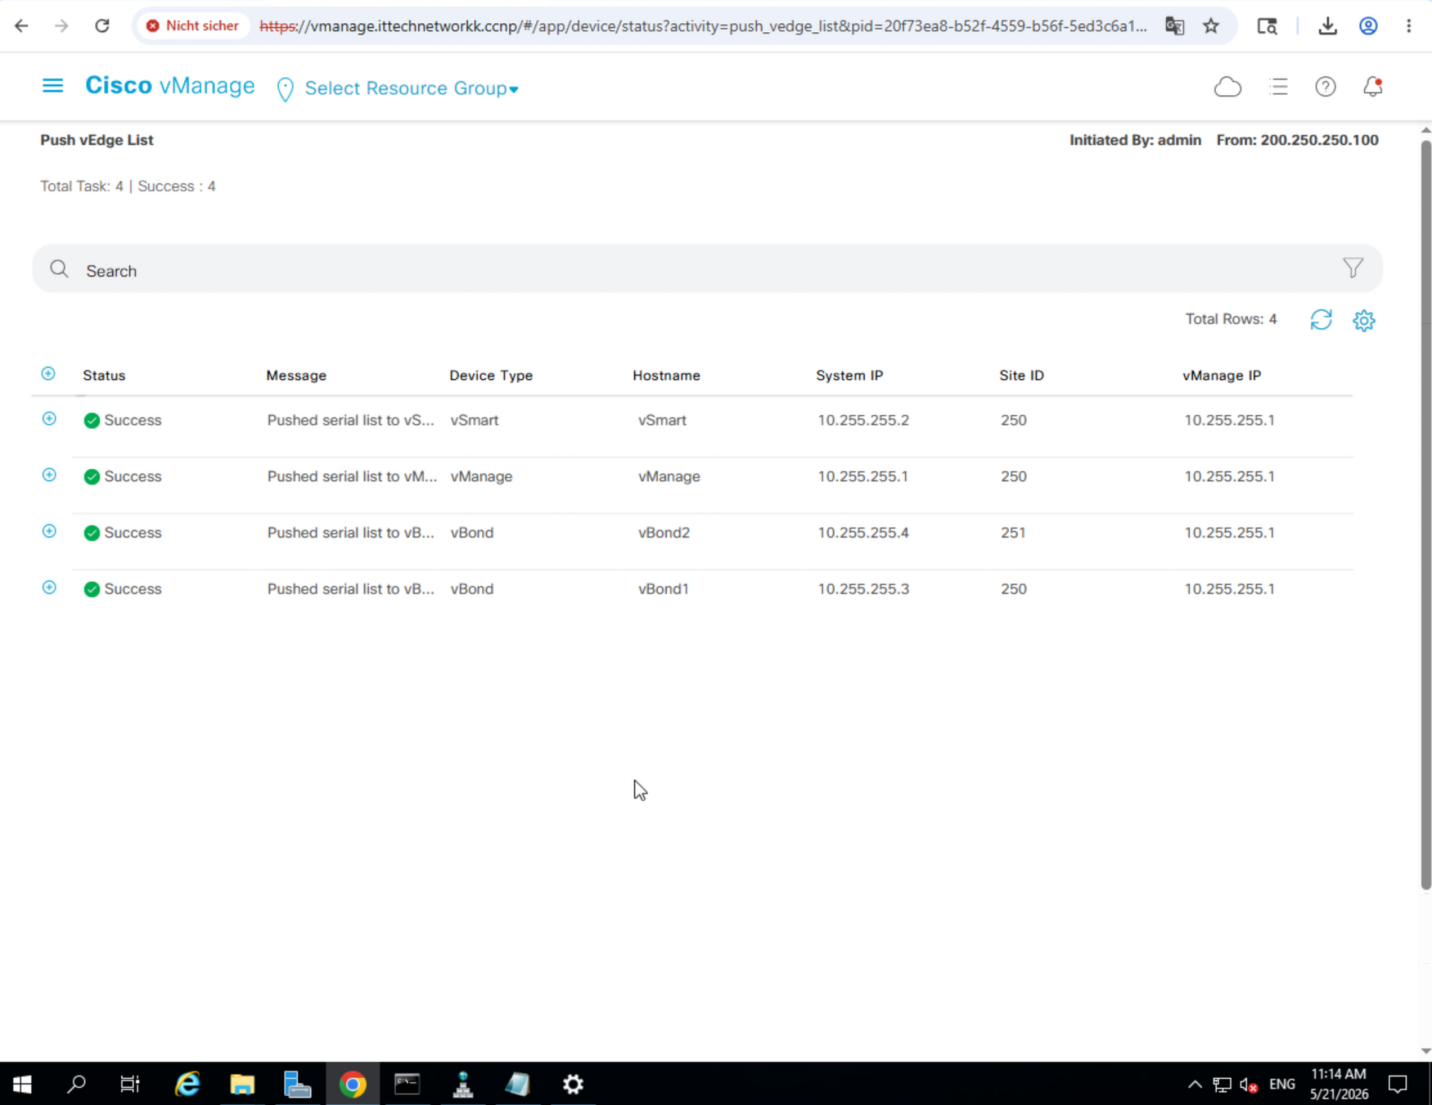
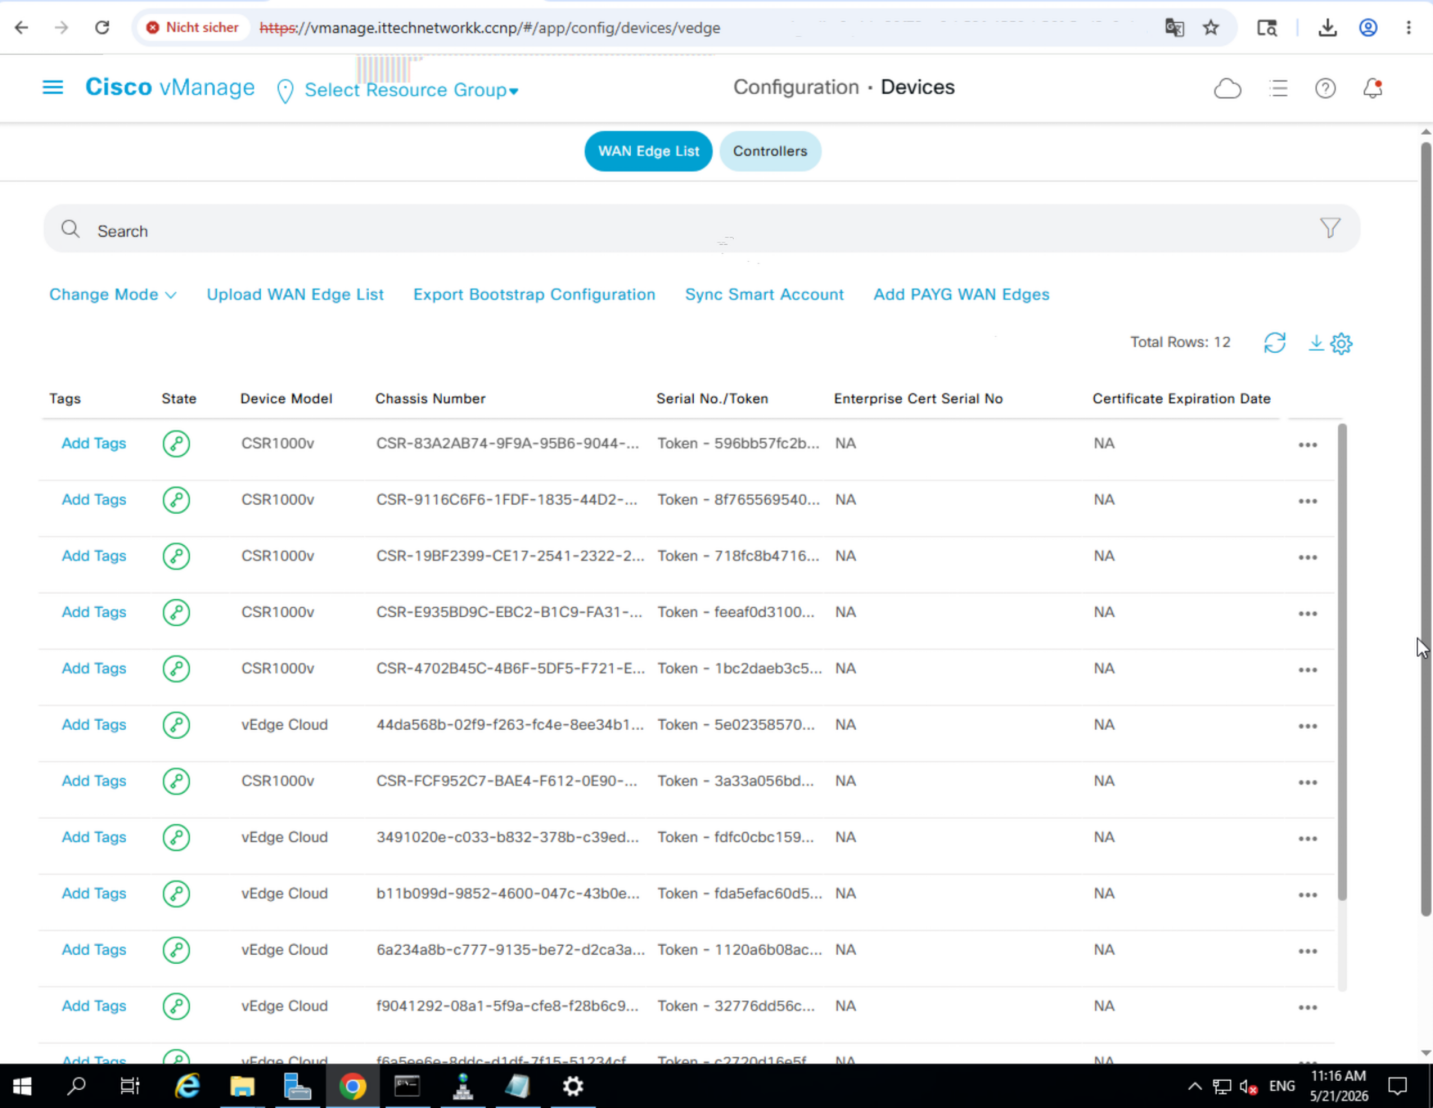
Upload WAN Edge List to vManage
- In vManage GUI, go to Configuration » Devices » WAN Edge List → Upload WAN Edge List
- Select the serial file and check the confirmation box
Step 9 — Onboard a vEdge Device
vEdge-51 System & WAN Configuration
conf t
system
 host-name vEdge-51
 system-ip 10.255.255.51
 vbond vbond.ittechnetworkk.ccnp
 clock timezone Europe/Berlin
 ntp server ntp.ittechnetworkk.ccnp
 organization-name ittechnetworkk.ccnp
 site-id 50
 exit
 commit

vpn 0
 dns 200.250.250.100
 ip route 0.0.0.0/0 200.50.1.92
 interface ge0/0
  ip address 200.50.1.51/24
  no shutdown
  tunnel-interface
   encapsulation ipsec
   color biz-internet restrict
   allow-service all
   exit
  exit
 interface ge0/3
  ip address 172.16.51.51/24
  no shutdown
  tunnel-interface
   allow-service all
   encapsulation ipsec
   color mpls restrict
   exit
  exit

 router ospf
  area 0
   interface ge0/3
   exit
  exit
 exit
exit
show configuration
commit
Install Root Certificate on the Edge
Option A — SFTP:
- SFTP to
200.50.1.51(admin/admin) - Upload
root_ca.certo/home/admin/ - Run:
request root-cert-chain install /home/admin/root_ca.cerOption B — Copy-paste via vshell:
- Enter
vshell - Run
vim root_ca.cer, paste the certificate content, save with:wq! - Exit to CLI mode and run:
request root-cert-chain install /home/admin/root_ca.cerActivate the Edge Device
- In the vManage GUI, copy the vEdge Chassis Number
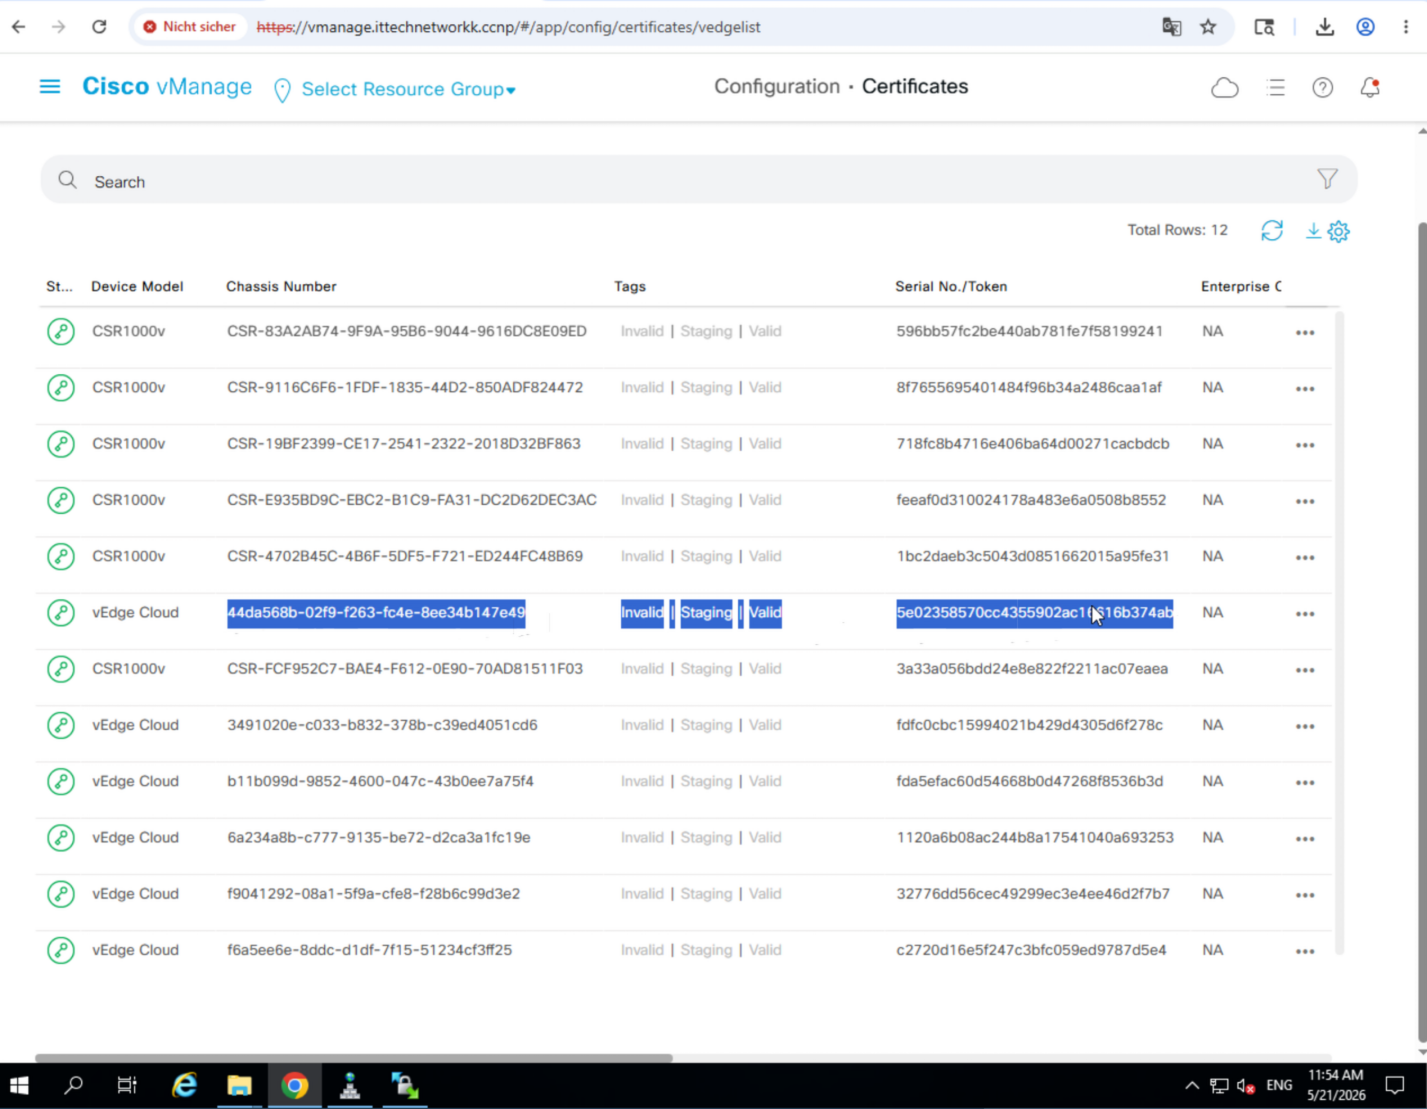
- On the vEdge CLI:
request vedge-cloud activate chassis-number <ChNum> token <token>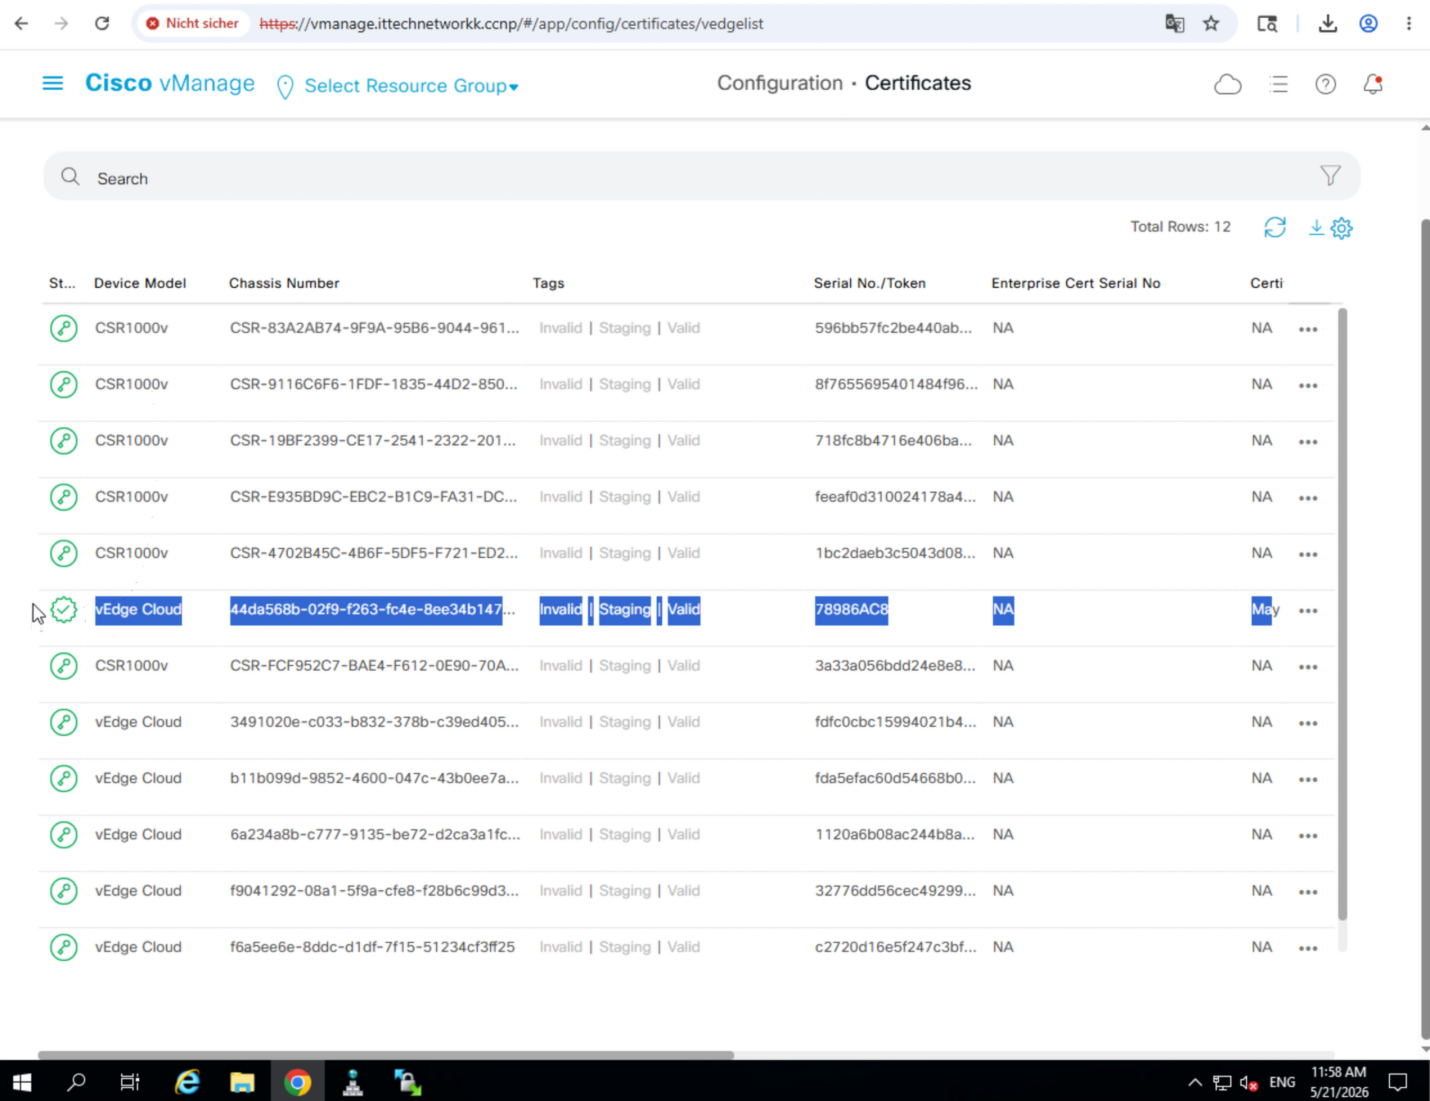
Verify
vEdge-51# show control connections
                                                                                      PEER                                          PEER                                          CONTROLLER
PEER    PEER PEER            SITE       DOMAIN PEER                                    PRIV  PEER                                    PUB                                           GROUP
TYPE    PROT SYSTEM IP       ID         ID     PRIVATE IP                              PORT  PUBLIC IP                               PORT  ORGANIZATION            LOCAL COLOR     PROXY STATE UPTIME      ID
----------------------------------------------------------------------------------------------------------------------------------------------------------------------------------------
vsmart  dtls 10.255.255.2    250        1      200.250.250.2                           12446 200.250.250.2                           12446 ittechnetworkk.ccnp       biz-internet    No    up     0:00:02:43 0
vbond   dtls 0.0.0.0         0          0      200.250.250.3                           12346 200.250.250.3                           12346                           mpls            -     connect           0
vbond   dtls 0.0.0.0         0          0      200.251.4.4                             12346 200.251.4.4                             12346 ittechnetworkk.ccnp       biz-internet    -     up     0:00:02:44 0
vmanage dtls 10.255.255.1    250        0      200.250.250.1                           12446 200.250.250.1                           12446 ittechnetworkk.ccnp       biz-internet    No    up     0:00:02:43 0
Step 10 — Onboard a cEdge Device
The configuration of cEdge devices is a bit different then cEdge devices since cEdge devices are IOS-XE OS based devices and vEdge ones are Viptela devices.
cEdge Initial Configuration
Enable the controller mode.
enable
controller-mode enable
no
The device will be booting again.
Initial Configuration
config-transaction
system
hostname cEdge-40
system-ip 10.255.255.40
site-id 40
organization-name ittechnetworkk.ccnp
vbond vbond.ittechnetworkk.ccnp
exit
ntp server ntp.ittechnetworkk.ccnp
ip domain lookup
ip name-server 200.250.250.100
clock timezone Istanbul 3 0
commit

interface GigabitEthernet 1
ip addr 200.40.1.40 255.255.255.0
no shutdown
exit

interface GigabitEthernet 2
no sh
ip address 172.16.40.40 255.255.255.0
ip ospf 40 area 0
exit

ip route 0.0.0.0 0.0.0.0 200.40.1.92

router ospf 40
router-id 40.40.40.40
exit
Install Root Certificate on the Edge
Now we’re using TFTP to upload root_ca.cer on cEdge device.
Install the Tftp64 tool and copy the root_ca.cer file and paste it into C:\Program Files\Tftp64 folder.
Then go back to the cEdge and type following.
copy tftp://200.250.250.100/root_ca.cer bootflash:/root_ca.cer
dir bootflash:
more bootflash:root_ca.cer
Activate the Edge Device
request platform software sdwan root-cert-chain install bootflash:/root_ca.cerTunnel Configuration
interface Tunnel 1
no sh
ip unnumbered GigabitEthernet1
tunnel source GigabitEthernet1
tunnel mode sdwan
exit
interface Tunnel 2
no sh
ip unnumbered GigabitEthernet2
tunnel source GigabitEthernet2
tunnel mode sdwan
exit
SD-WAN Configuration
config-transaction
sdwan
interface GigabitEthernet1
tunnel-interface
encapsulation ipsec
color biz-internet restrict
allow-service all
exit
exit
interface GigabitEthernet2
tunnel-interface
encapsulation ipsec
color mpls restrict
allow-service all
exit
commit
sh sdwan running-config
Activate the cEdge Device
request platform software sdwan vedge_cloud activate chassis-number <chasNum> token <token>Thank you for taking time to read this article, I hope you’ll find this helpful.
Keep up the great work.