
I built a Stratum 2 NTP time server that runs on an ESP32, serves accurate time to every device on my local network, and looks good doing it — complete with a color TFT display and a web dashboard you can manage from your phone.
Why Build Your Own NTP Server?
A local NTP server means:
- Faster sync — sub-millisecond responses instead of 20-50ms round trips
- Works offline — your LAN keeps time even if your internet goes down
- One upstream connection — the ESP32 syncs to the internet; everything else talks to it
- Visibility — you can see exactly which devices are requesting time and how often
And honestly? It’s a fun weekend project.
The Hardware
The build uses just two components:
| Part |
|---|
| ESP32 DevKit v1 (WROOM-32) |
| GMT020-02 — 2.0″ SPI TFT (ST7789V, 240×320) |
Seven wires connect them:
| Display Pin | ESP32 GPIO |
|---|---|
| VCC | 3.3V |
| GND | GND |
| CS | GPIO 5 |
| DC | GPIO 4 |
| RST | GPIO 22 |
| SDA (MOSI) | GPIO 23 |
| SCL (CLK) | GPIO 18 |
No PCB, no soldering (if you use a breadboard), no level shifters. Plug and go.
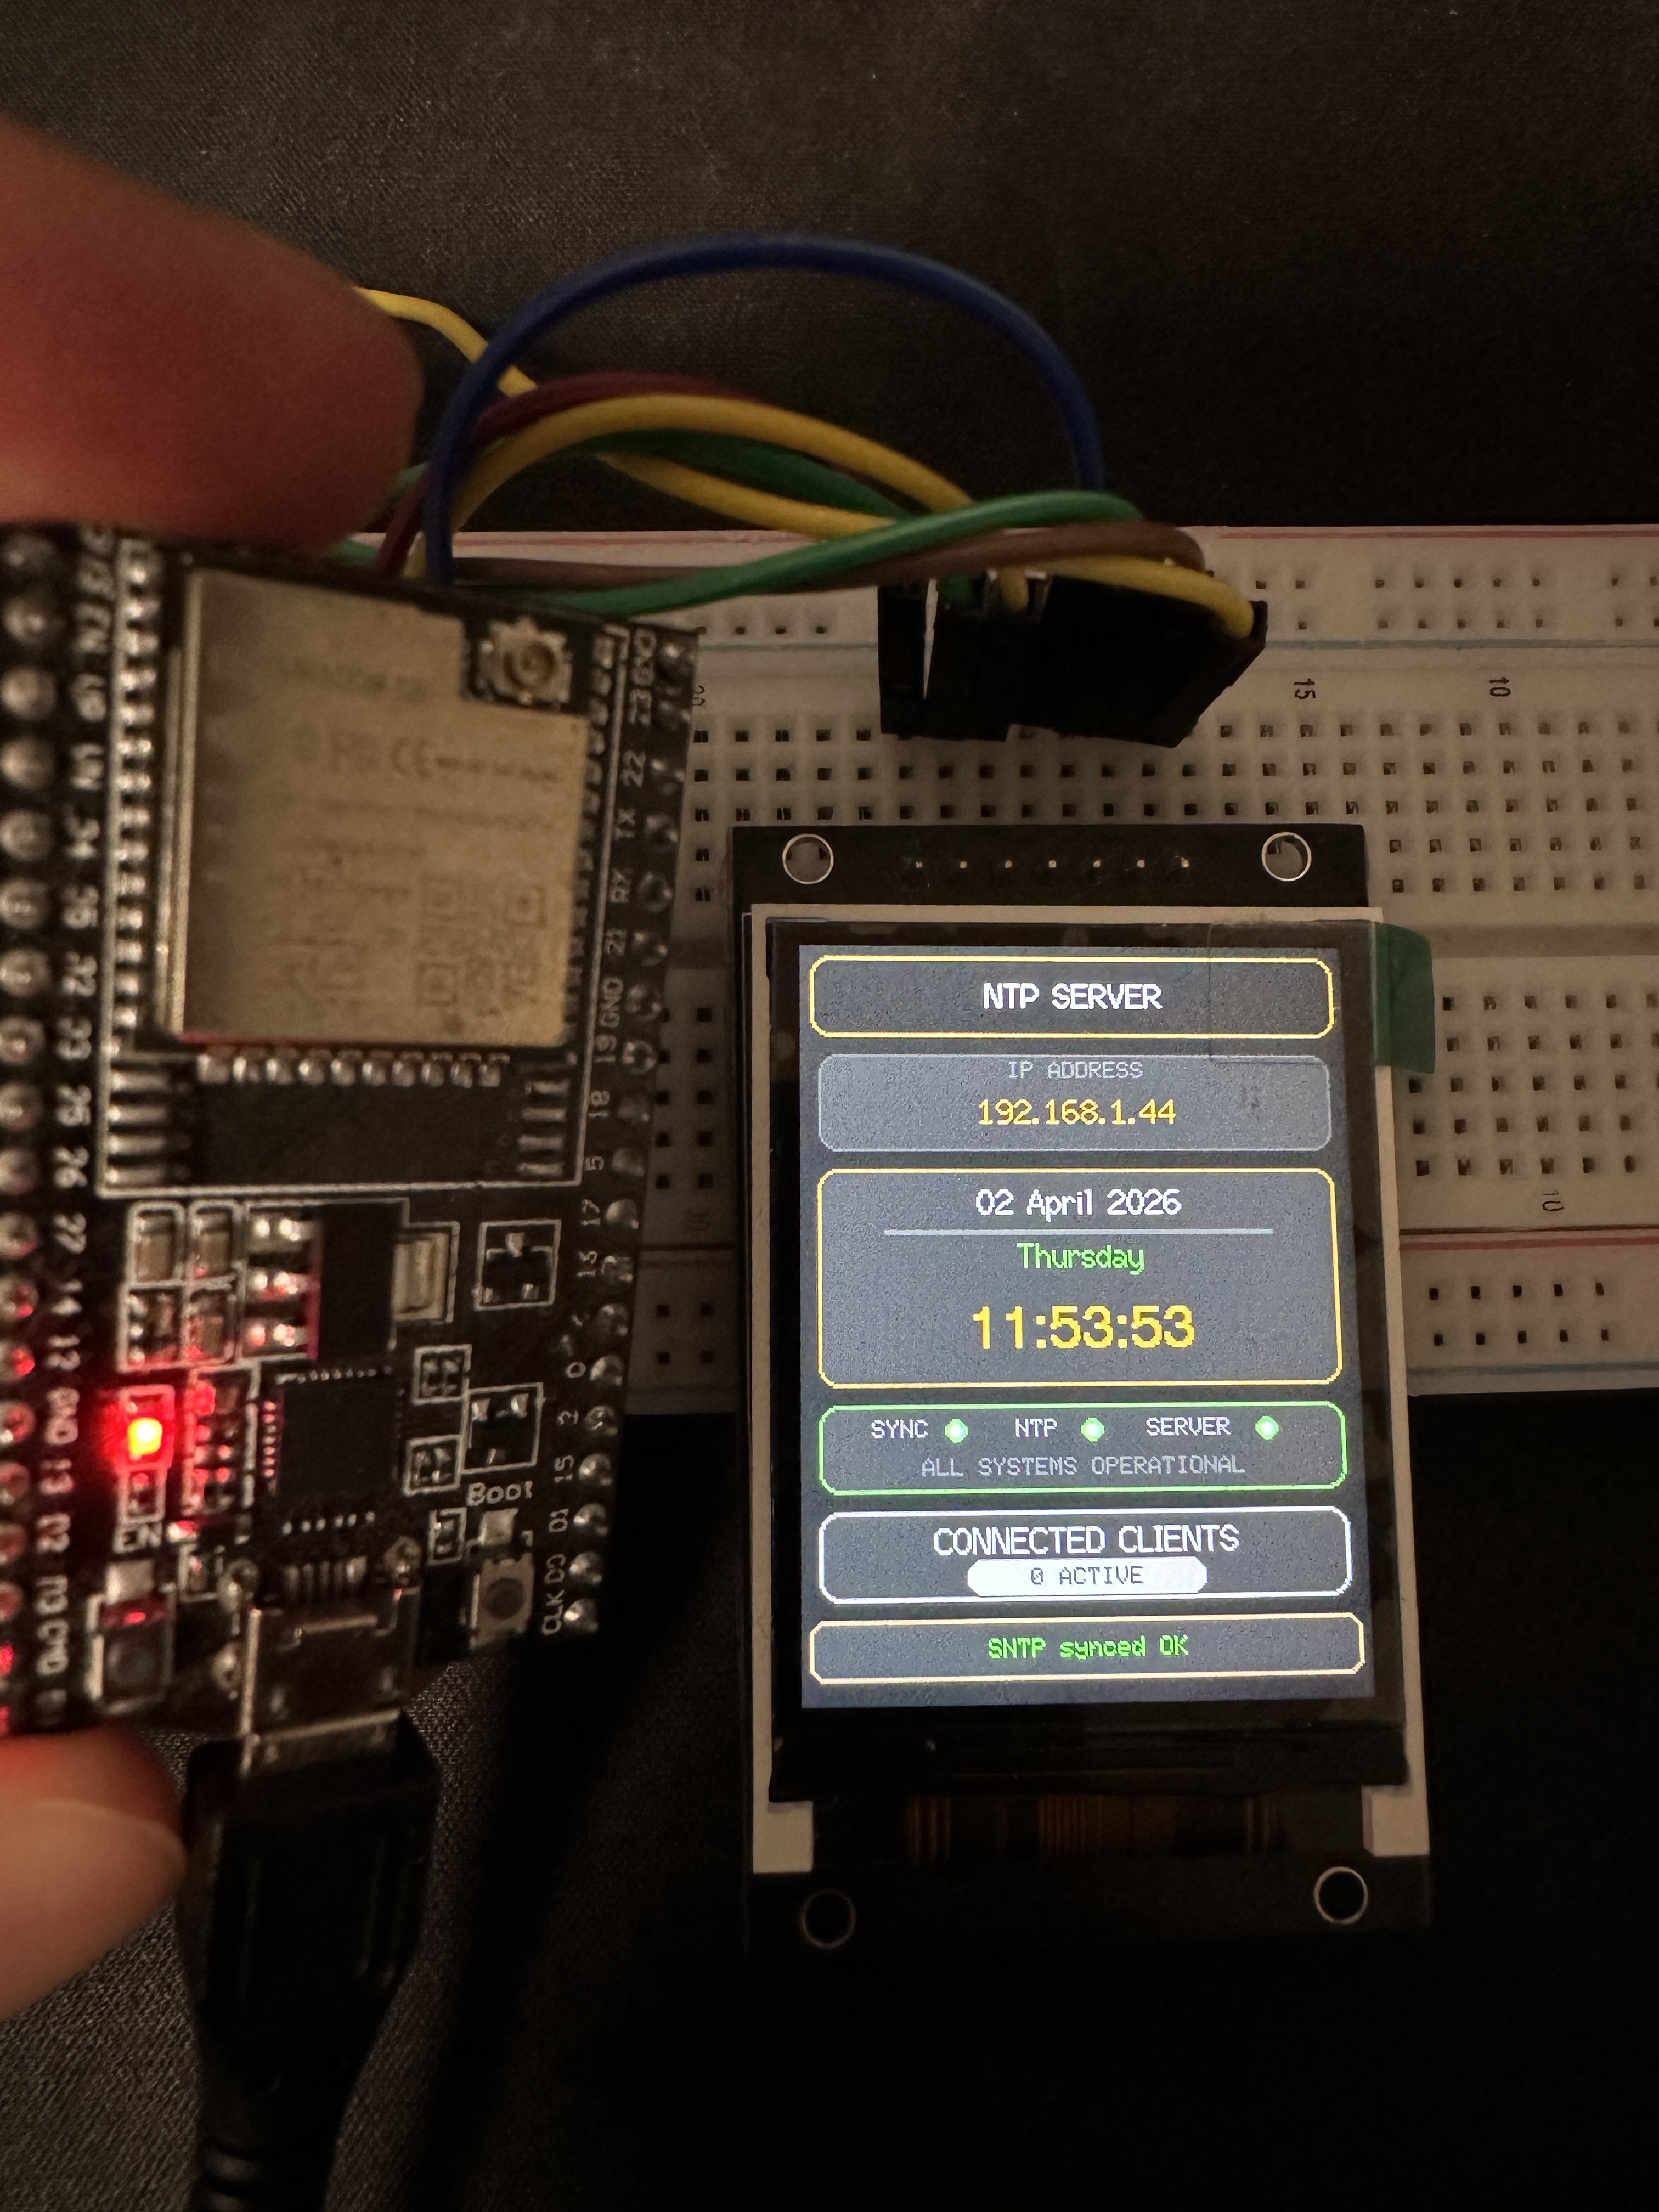
The display shows the current time, date, IP address, sync status, and how many NTP clients are connected — all at a glance.
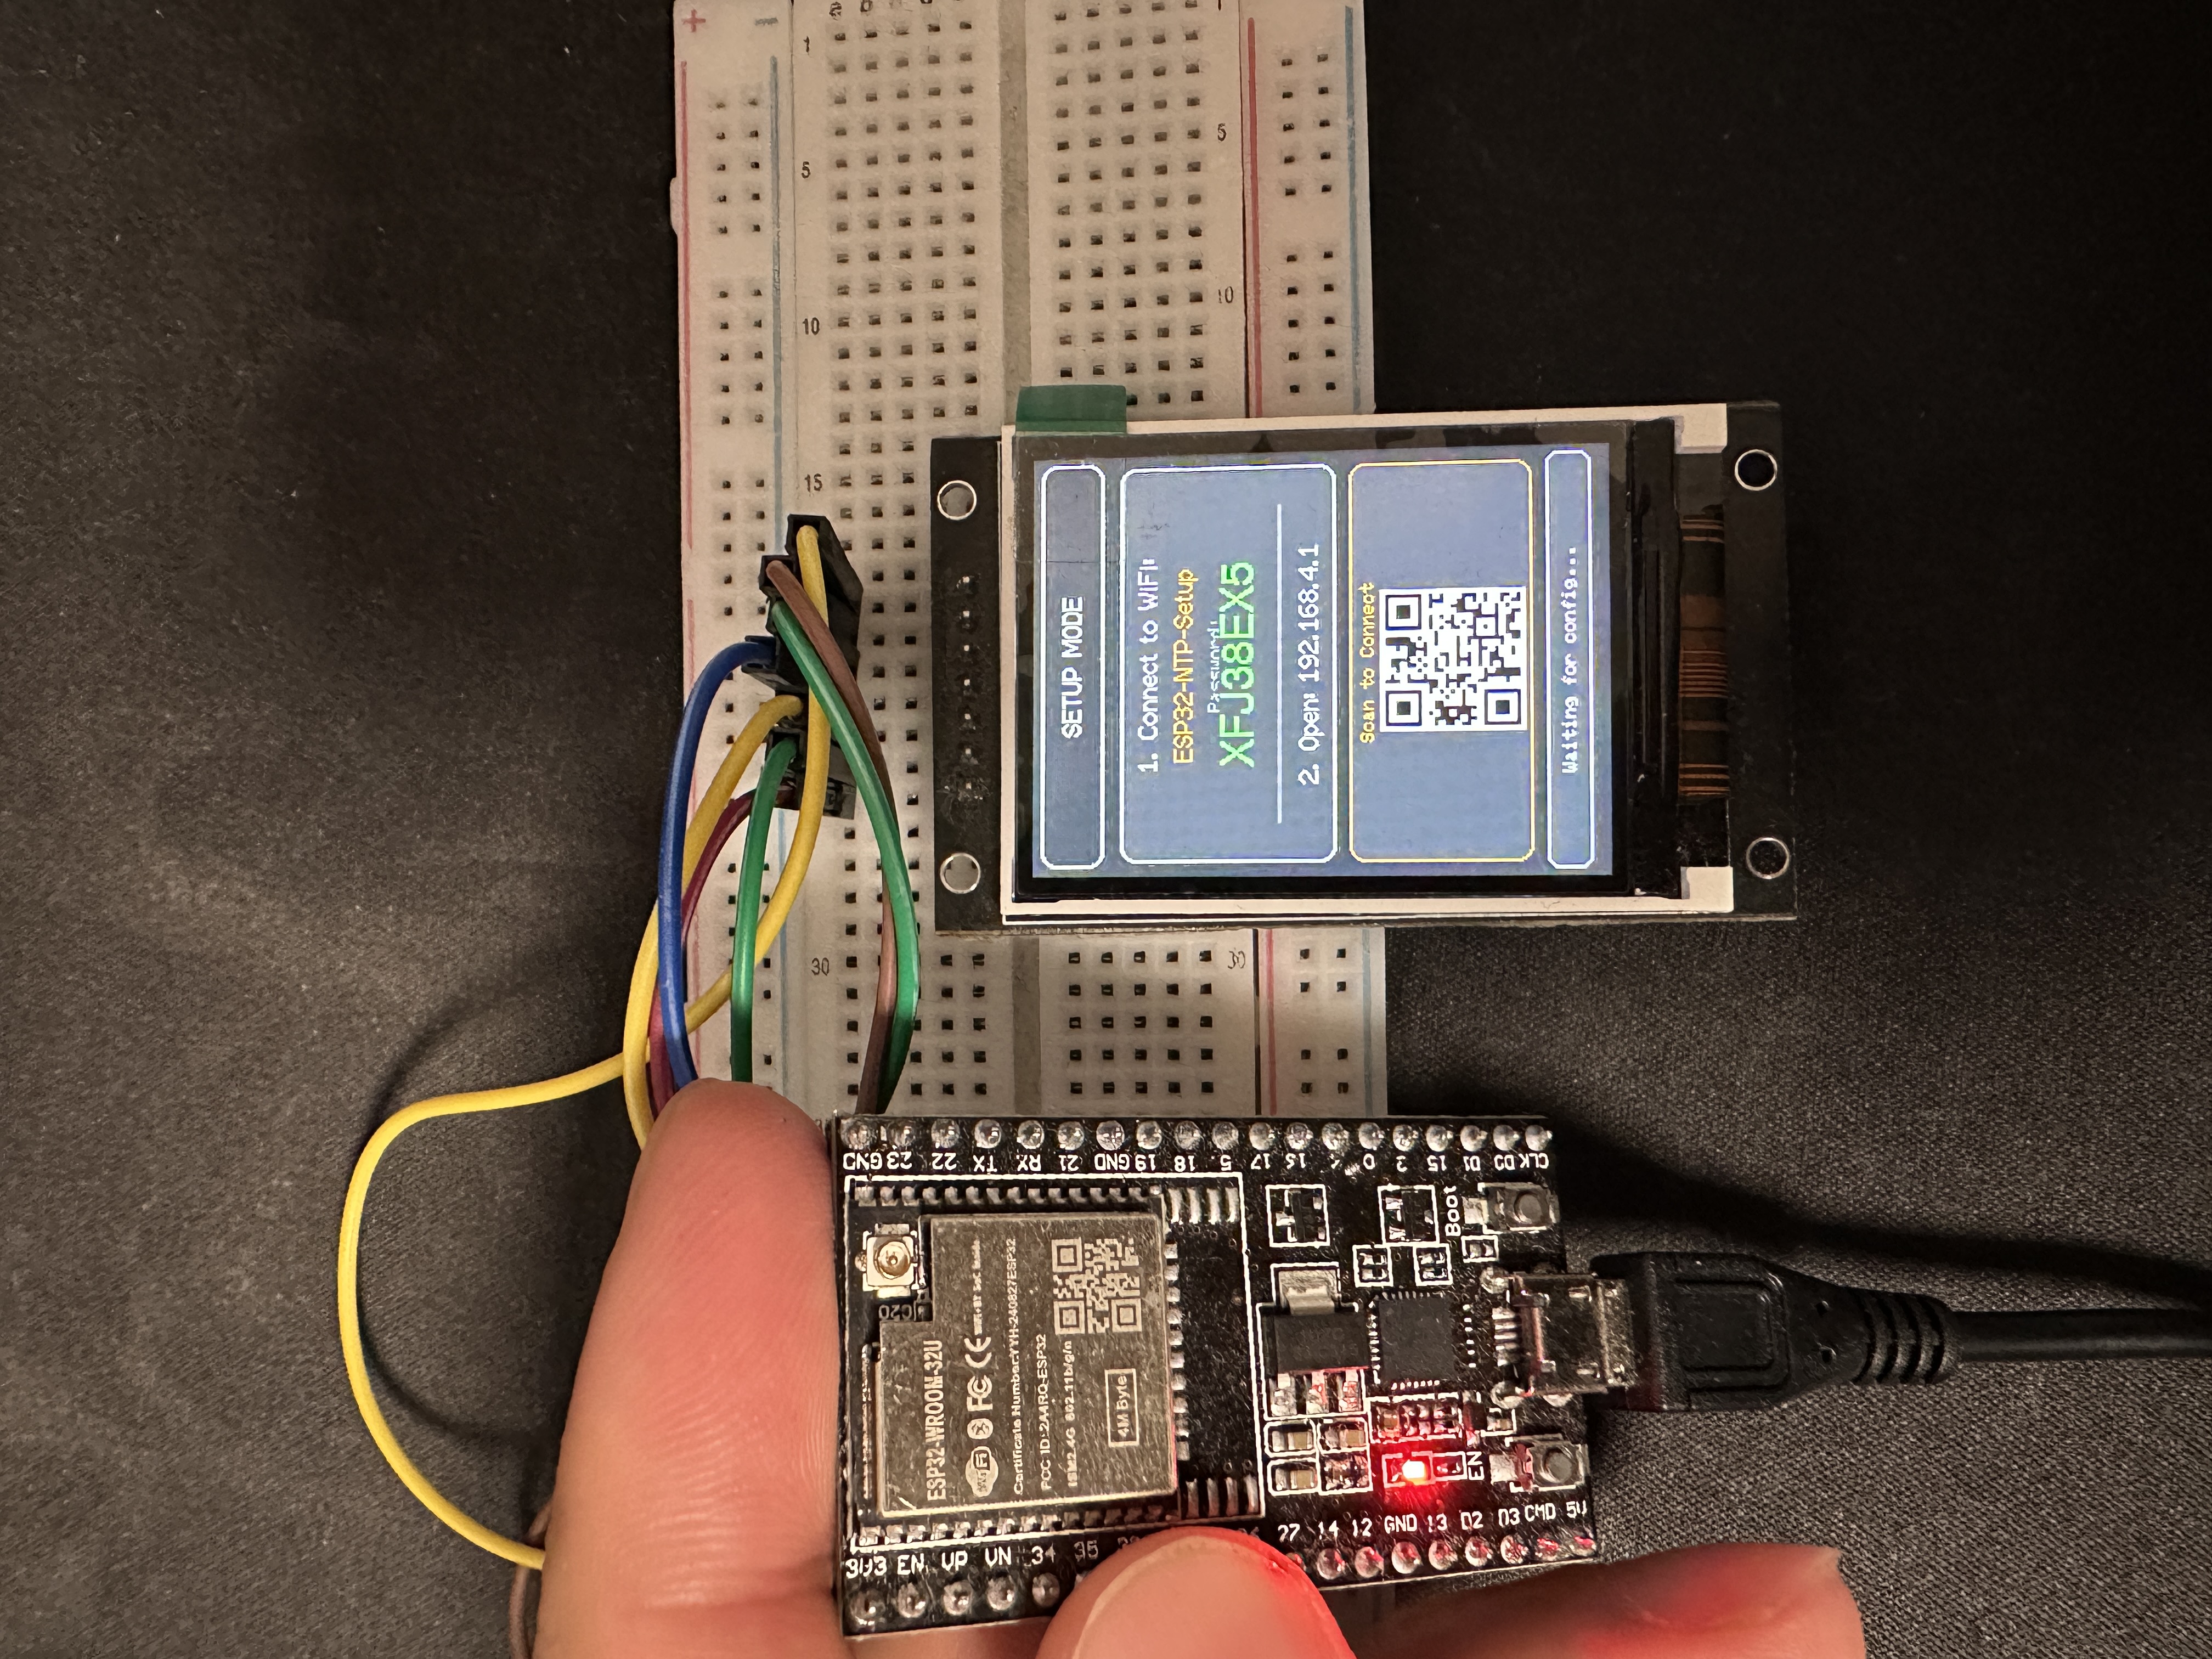
First Boot: WiFi Setup via Captive Portal
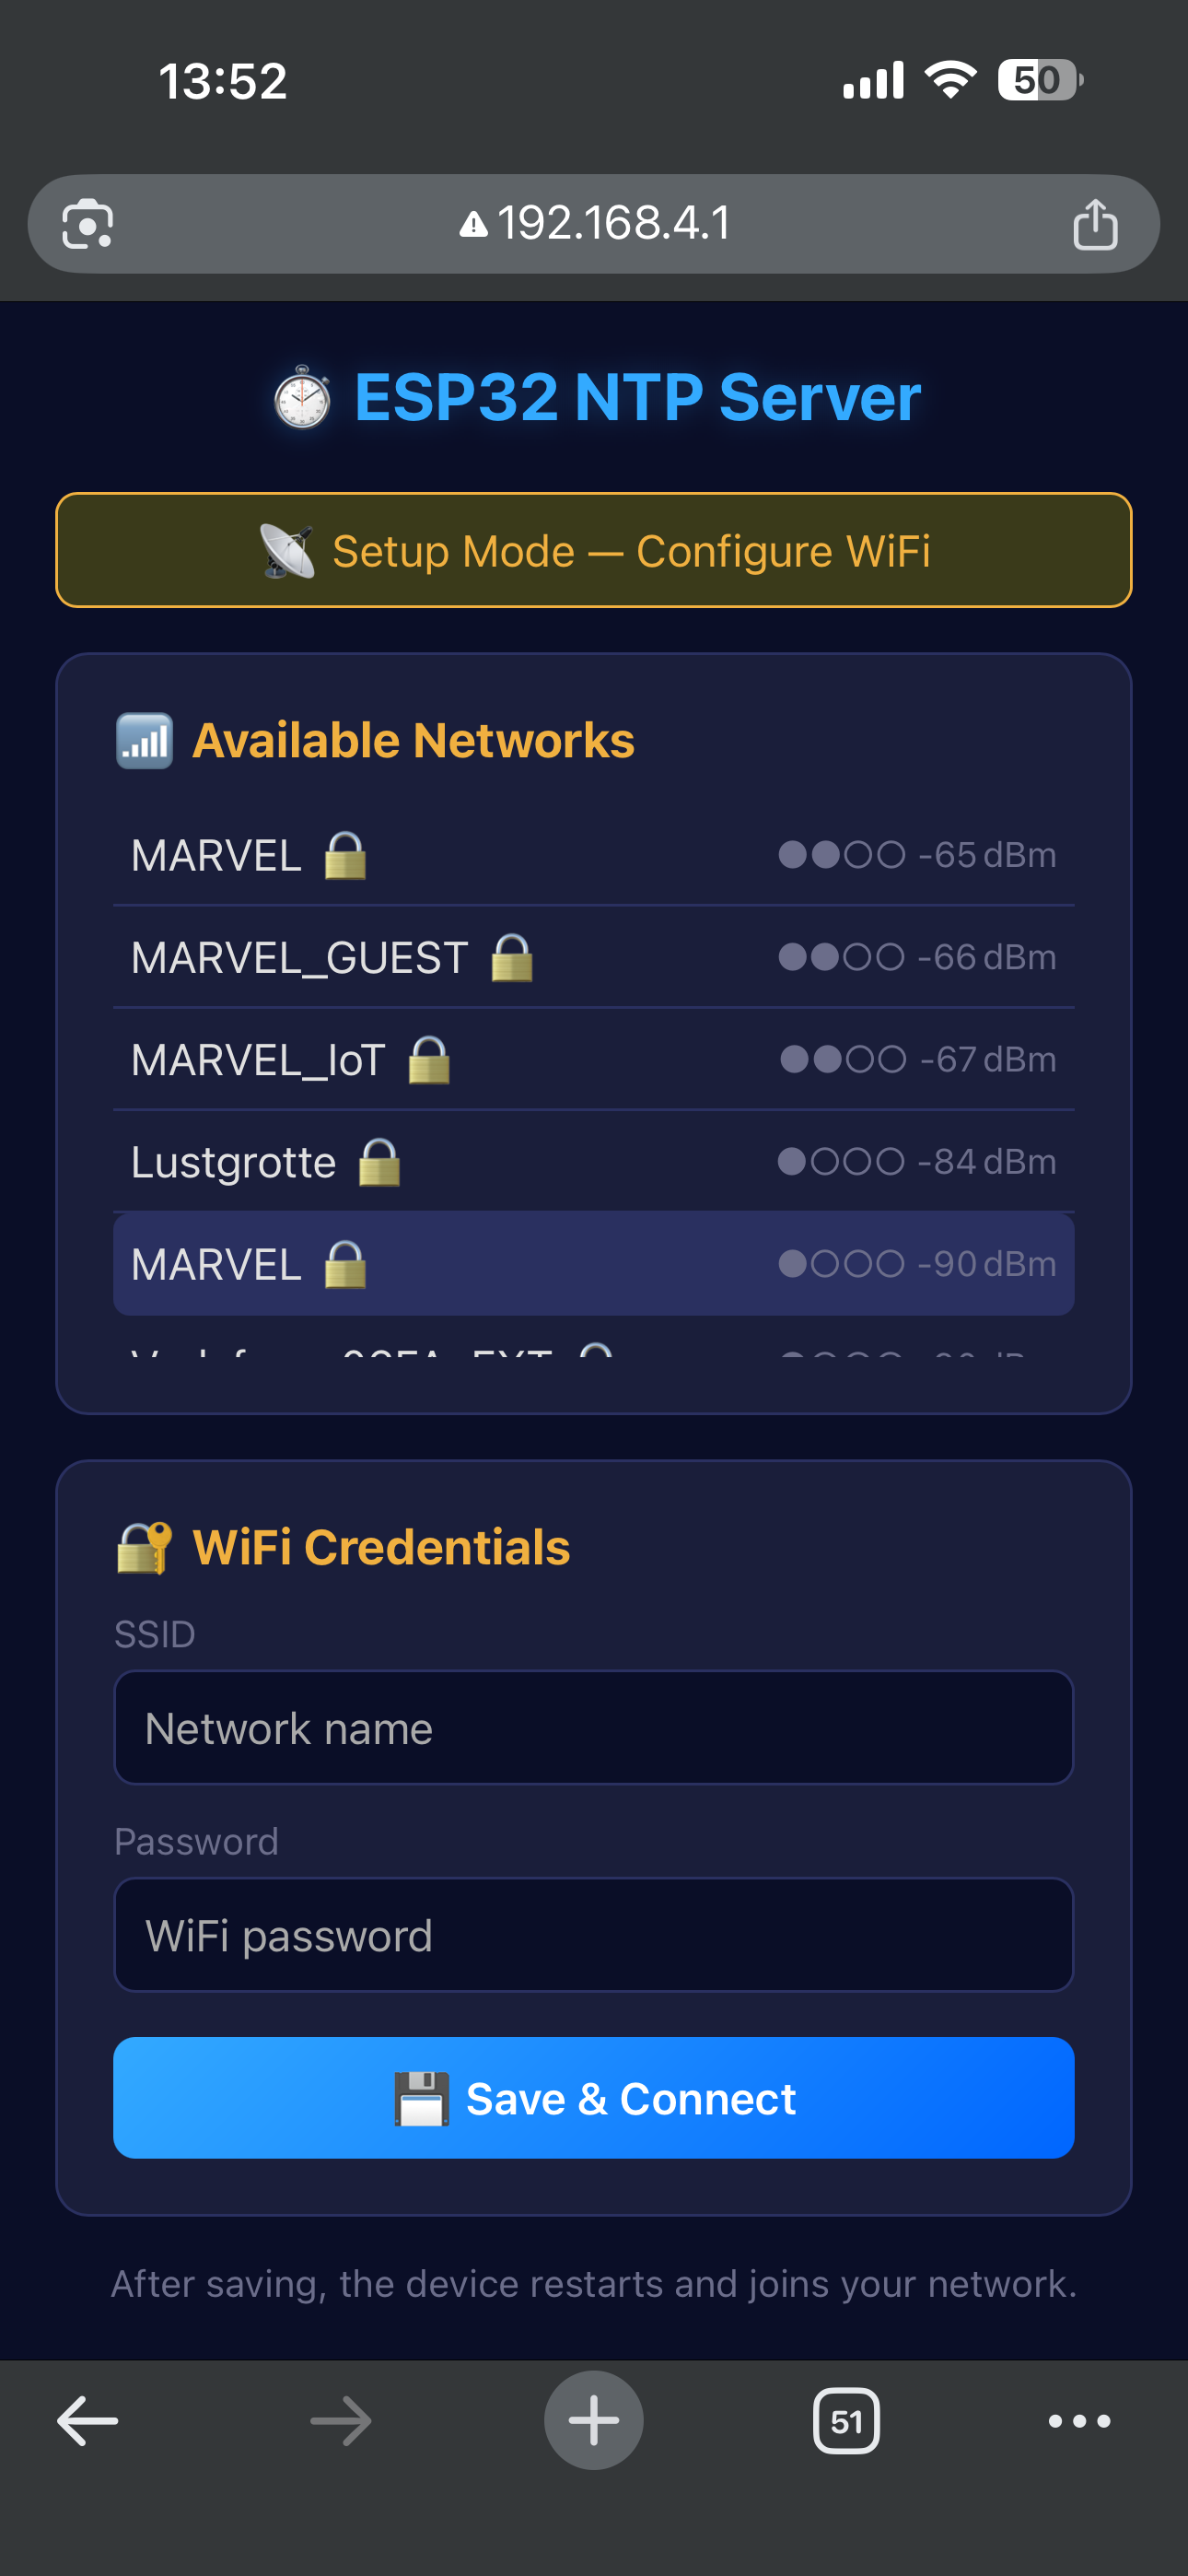
On first power-up, the ESP32 doesn’t know your WiFi credentials. Instead of hardcoding them, it spins up its own access point called ESP32-NTP-Setup and shows a random password on the TFT screen (along with a QR code you can scan).
Connect from your phone, and a captive portal opens automatically — the same way hotel WiFi works. Pick your network, enter the password, hit save. The ESP32 reboots and joins your WiFi.
One thing I ran into: phones constantly send “captive portal detection” probes (Android hits /generate_204, iOS checks /hotspot-detect.html, Windows pings /connecttest.txt). If you blindly redirect everything to your setup page, the phone reloads it in an infinite loop. The fix was registering handlers for each of those probe URLs and returning the expected responses, plus caching WiFi scan results so the page doesn’t block for 3 seconds on every load.
The Web Dashboard
Once connected, the ESP32 serves a full web UI — no app needed, just open the IP in any browser.
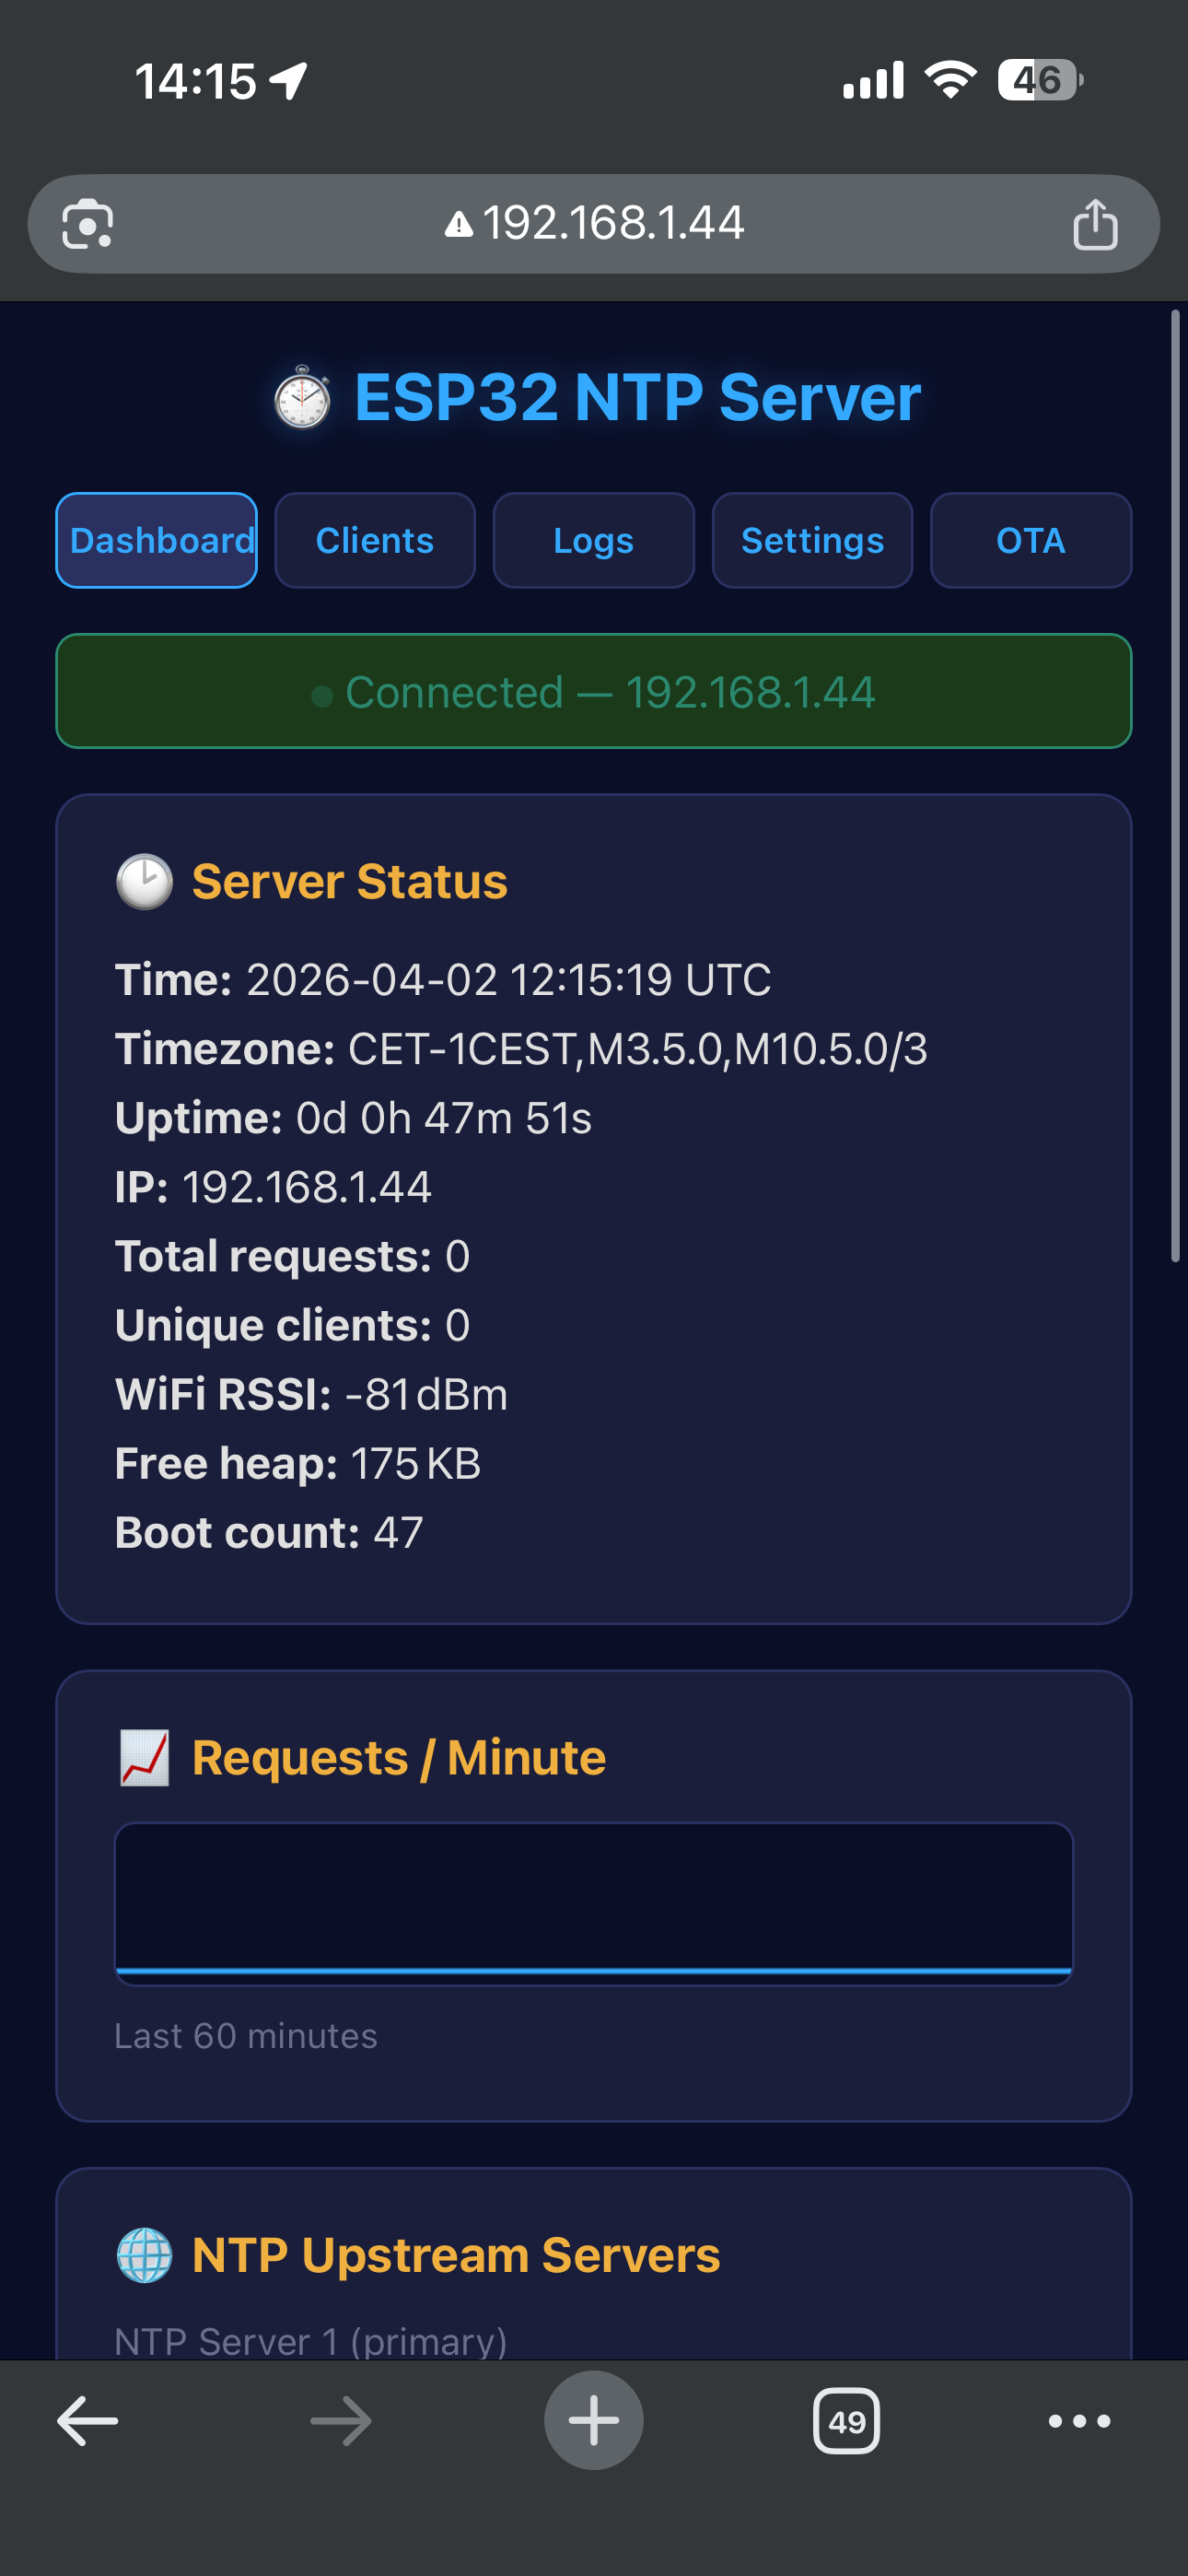
The dashboard shows:
- Server status — current time, timezone, uptime, IP, free heap, boot count
- WiFi signal strength (RSSI)
- Total NTP requests served and unique client count
- Requests-per-minute sparkline — a live canvas graph of the last 60 minutes
- NTP upstream configuration — change your three upstream pool servers
- Timezone selector — common presets or enter a custom POSIX TZ string
Everything updates in real-time via Server-Sent Events (SSE) — no page reloads, no polling.
Client Tracking
The Clients tab shows every device that has requested time from the server:
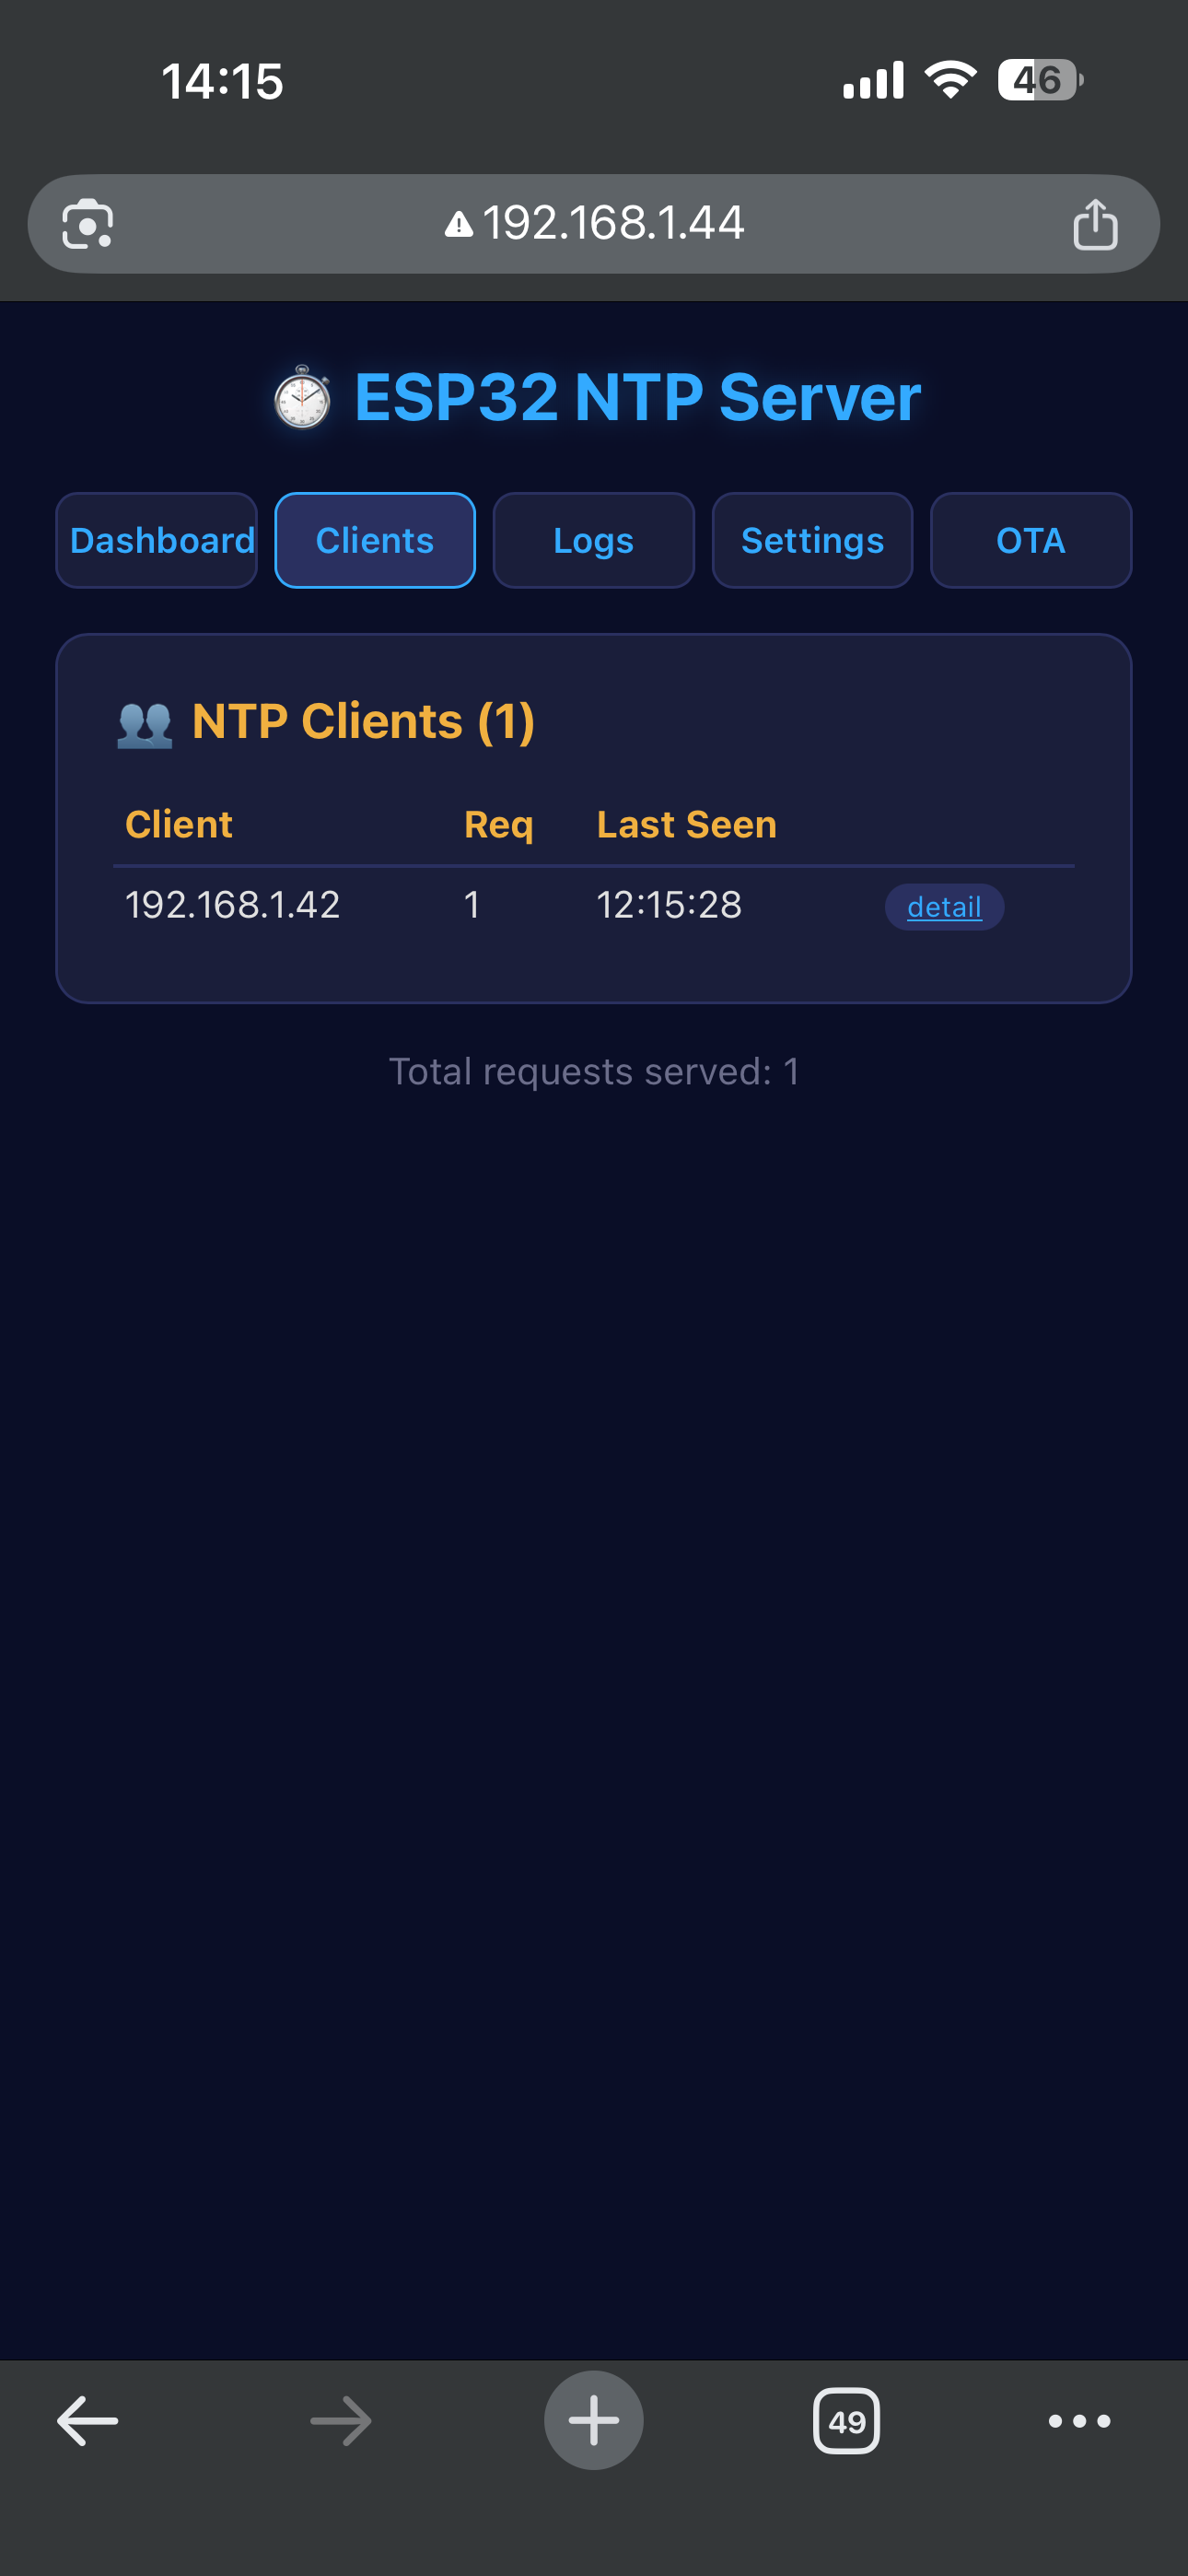
Each client gets its own detail page with a per-client request history graph and a label field — so instead of staring at 192.168.1.42, you can name it “Desktop PC” or “Raspberry Pi”:
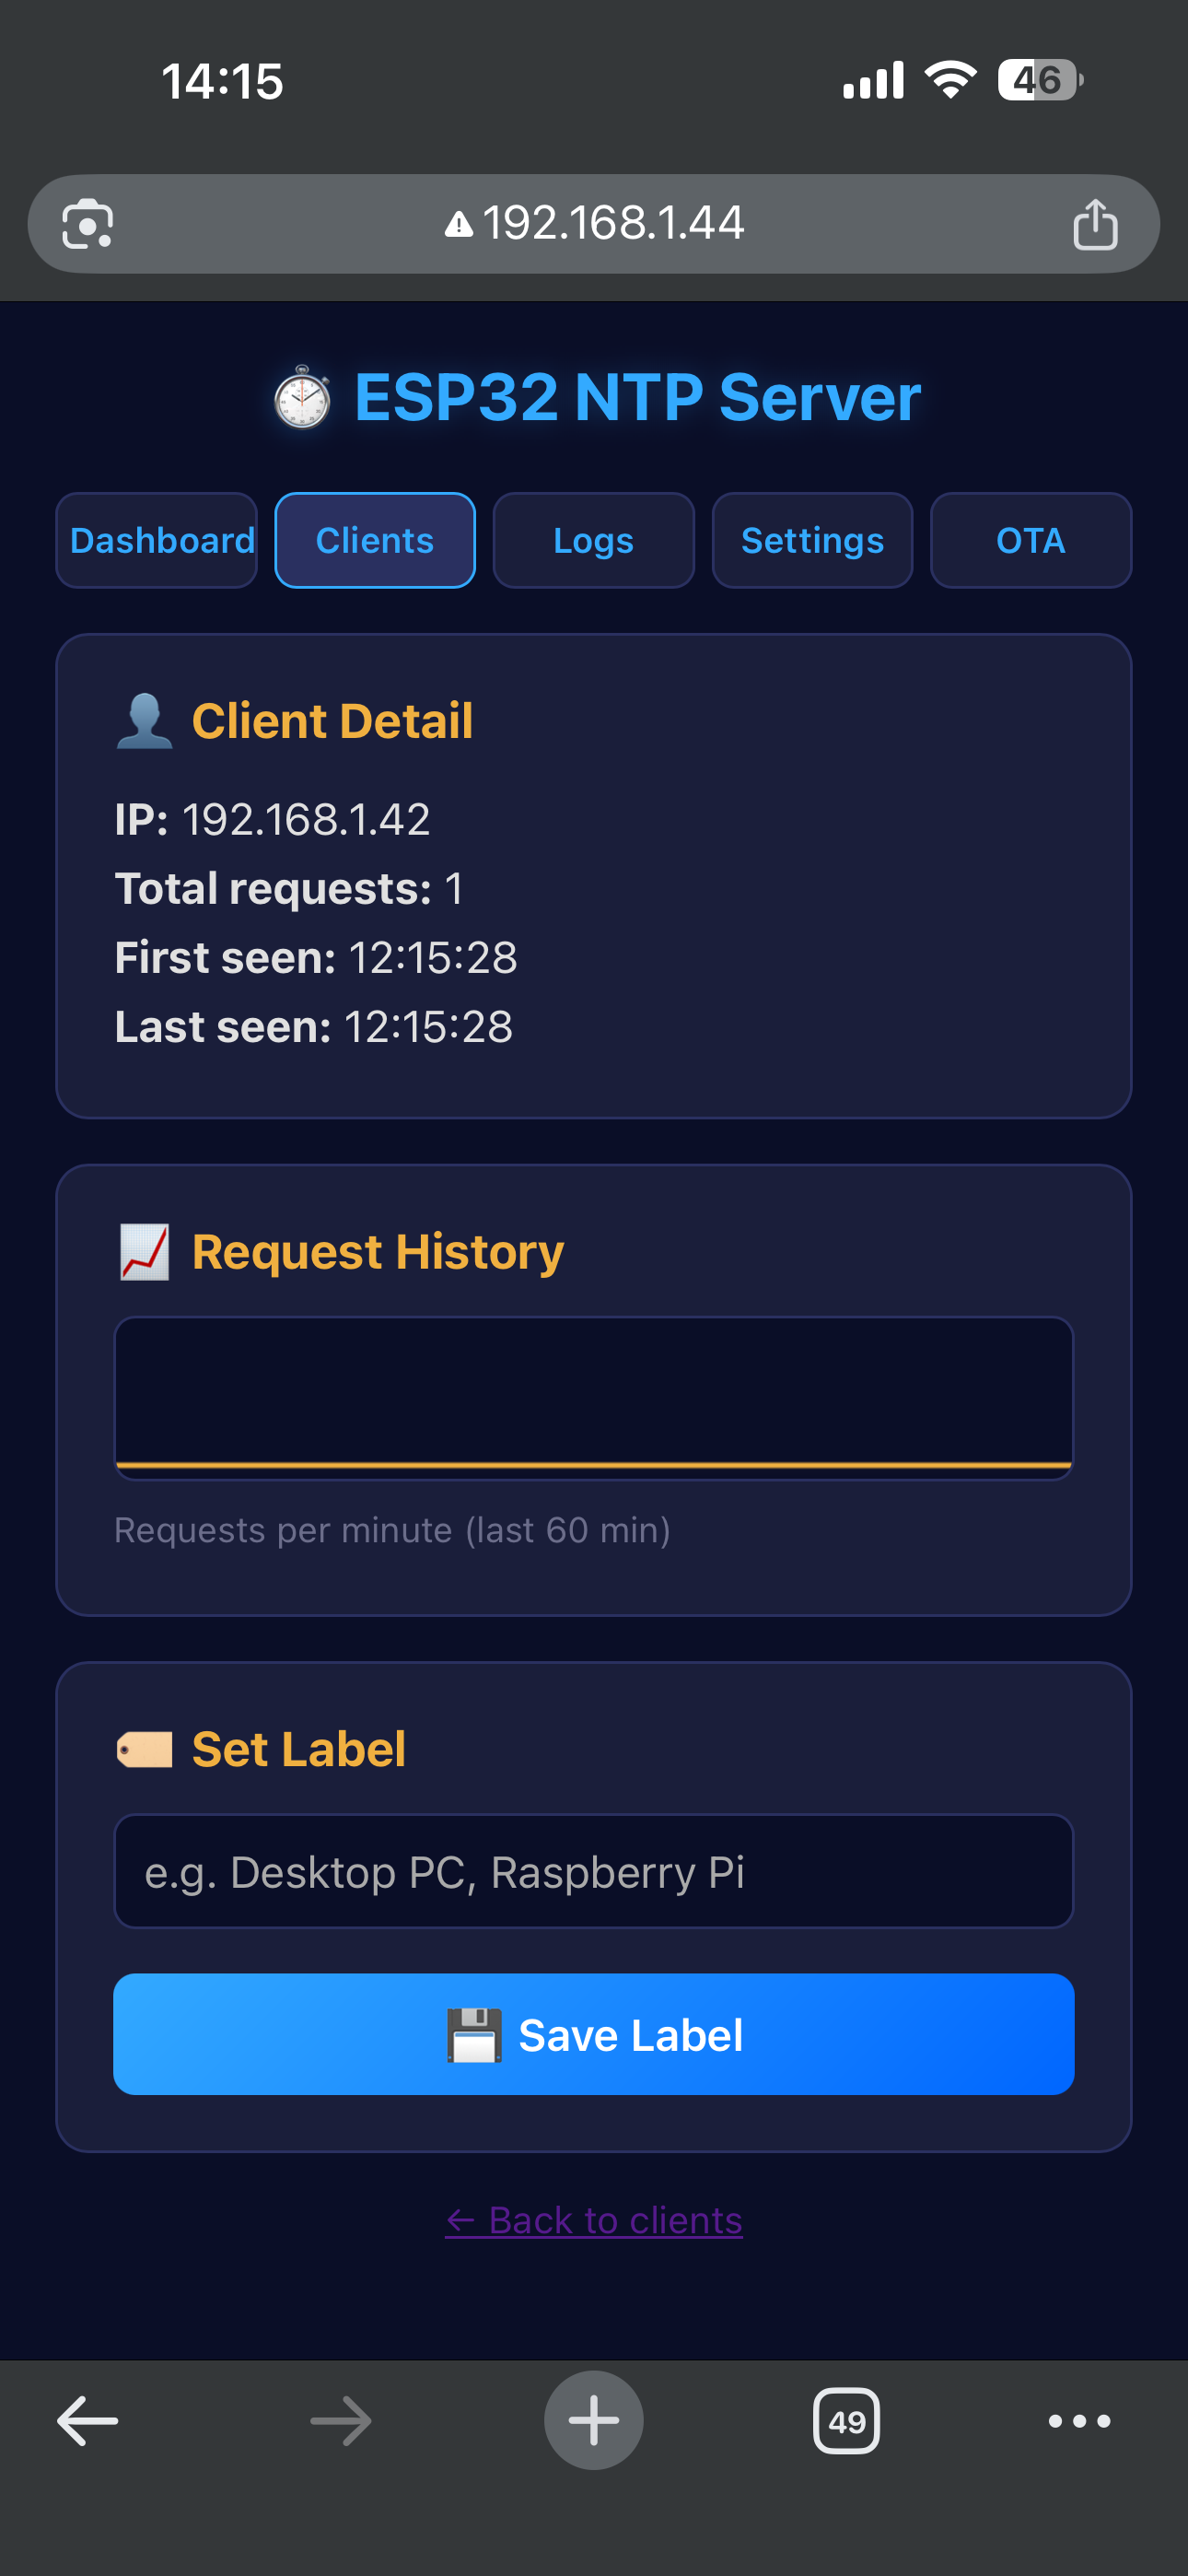
Labels are persisted in NVS flash, so they survive reboots. The server tracks up to 32 unique clients simultaneously.
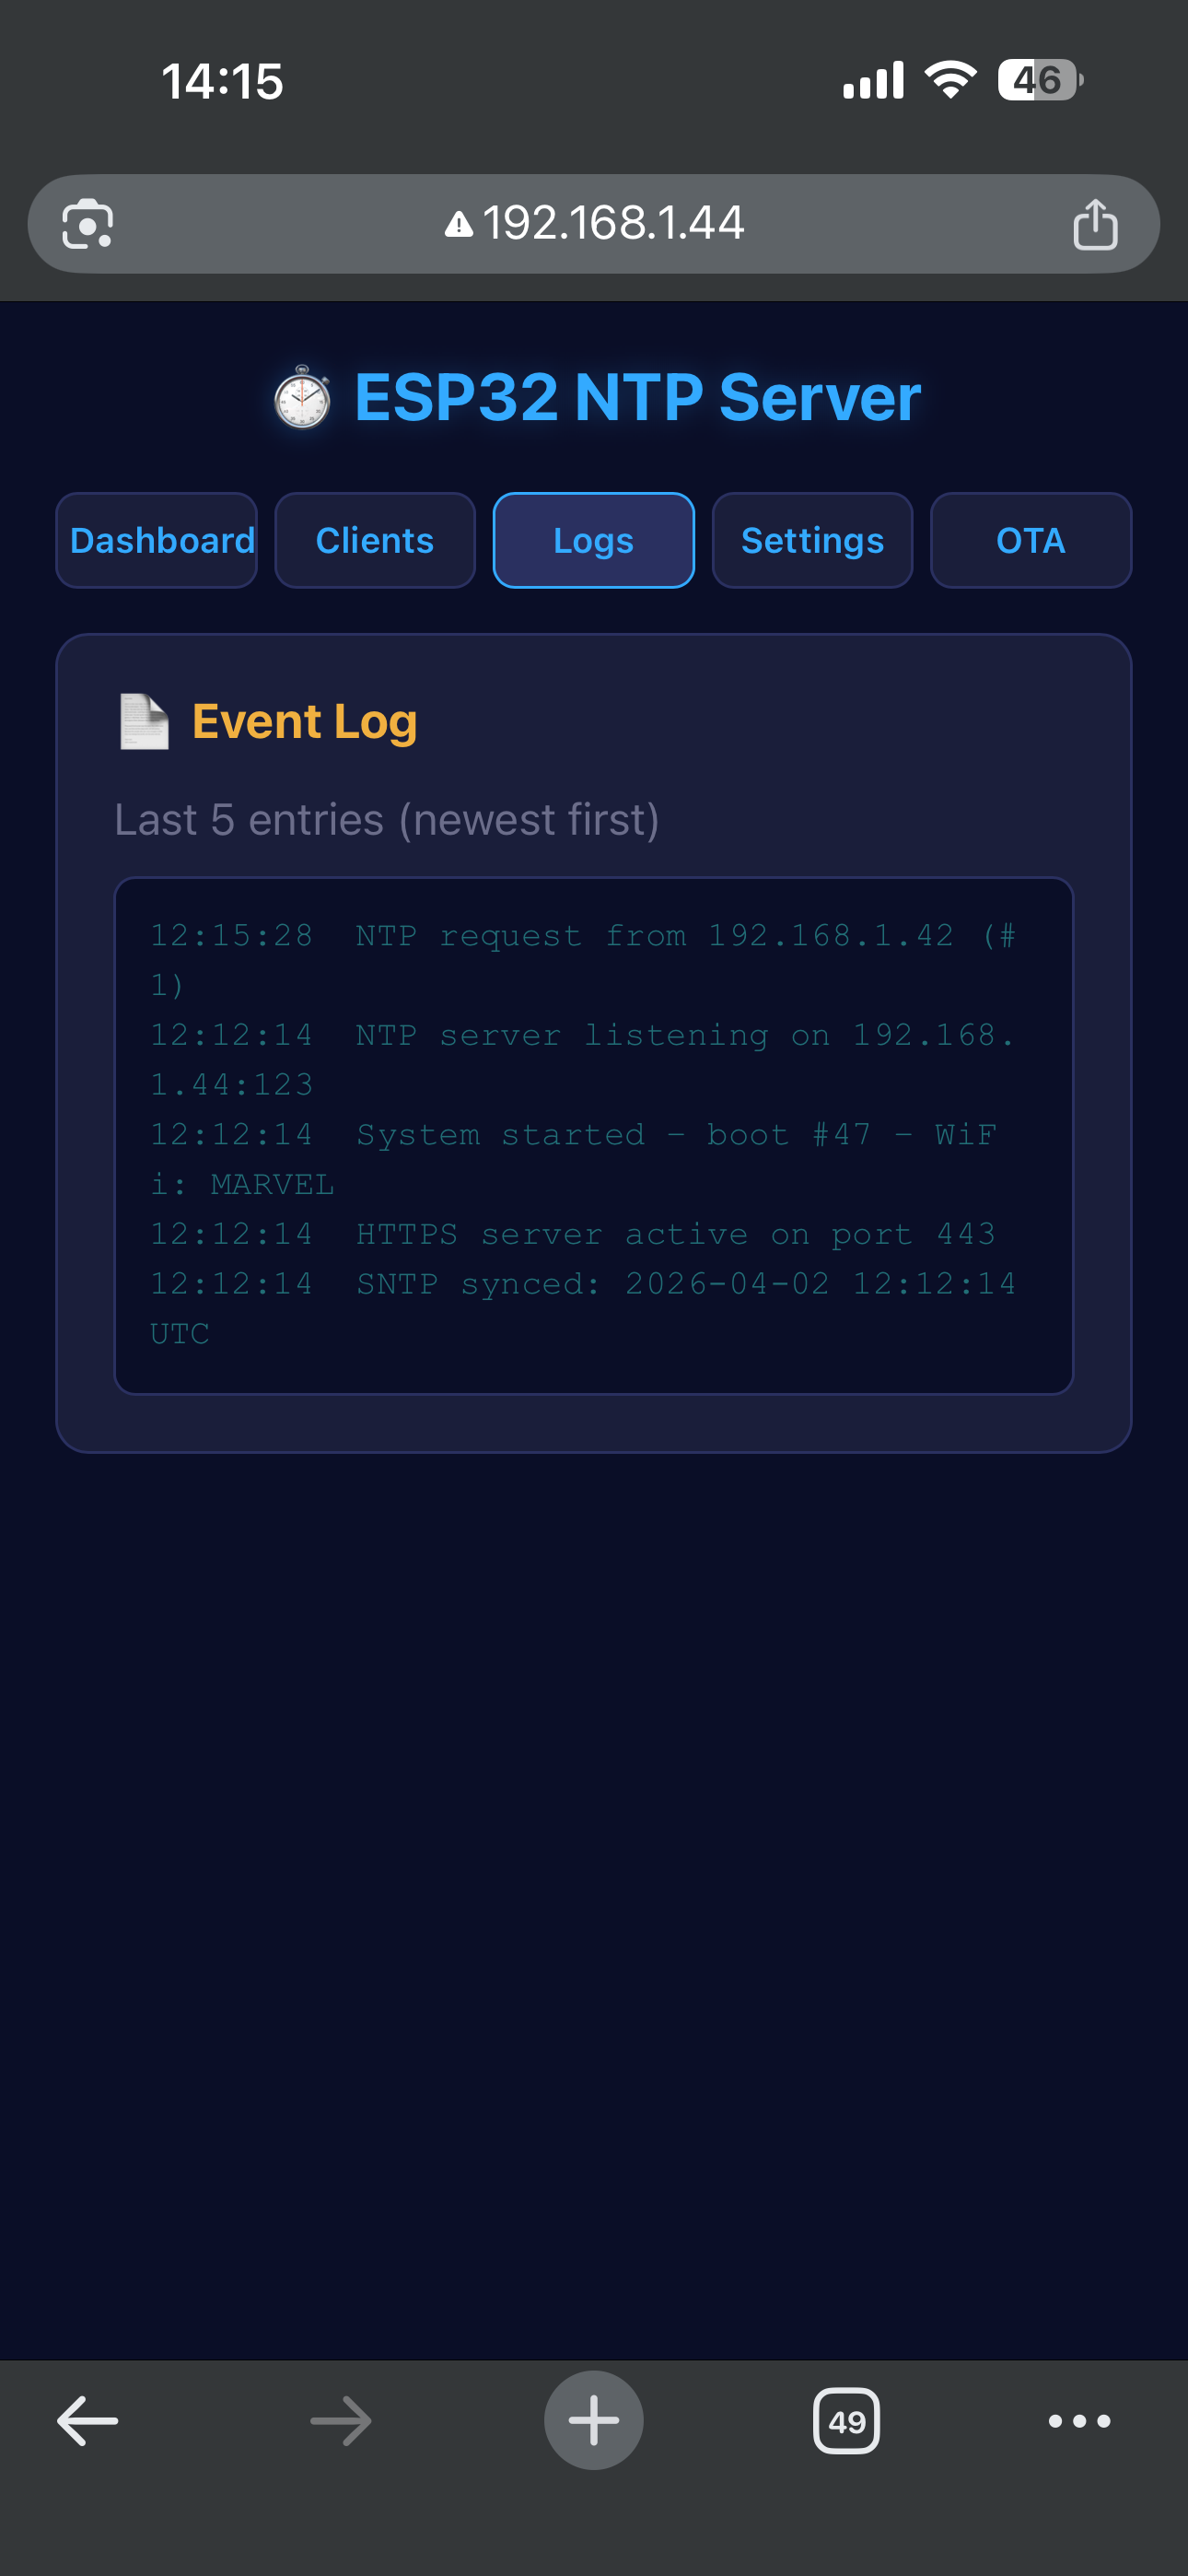
Logs, Settings & OTA
The Logs tab shows the last 100 events — boot messages, NTP sync results, client connections:
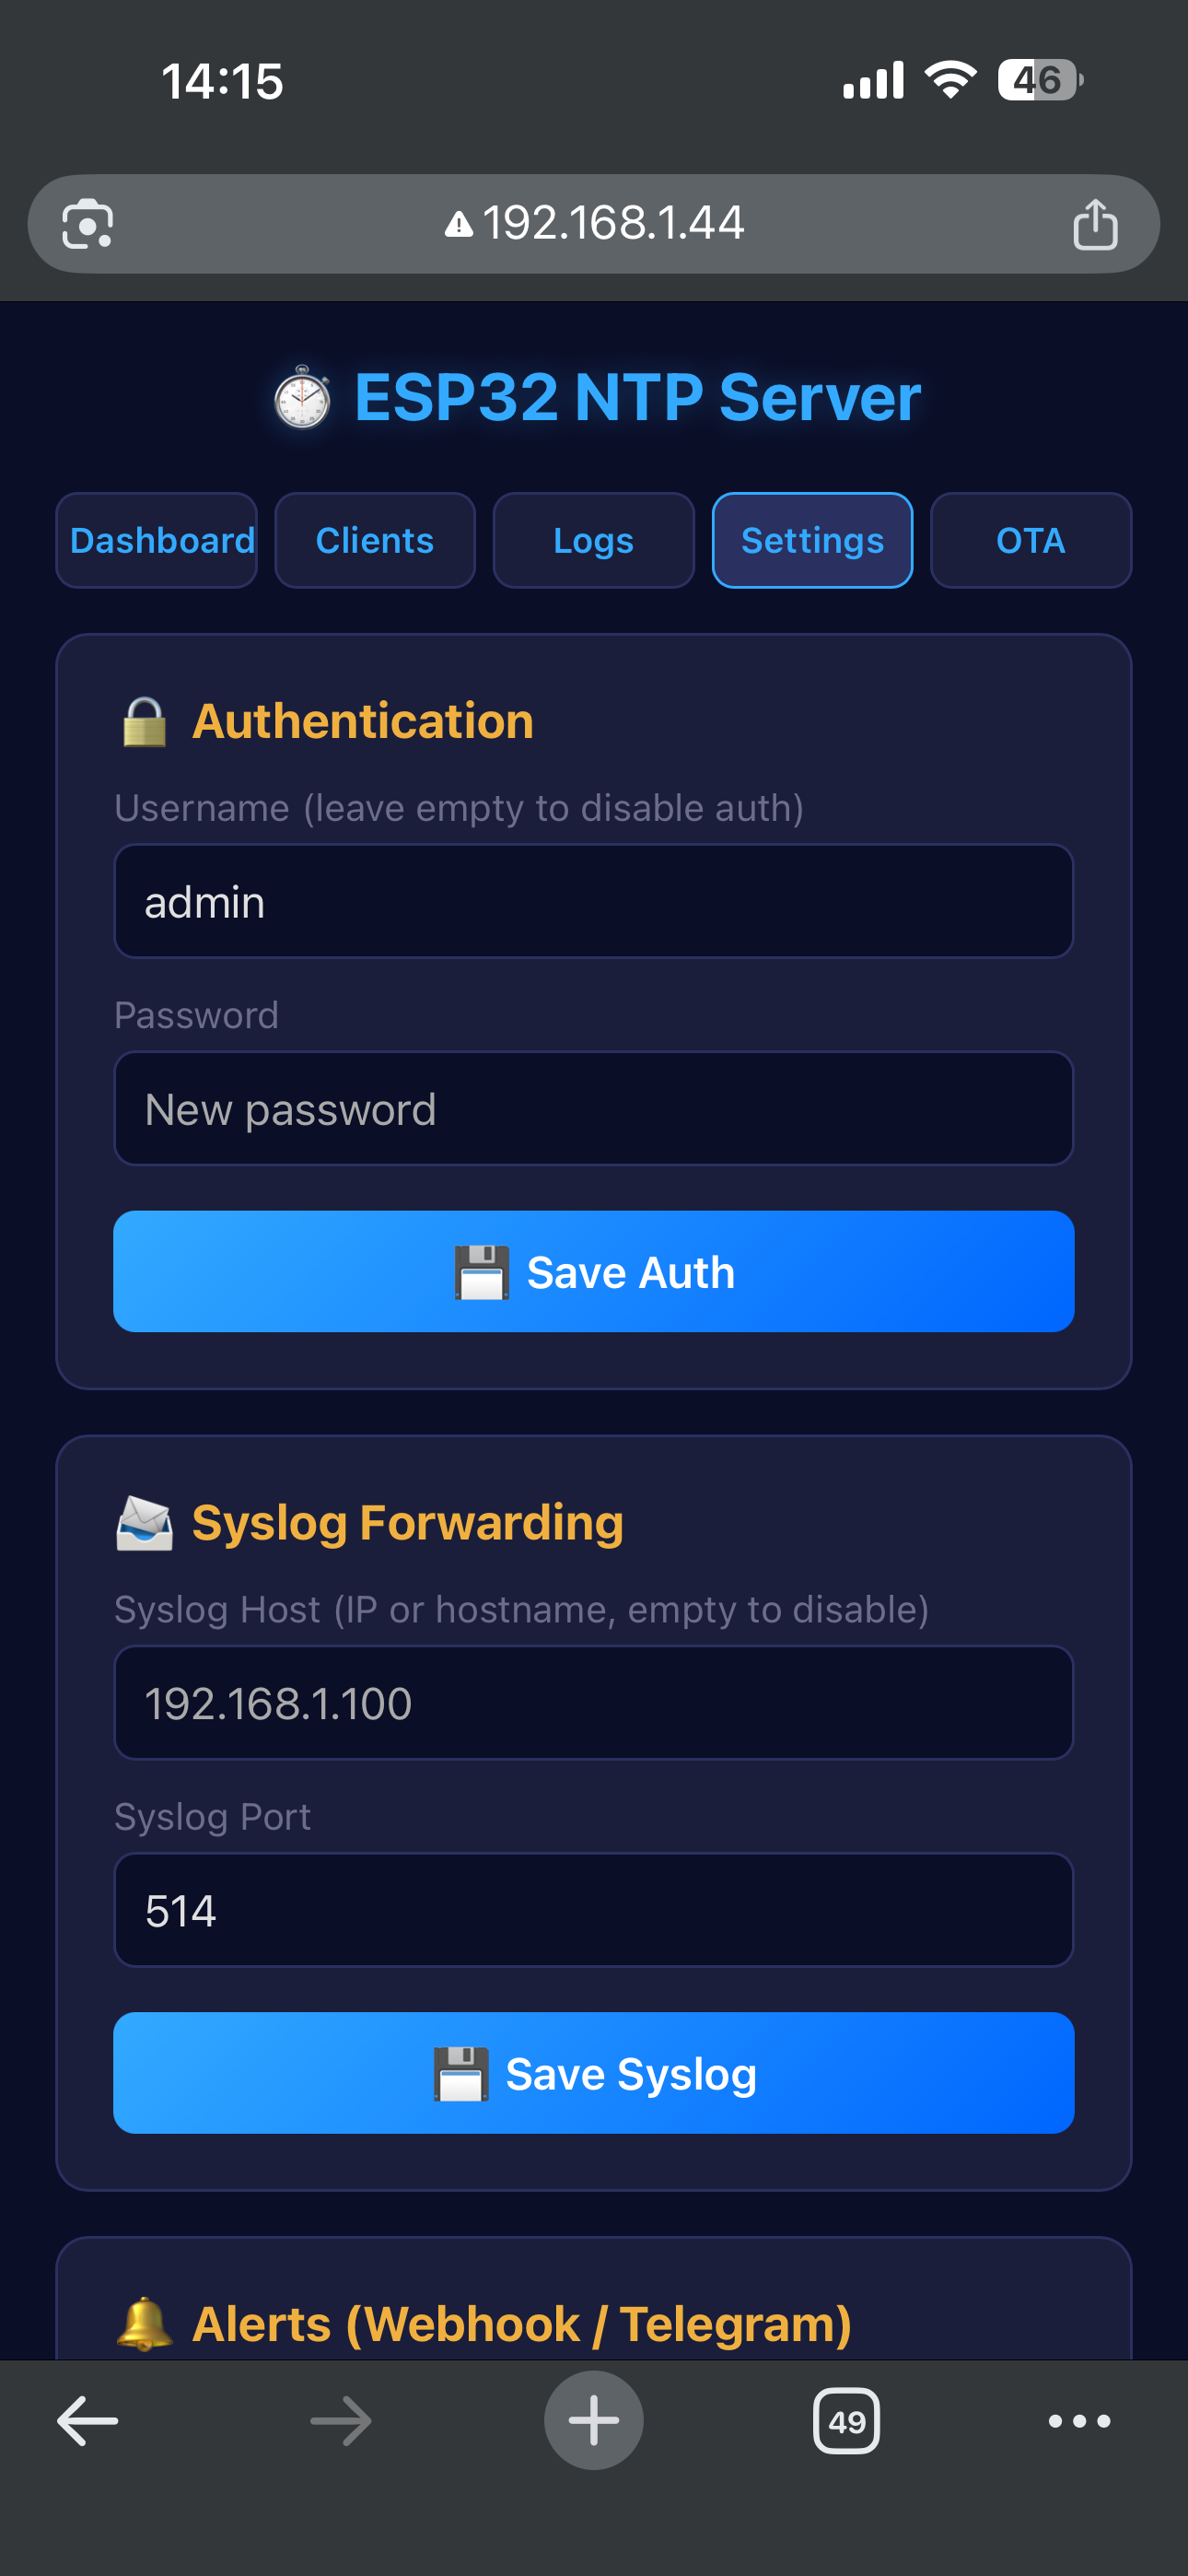
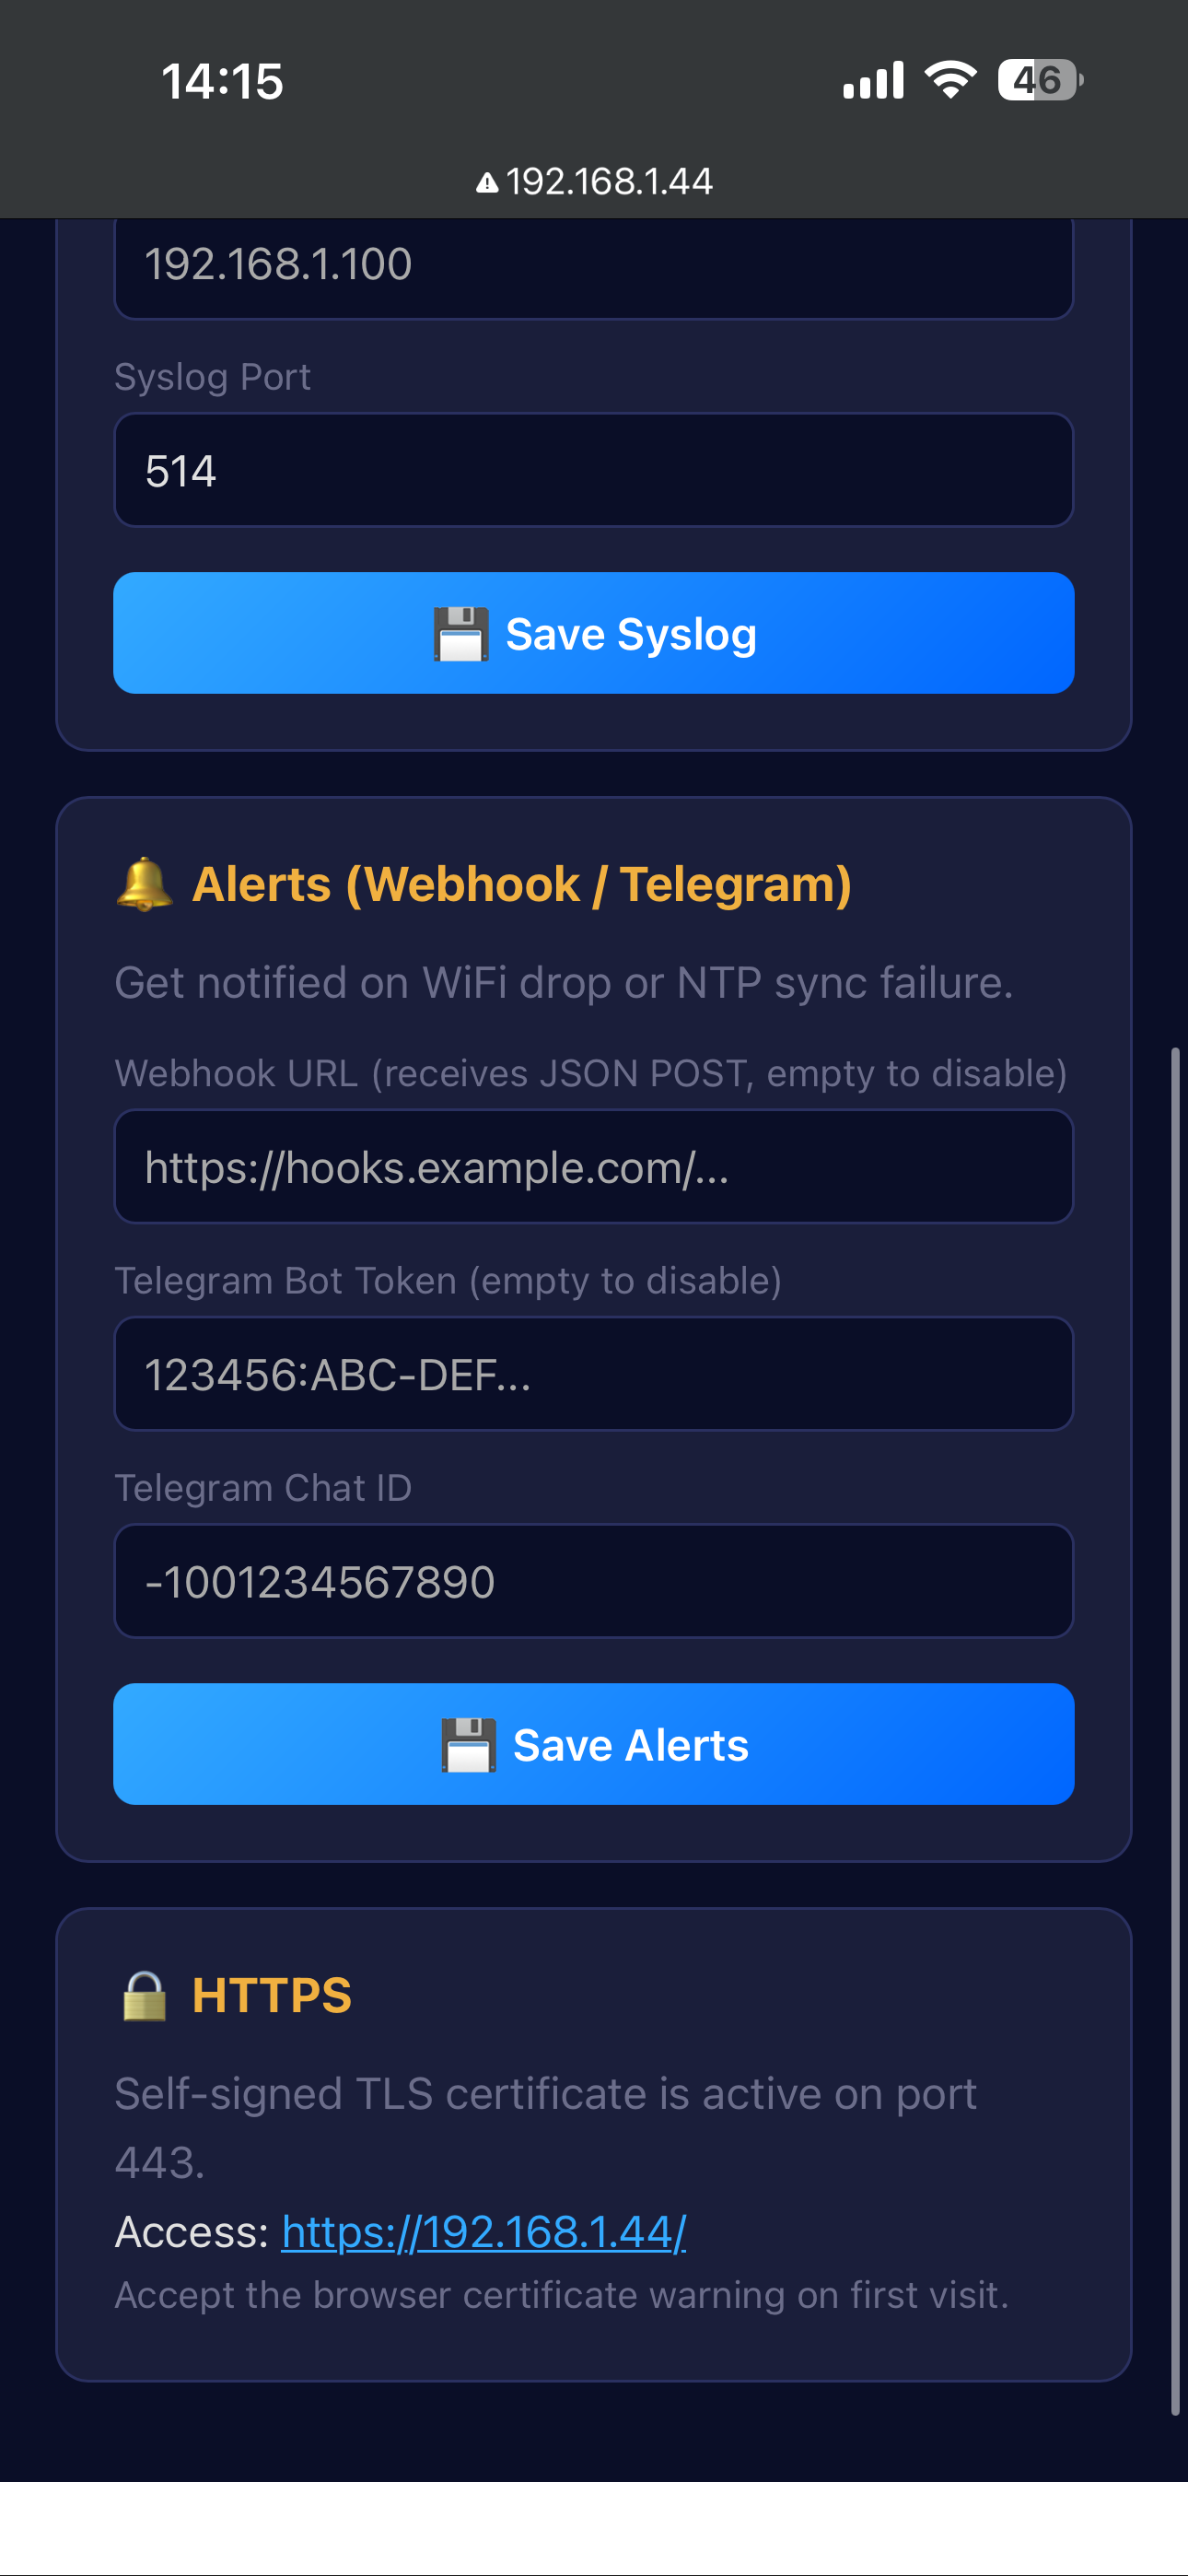
Settings lets you configure:
- HTTP Basic Auth credentials (default
admin/admin) - Syslog forwarding — send logs to a remote syslog server over UDP (RFC 5424)
- Webhook / Telegram alerts — get notified when WiFi drops, reconnects, or NTP sync fails
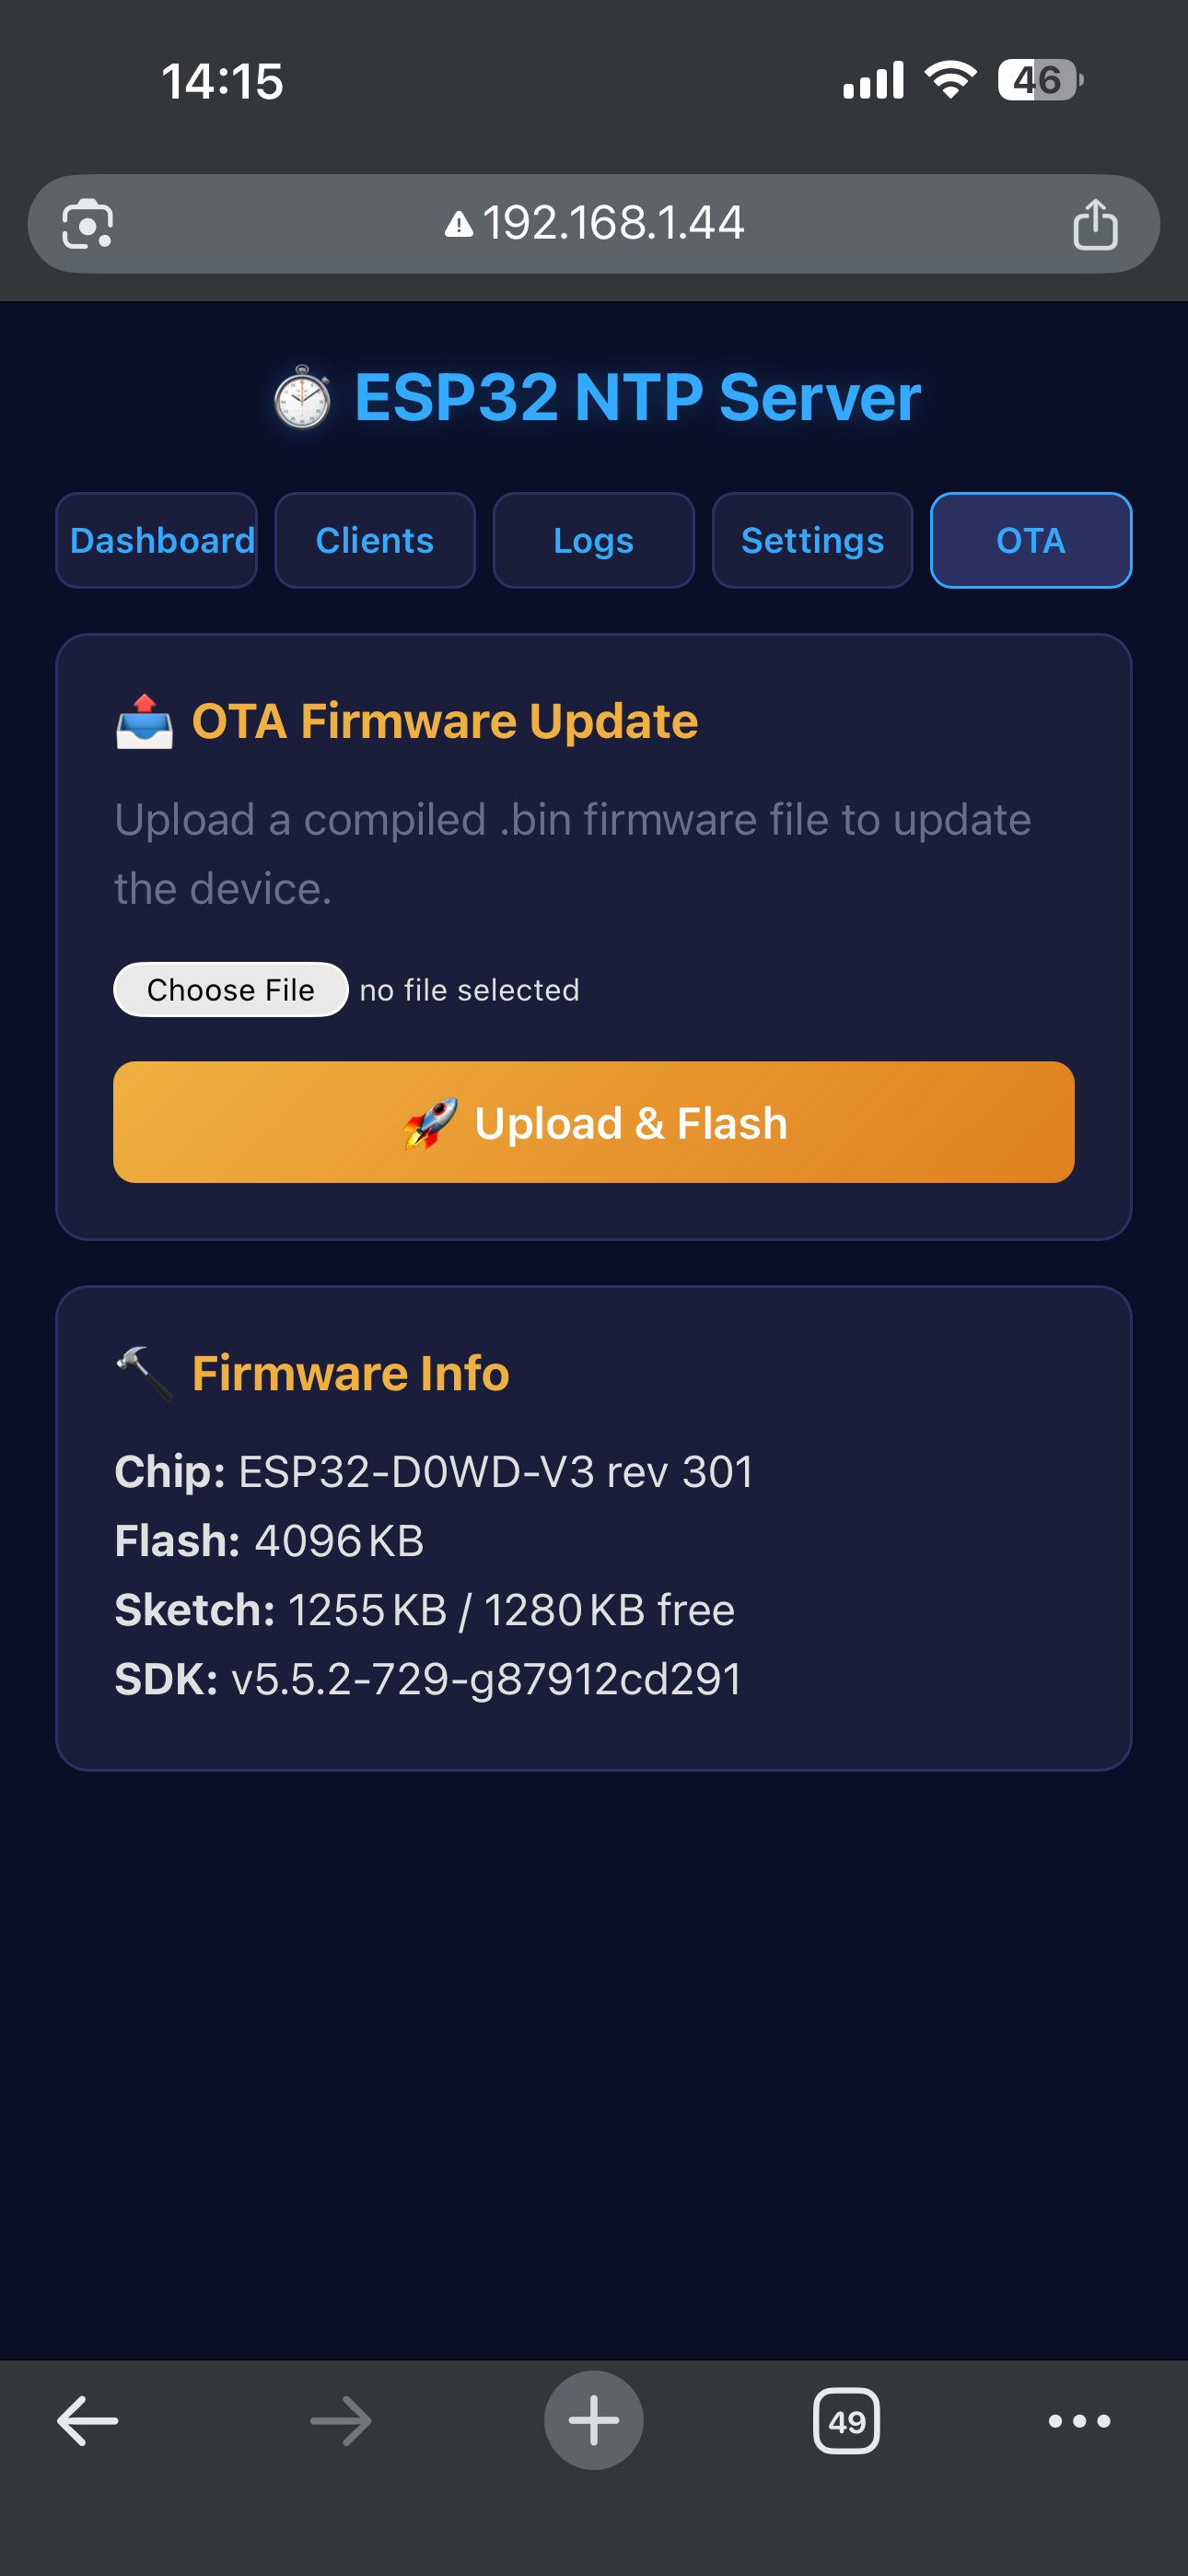
And the OTA page lets you upload new firmware directly from the browser — no USB cable needed after the first flash:
Under the Hood
The whole project is a single .ino file — about 2,600 lines. Here’s what’s packed in there:
NTP Server (RFC 5905)
The server listens on UDP port 123 and responds to NTPv4 requests. It syncs to upstream pools using the ESP32’s built-in SNTP client, then serves time as a Stratum 2 source. The response includes proper reference timestamps, origin timestamps, and transmit timestamps with microsecond precision.
HTTPS with Self-Signed Certificates
On first boot, the ESP32 generates an EC P-256 key pair and a self-signed X.509 certificate using mbedTLS — the same crypto library that ships with the ESP-IDF. The cert and key are stored in NVS so they persist across reboots. HTTPS runs on port 443 using the ESP-IDF’s esp_https_server.
Captive Portal Detection
When in AP mode, the DNS server resolves every domain to the ESP32’s IP. But phones and operating systems probe specific URLs to detect captive portals:
- Android:
/generate_204,/gen_204 - iOS/macOS:
/hotspot-detect.html,/library/test/success.html - Windows:
/connecttest.txt,/ncsi.txt
Each one gets a proper handler that triggers the OS to show the portal sheet, instead of all falling into a 302 redirect loop.
Fallback AP Mode
If WiFi disconnects for more than 5 minutes, the ESP32 automatically falls back to AP mode so you can reconfigure it. The AP password is generated randomly once and persisted in NVS — it stays the same across reboots but resets if you clear the WiFi settings.
NVS Persistence
All settings live in the ESP32’s Non-Volatile Storage under a single namespace (ntp-cfg): WiFi credentials, NTP servers, timezone, auth, syslog config, alert endpoints, boot counter, accumulated uptime, TLS certificates, and client labels.
Memory Usage
The firmware uses 98% of flash (1.28 MB / 1.31 MB) — mostly due to the TLS stack and all the HTML/CSS/JS embedded in the binary. RAM sits at a comfortable 19% (62 KB / 327 KB), leaving plenty of headroom at runtime.
If you need to free flash space, the biggest wins would be stripping HTTPS support or reducing the HTML templates. But at 98%, everything still fits.
How to Set It Up
1. Flash the firmware
# Install ESP32 board support in Arduino IDE (or arduino-cli)
# Install TFT_eSPI by Bodmer from Library Manager

# Edit ~/Arduino/libraries/TFT_eSPI/User_Setup.h:
#   #define ST7789_DRIVER
#   #define TFT_WIDTH 240 / TFT_HEIGHT 320
#   #define TFT_CS 15 / TFT_DC 27 / TFT_RST 4
#   #define TFT_MOSI 23 / TFT_SCLK 18

arduino-cli compile --fqbn esp32:esp32:esp32 .
arduino-cli upload  --fqbn esp32:esp32:esp32 -p /dev/ttyUSB0 .
2. Connect to WiFi
Power on → connect to ESP32-NTP-Setup → enter WiFi credentials → save.
3. Point your devices to it
Linux:
# /etc/systemd/timesyncd.conf
[Time]
NTP=192.168.1.44
Windows:
Settings → Time & Language → Internet Time → Server: 192.168.1.44macOS:
sudo sntp -sS 192.168.1.44Other ESP32s:
configTime(0, 0, "192.168.1.44");Source Code
The full source is on GitHub: ESP32-NTP_Project
Single-file firmware, no external dependencies beyond TFT_eSPI, runs on any ESP32 DevKit.